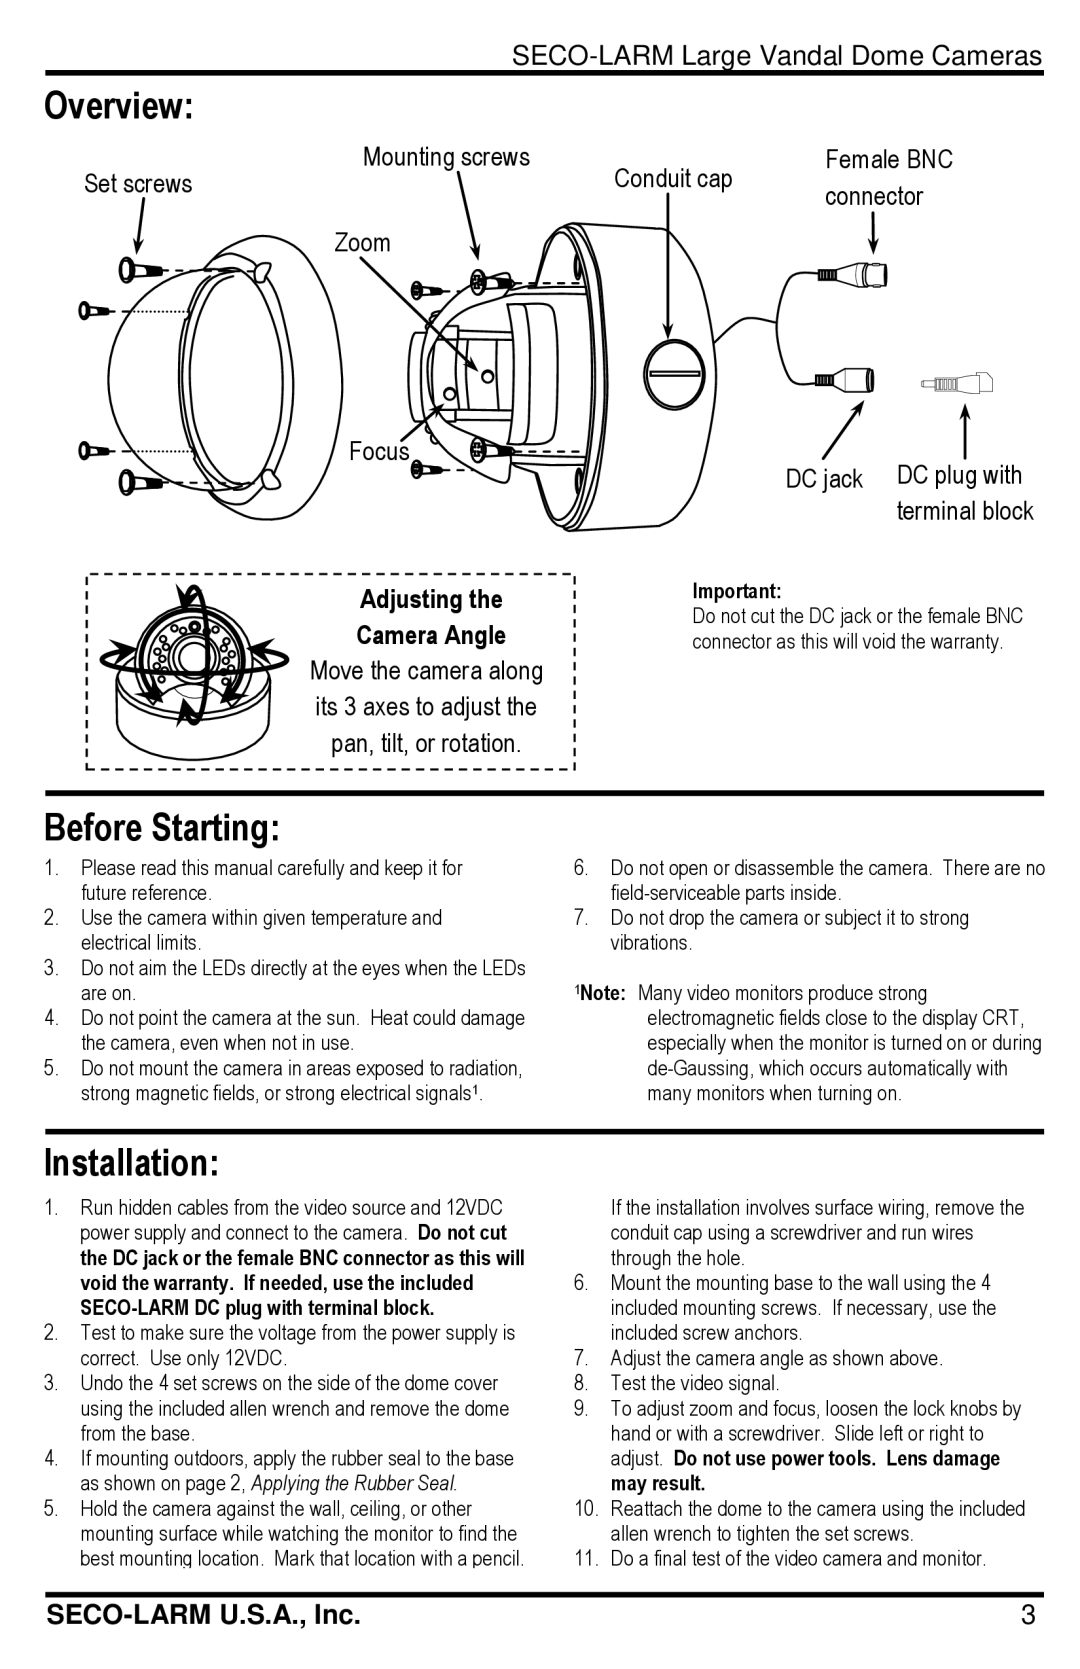
Overview:
Mounting screws
Set screws
Zoom
Focus
Adjusting the
Camera Angle
Move the camera along its 3 axes to adjust the pan, tilt, or rotation.
Conduit cap | Female BNC | |||||||||||||
connector | ||||||||||||||
|
|
| ||||||||||||
|
|
|
|
|
|
|
|
|
|
|
|
|
| |
|
|
|
|
|
|
|
|
|
|
|
|
|
| |
|
|
|
|
|
|
|
|
|
|
|
|
|
| |
|
|
|
|
|
|
|
|
|
|
|
|
|
| |
|
|
|
|
|
|
|
|
|
|
|
|
|
| |
DC jack DC plug with terminal block
Important:
Do not cut the DC jack or the female BNC connector as this will void the warranty.
Before Starting:
1.Please read this manual carefully and keep it for future reference.
2.Use the camera within given temperature and electrical limits.
3.Do not aim the LEDs directly at the eyes when the LEDs are on.
4.Do not point the camera at the sun. Heat could damage the camera, even when not in use.
5.Do not mount the camera in areas exposed to radiation, strong magnetic fields, or strong electrical signals1.
6.Do not open or disassemble the camera. There are no
7.Do not drop the camera or subject it to strong vibrations.
1Note: Many video monitors produce strong electromagnetic fields close to the display CRT, especially when the monitor is turned on or during
Installation:
1.Run hidden cables from the video source and 12VDC power supply and connect to the camera. Do not cut the DC jack or the female BNC connector as this will void the warranty. If needed, use the included
2.Test to make sure the voltage from the power supply is correct. Use only 12VDC.
3.Undo the 4 set screws on the side of the dome cover using the included allen wrench and remove the dome from the base.
4.If mounting outdoors, apply the rubber seal to the base as shown on page 2, Applying the Rubber Seal.
5.Hold the camera against the wall, ceiling, or other mounting surface while watching the monitor to find the best mounting location. Mark that location with a pencil.
If the installation involves surface wiring, remove the conduit cap using a screwdriver and run wires through the hole.
6.Mount the mounting base to the wall using the 4 included mounting screws. If necessary, use the included screw anchors.
7.Adjust the camera angle as shown above.
8.Test the video signal.
9.To adjust zoom and focus, loosen the lock knobs by hand or with a screwdriver. Slide left or right to adjust. Do not use power tools. Lens damage may result.
10.Reattach the dome to the camera using the included allen wrench to tighten the set screws.
11.Do a final test of the video camera and monitor.
3 |