
NV350W specifications
The Shark NV350W is a versatile and powerful vacuum cleaner designed to tackle a variety of cleaning tasks around the home. With its advanced features and innovative technologies, it provides users with an efficient and user-friendly cleaning solution.One of the standout features of the Shark NV350W is its Lift-Away technology. This unique design allows users to detach the canister from the vacuum's main body, enabling easy cleaning of upholstery, stairs, and other hard-to-reach areas. The lightweight canister makes it convenient to carry while still delivering the powerful suction that Shark vacuums are known for.
Equipped with a powerful 1200-watt motor, the NV350W generates strong suction capable of picking up dirt, debris, and pet hair from both carpets and hard floors. The vacuum features a brush roll that can be turned on or off, allowing users to switch between deep cleaning carpets and gentle cleaning on bare floors. This flexibility ensures that no surface is left untouched.
The Shark NV350W also comes with a HEPA filter, which is crucial for allergy sufferers and households with pets. The filter captures 99.9% of dust and allergens, ensuring that the air remains clean while vacuuming. Additionally, the vacuum's anti-allergen complete seal technology prevents allergens from escaping back into the air, creating a healthier home environment.
Another notable characteristic of the NV350W is its large capacity dust cup. With a capacity of 1.2 quarts, it allows for extended cleaning sessions without frequent emptying. The dust cup is easy to remove and washable, adding to the overall convenience of maintenance.
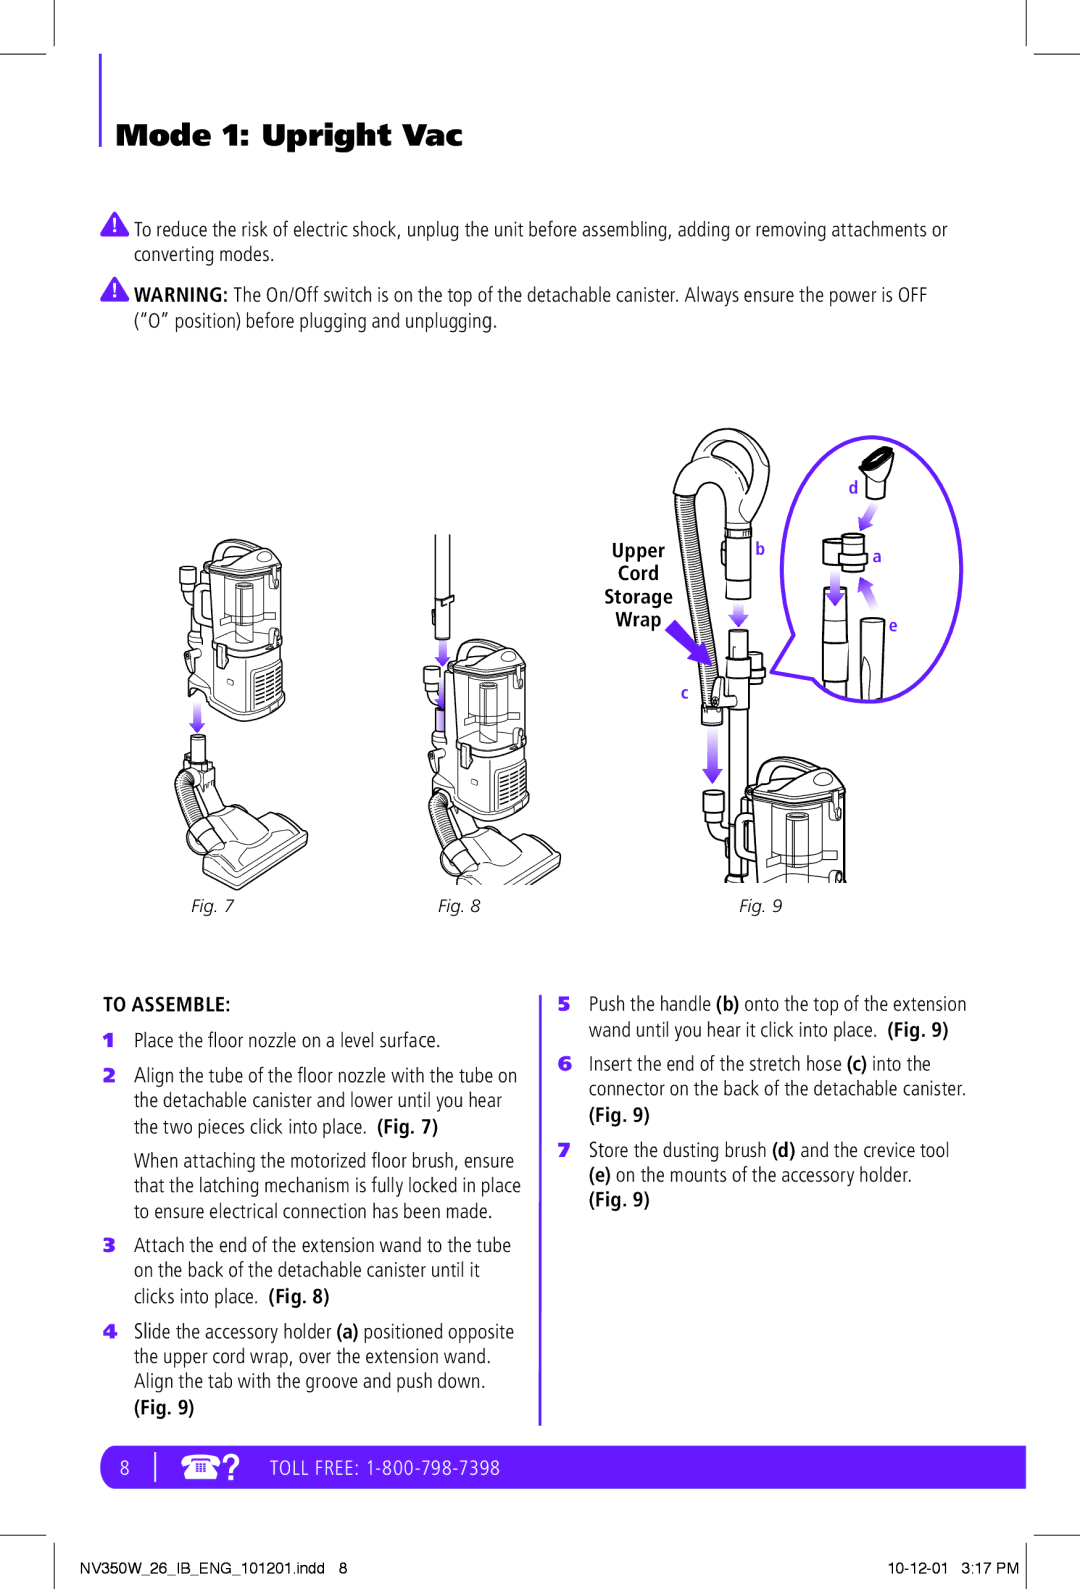
The vacuum is also equipped with a variety of attachments designed for different cleaning needs. The included crevice tool is ideal for tight spaces, while the upholstery tool can efficiently clean furniture and soft surfaces. Additionally, the dusting brush helps to clean delicate items and surfaces effectively.
Finally, the Shark NV350W is designed for ease of use. It features a long power cord that allows for extended reach without the need to constantly switch outlets, and its lightweight design ensures that maneuverability is effortless.
With its combination of powerful suction, advanced filtration, and user-friendly design, the Shark NV350W is an excellent choice for anyone seeking a reliable and effective vacuum cleaner to maintain a clean home.