Battery Removal & Disposal
NOTE: If uncertain as to how to remove your battery pack, we suggest you take your sweeper to a reputable small appliance service technician to have this service performed.
Follow these steps when battery removal is required.
This sweeper is equipped with
WARNING: You must never use ordinary batteries for replacement as these may leak and cause damage. Use only battery pack X8905 provided for replacement.
Removal of Battery Pack
1.Remove the extention handles and dust cup container.
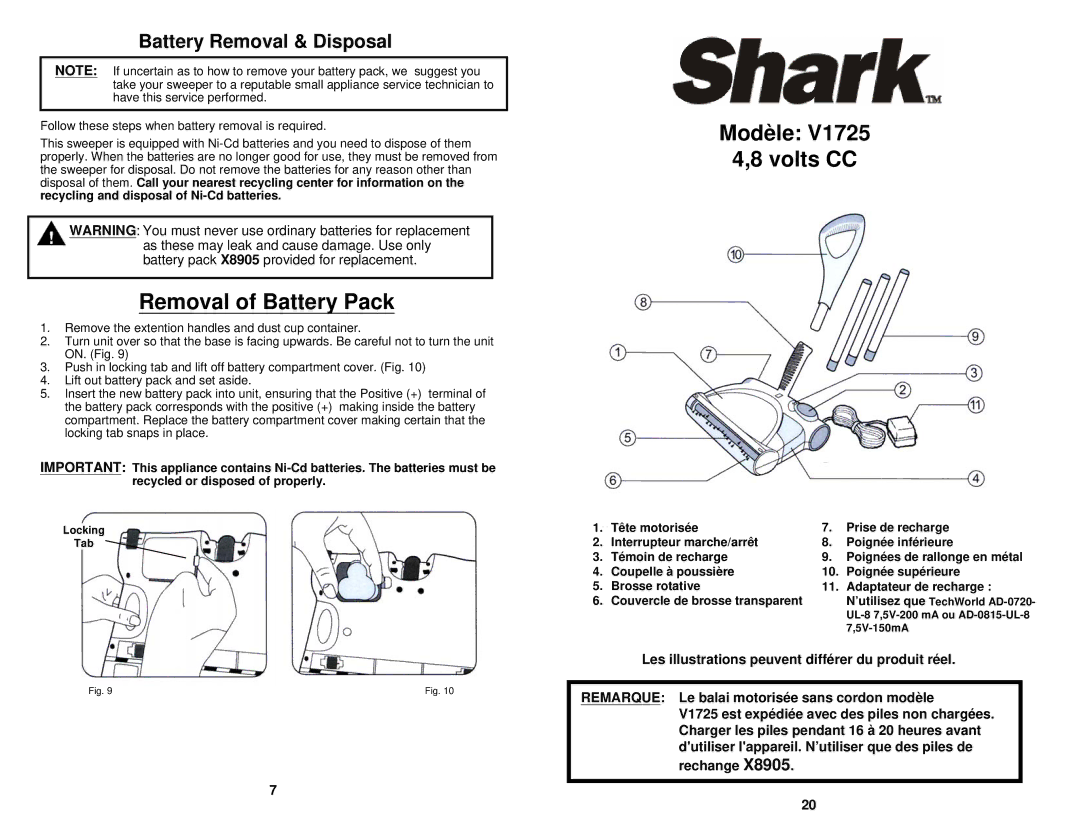
2.Turn unit over so that the base is facing upwards. Be careful not to turn the unit ON. (Fig. 9)
3.Push in locking tab and lift off battery compartment cover. (Fig. 10)
4.Lift out battery pack and set aside.
5.Insert the new battery pack into unit, ensuring that the Positive (+) terminal of the battery pack corresponds with the positive (+) making inside the battery compartment. Replace the battery compartment cover making certain that the locking tab snaps in place.
IMPORTANT: This appliance contains
Locking
Tab
Fig. 9 | Fig. 10 |
7
Modèle: V1725
4,8 volts CC
1. | Tête motorisée | 7. | Prise de recharge |
2. | Interrupteur marche/arrêt | 8. | Poignée inférieure |
3. | Témoin de recharge | 9. | Poignées de rallonge en métal |
4. | Coupelle à poussière | 10. | Poignée supérieure |
5. | Brosse rotative | 11. | Adaptateur de recharge : |
6. | Couvercle de brosse transparent |
| N’utilisez que TechWorld |
|
|
| |
|
|
|
Les illustrations peuvent différer du produit réel.
REMARQUE: Le balai motorisée sans cordon modèle
V1725 est expédiée avec des piles non chargées. Charger les piles pendant 16 à 20 heures avant d'utiliser l'appareil. N’utiliser que des piles de rechange X8905.
20
