INSTALLATION INSTRUCTIONS
5
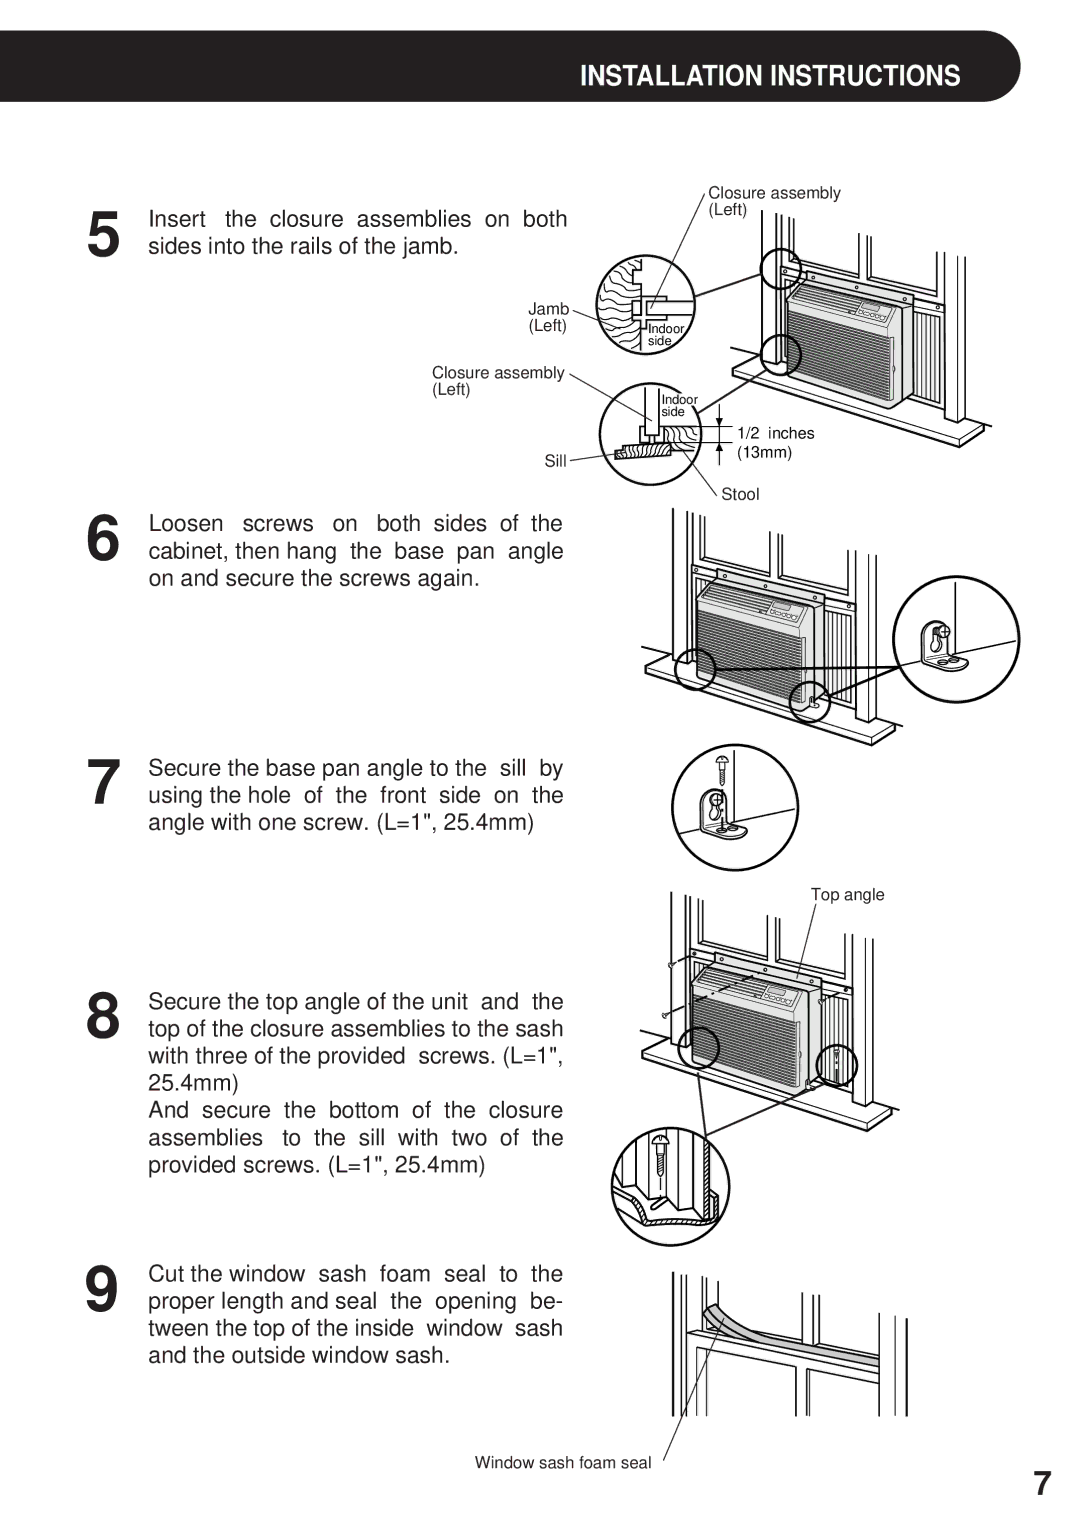
Insert the closure assemblies on both sides into the rails of the jamb.
Closure assembly (Left)
6
Jamb |
|
|
(Left) | Indoor |
|
| side |
|
Closure assembly |
|
|
(Left) | Indoor |
|
|
| |
| side |
|
| 1/2 | inches |
Sill | (13mm) | |
|
| |
| Stool |
|
Loosen screws on both sides of the cabinet, then hang the base pan angle on and secure the screws again.
7 | Secure the base pan angle to the | sill | by |
using the hole of the front side | on | the |
angle with one screw. (L=1", 25.4mm)
Top angle
8 | Secure the top angle of the unit and the |
top of the closure assemblies to the sash |
with three of the provided screws. (L=1", 25.4mm)
And secure the bottom of the closure assemblies to the sill with two of the provided screws. (L=1", 25.4mm)
9 | Cut the window sash foam seal to the |
proper length and seal the opening be- |
tween the top of the inside window sash and the outside window sash.
Window sash foam seal
7