Manuals
/
Sharp
/
Home Audio
/
Stereo System
Sharp
DHS1050P Listening to a cassette tape, Setting the clock Remote control only, E-11
Models:
DHS1050P
1
12
16
16
Download
16 pages
40.24 Kb
9
10
11
12
13
14
15
16
Page 12
Image 12
Page 11
Page 13
Page 12
Image 12
Page 11
Page 13
Contents
Accessories
Special Note
CD-DHS1050P
ENGLISH
IMPORTANT SAFETY INSTRUCTIONS
SPECIAL NOTES
Precautions
IMPORTANT SAFETY INSTRUCTIONS continued
QGeneral
CONSUMER LIMITED WARRANTY
Precautions continued
QVolume control
For U.S. customer only
Remote control
QBattery installation
System connections continued
QAuto power on function
QTo turn the power on
QVolume auto fade-in
QAuto power off function
Listening to the iPod or iPhone
QiPod and iPhone adaptor connection
QTo remove iPod or iPhone adaptor
QiPod or iPhone playback
Listening to a CD or MP3/WMA disc
Q Disc playback
Q Various disc functions
Q Watching videos on a TV connected to
Listening to a CD or MP3/WMA disc continued
QDirect track search
QProgrammed play
QRepeat play
Listening to USB mass storage device/MP3 player
Advanced USB playback
QTo play back USB/MP3 player with folder mode off
QTo play back USB/MP3 player with folder mode on
QTuning
QTo scan the preset stations
QTo erase entire preset memory
Listening to the radio
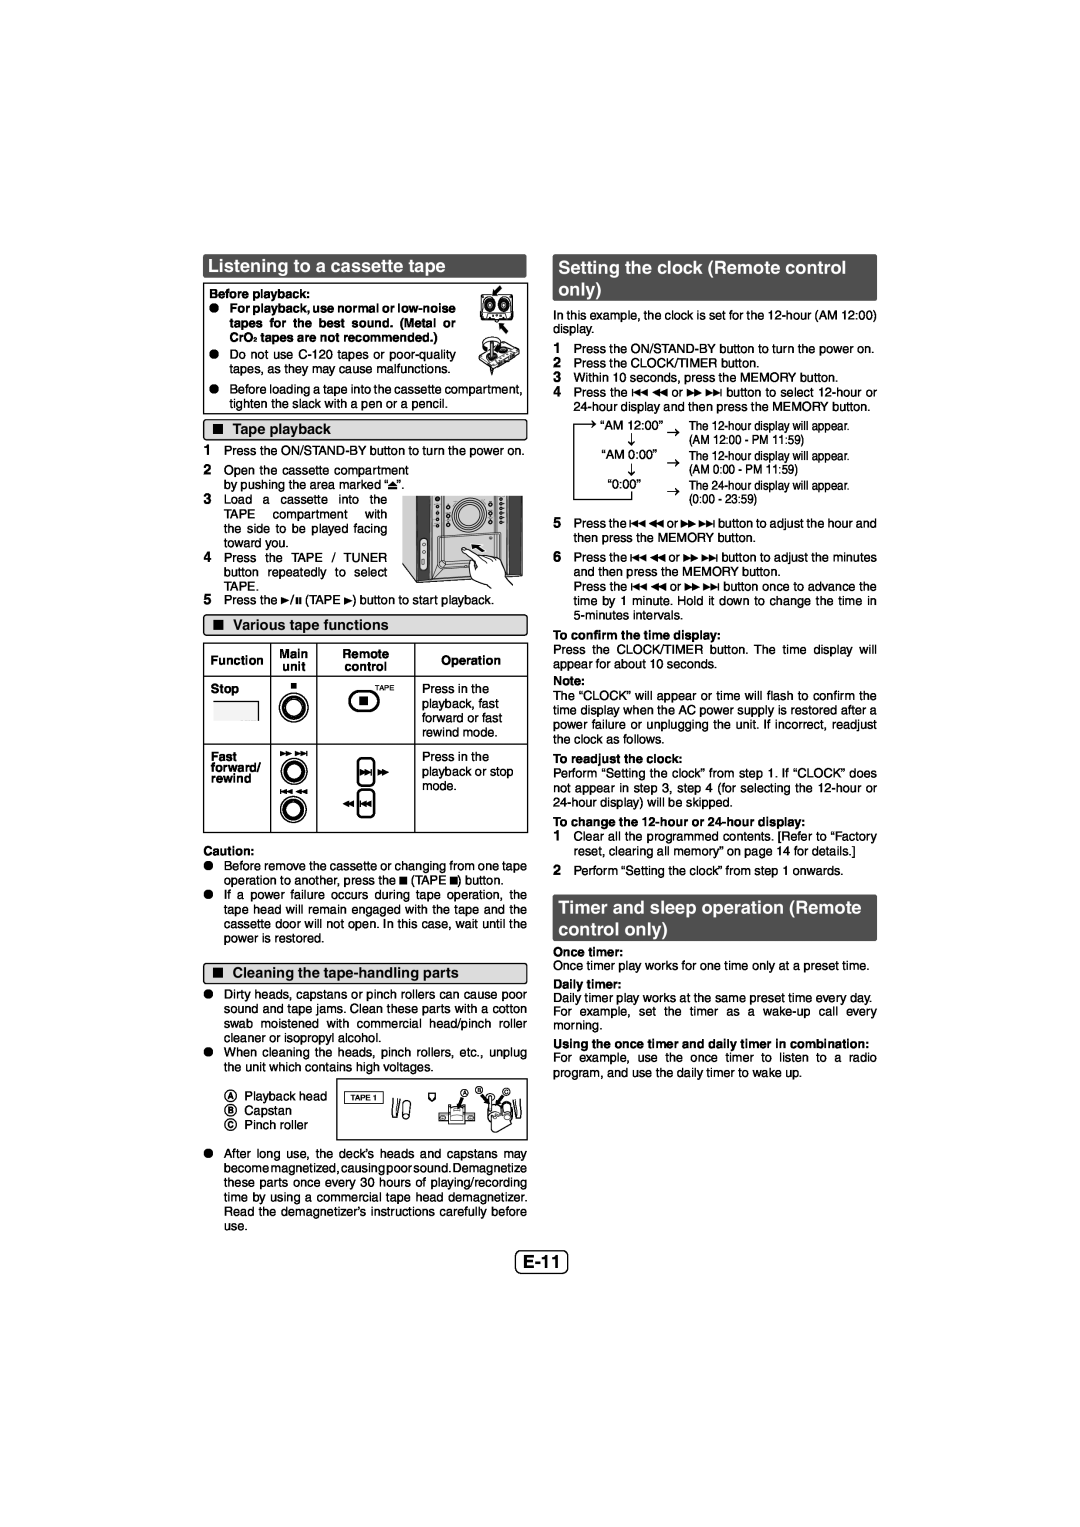
Setting the clock Remote control only
Timer and sleep operation Remote control only
QCleaning the tape-handlingparts
Listening to a cassette tape
QTimer playback
E-12
QSleep operation
Troubleshooting chart
QTo use timer and sleep operation together
QHeadphones
Enhancing your system
Maintenance
Troubleshooting chart continued
QRemote control
QIf problem occurs
Specifications
E-15
Q Amplifier
Q Tuner
Top
Page
Image
Contents