2)Remove the printer cover. (Fig. 1)
3)Remove the ink roller by turning it counterclockwise and pulling it upward (Fig. 2)
4)Install the correct color new ink roller and press it in the correct position. Make sure that the ink roller is securely in place. (Fig. 3)
5)Put back the printer cover.
RedBlack
Fig. 1 | Fig. 2 | Fig. 3 |
Fig. 1 | Fig. 2 | Fig. 3 |
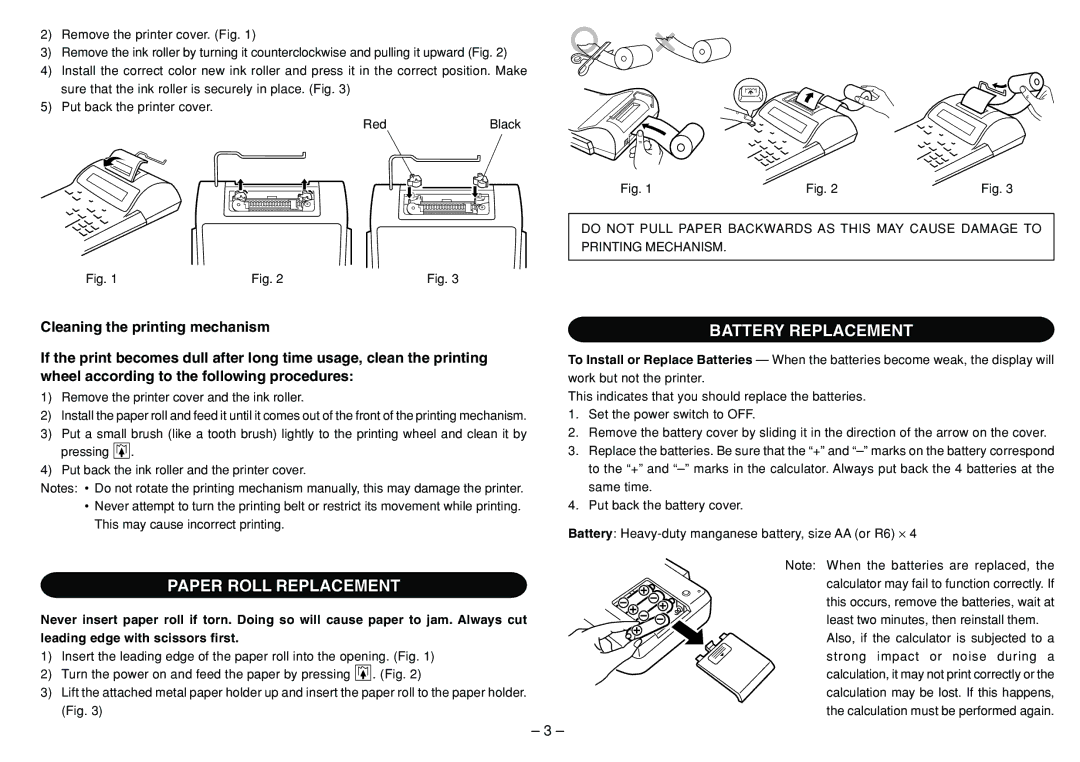
DO NOT PULL PAPER BACKWARDS AS THIS MAY CAUSE DAMAGE TO PRINTING MECHANISM.
Cleaning the printing mechanism
If the print becomes dull after long time usage, clean the printing wheel according to the following procedures:
1)Remove the printer cover and the ink roller.
2)Install the paper roll and feed it until it comes out of the front of the printing mechanism.
3)Put a small brush (like a tooth brush) lightly to the printing wheel and clean it by pressing ![]() .
.
4)Put back the ink roller and the printer cover.
Notes: • Do not rotate the printing mechanism manually, this may damage the printer.
•Never attempt to turn the printing belt or restrict its movement while printing. This may cause incorrect printing.
PAPER ROLL REPLACEMENT
Never insert paper roll if torn. Doing so will cause paper to jam. Always cut leading edge with scissors first.
1)Insert the leading edge of the paper roll into the opening. (Fig. 1)
2)Turn the power on and feed the paper by pressing ![]() . (Fig. 2)
. (Fig. 2)
3)Lift the attached metal paper holder up and insert the paper roll to the paper holder. (Fig. 3)
BATTERY REPLACEMENT
To Install or Replace Batteries — When the batteries become weak, the display will
work but not the printer.
This indicates that you should replace the batteries.
1.Set the power switch to OFF.
2.Remove the battery cover by sliding it in the direction of the arrow on the cover.
3.Replace the batteries. Be sure that the “+” and
4.Put back the battery cover.
Battery:
Note: When the batteries are replaced, the calculator may fail to function correctly. If this occurs, remove the batteries, wait at least two minutes, then reinstall them.
Also, if the calculator is subjected to a strong impact or noise during a calculation, it may not print correctly or the calculation may be lost. If this happens, the calculation must be performed again.
– 3 –