Quick guide

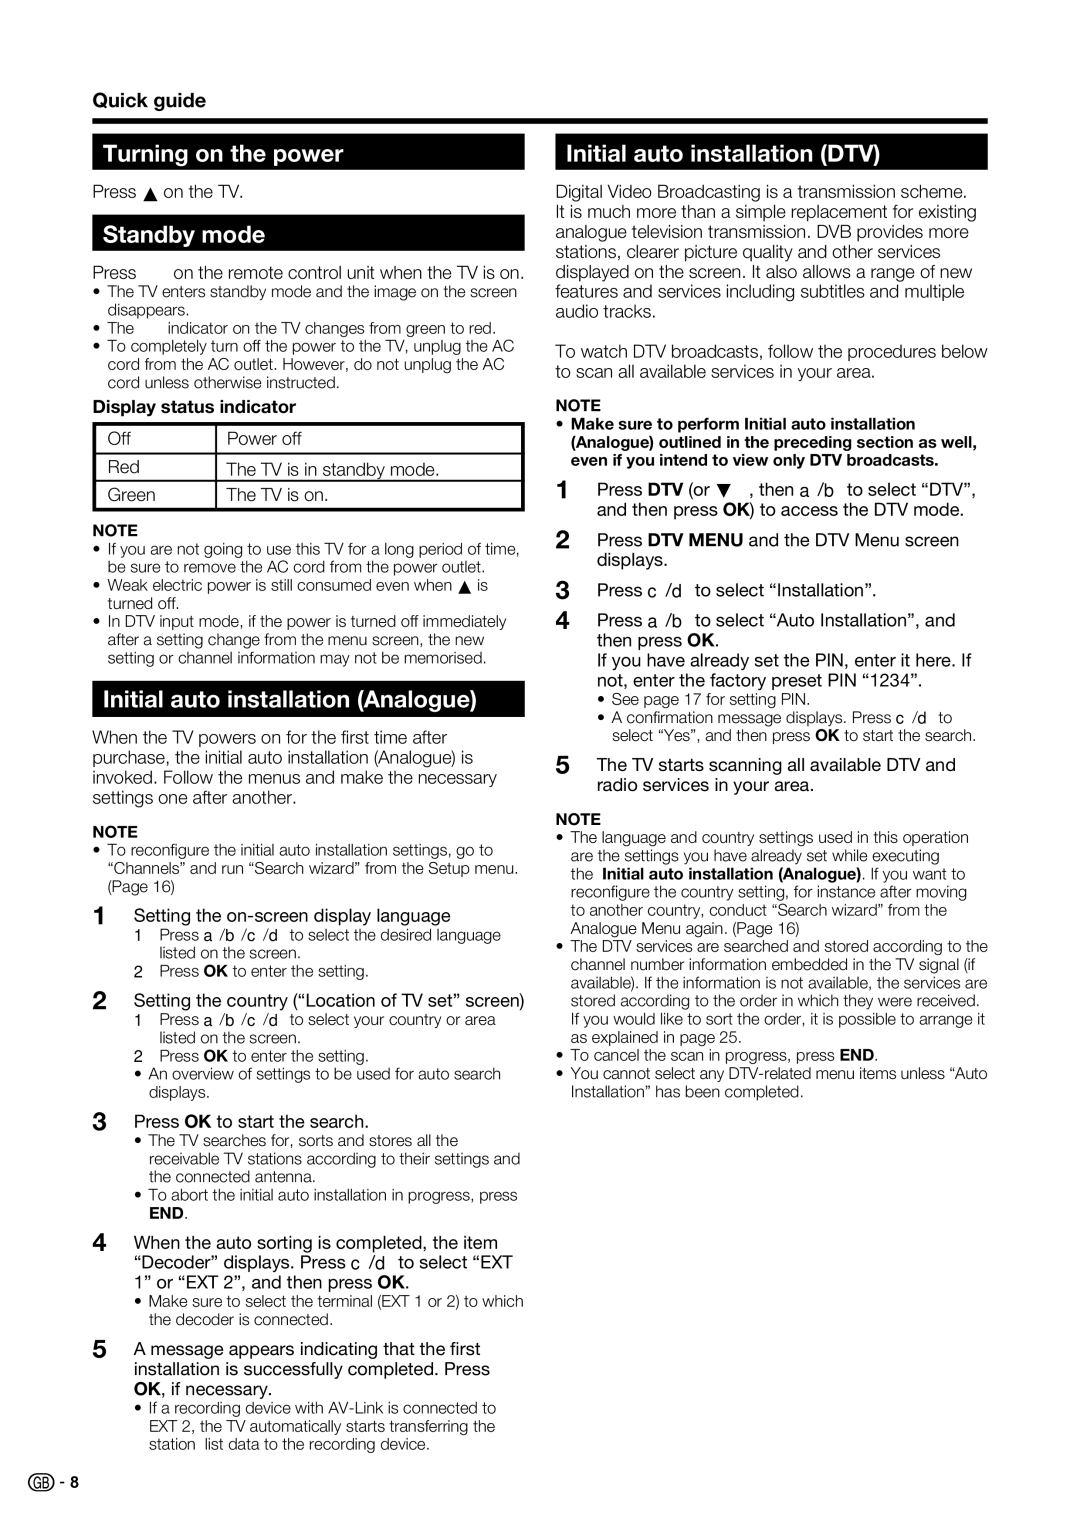
Turning on the power

Press a on the TV.

Standby mode

Press B on the remote control unit when the TV is on.

The TV enters standby mode and the image on the screen disappears.

The B indicator on the TV changes from green to red.

To completely turn off the power to the TV, unplug the AC cord from the AC outlet. However, do not unplug the AC cord unless otherwise instructed.

Display status indicator

Off

Power off


Red

The TV is in standby mode.

Green

The TV is on.


NOTE

If you are not going to use this TV for a long period of time, be sure to remove the AC cord from the power outlet.

Weak electric power is still consumed even when a is turned off.

In DTV input mode, if the power is turned off immediately after a setting change from the menu screen, the new setting or channel information may not be memorised.

Initial auto installation (Analogue)

When the TV powers on for the fi rst time after purchase, the initial auto installation (Analogue) is invoked. Follow the menus and make the necessary settings one after another.

NOTE

To reconfi gure the initial auto installation settings, go to “Channels” and run “Search wizard” from the Setup menu. (Page 16)

1Setting the on-screen display language

1Press a/b/c/d to select the desired language listed on the screen.

2Press OK to enter the setting.

2Setting the country (“Location of TV set” screen)

1Press a/b/c/d to select your country or area listed on the screen.

2Press OK to enter the setting.

An overview of settings to be used for auto search displays.

3Press OK to start the search.

The TV searches for, sorts and stores all the receivable TV stations according to their settings and the connected antenna.

To abort the initial auto installation in progress, press END.

4When the auto sorting is completed, the item “Decoder” displays. Press c/d to select “EXT 1” or “EXT 2”, and then press OK.

Make sure to select the terminal (EXT 1 or 2) to which the decoder is connected.

5A message appears indicating that the first installation is successfully completed. Press OK, if necessary.

If a recording device with AV-Link is connected to EXT 2, the TV automatically starts transferring the station list data to the recording device.

Initial auto installation (DTV)

Digital Video Broadcasting is a transmission scheme. It is much more than a simple replacement for existing analogue television transmission. DVB provides more stations, clearer picture quality and other services displayed on the screen. It also allows a range of new features and services including subtitles and multiple audio tracks.

To watch DTV broadcasts, follow the procedures below to scan all available services in your area.

NOTE

Make sure to perform Initial auto installation (Analogue) outlined in the preceding section as well, even if you intend to view only DTV broadcasts.

1Press DTV (or b, then a/b to select “DTV”, and then press OK) to access the DTV mode.

2Press DTV MENU and the DTV Menu screen displays.

3Press c/d to select “Installation”.

4Press a/b to select “Auto Installation”, and then press OK.

If you have already set the PIN, enter it here. If not, enter the factory preset PIN “1234”.

See page 17 for setting PIN.

A confi rmation message displays. Press c/d to select “Yes”, and then press OK to start the search.

5The TV starts scanning all available DTV and radio services in your area.

NOTE

The language and country settings used in this operation are the settings you have already set while executing the Initial auto installation (Analogue). If you want to reconfi gure the country setting, for instance after moving to another country, conduct “Search wizard” from the Analogue Menu again. (Page 16)

The DTV services are searched and stored according to the channel number information embedded in the TV signal (if available). If the information is not available, the services are stored according to the order in which they were received. If you would like to sort the order, it is possible to arrange it as explained in page 25.

To cancel the scan in progress, press END.

You cannot select any DTV-related menu items unless “Auto Installation” has been completed.

8

Page 10
Image 10
Sharp LC-46XD1E Turning on the power, Standby mode, Initial auto installation Analogue, Initial auto installation DTV

LC-52XD1E, LC-46XD1E specifications

The Sharp LC-46XD1E and LC-52XD1E are part of Sharp's acclaimed series of LCD televisions known for their exceptional quality and innovative features. These models, which flaunt screen sizes of 46 inches and 52 inches respectively, are ideal for those seeking a large viewing experience without compromising on picture clarity and performance.

One of the standout features of both the LC-46XD1E and LC-52XD1E is their use of Sharp's proprietary XXV technology, which significantly enhances the picture quality. This technology optimizes color reproduction and provides sharp, vibrant images, making them perfect for watching movies, sports, or playing video games. Coupled with a high dynamic contrast ratio, viewers can expect deeper blacks and brighter whites, ensuring a more immersive visual experience.

The viewing angles on these models are also noteworthy, thanks to the use of advanced LCD panel technology that minimizes color distortion at wider angles. This means that whether you are sitting directly in front of the television or off to the side, you can enjoy a consistently high-quality picture.

Both models are equipped with a 1080p Full HD resolution, providing a significant upgrade over standard HD televisions. This resolution delivers finer details and sharper images, making your viewing experience more engaging. Furthermore, the incorporation of 120Hz refresh rate technology helps reduce motion blur during fast-moving scenes, which is particularly beneficial for action-packed content like sports or action movies.

In terms of connectivity, the LC-46XD1E and LC-52XD1E come with multiple HDMI ports, allowing for easy connection to various devices such as Blu-ray players, gaming consoles, and streaming devices. An integrated USB port allows users to view personal photos or videos directly from USB storage devices, adding another layer of versatility.

Sound quality is equally impressive, with a built-in audio system that offers clear and balanced sound. The models also support various audio codecs, ensuring compatibility with different formats for a better auditory experience.

Overall, the Sharp LC-46XD1E and LC-52XD1E televisions are exceptional choices for consumers seeking high-quality visuals and sound wrapped in a stylish design. Their advanced technologies and user-friendly features make these TVs a great addition to any home entertainment system, providing entertainment that meets the demands of modern viewers.