Operating with the Remote Control
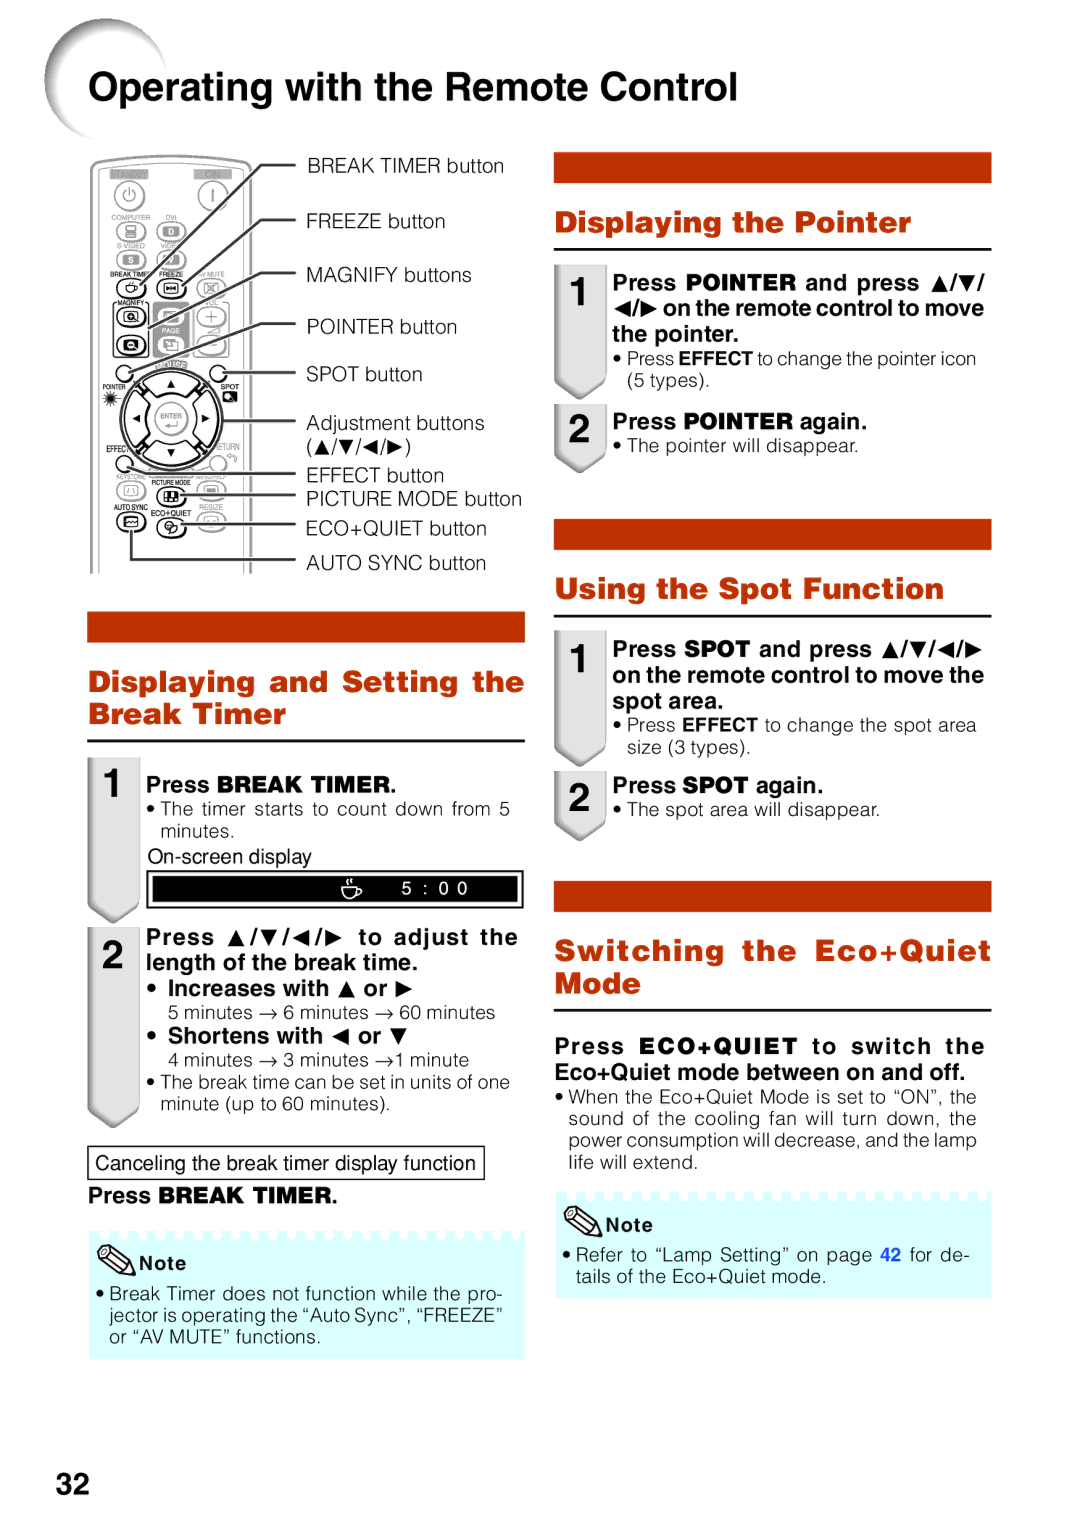
BREAK TIMER button
FREEZE button | Displaying the Pointer |
MAGNIFY buttons
POINTER button
SPOT button
Adjustment buttons
(P/R/O/Q)
![]()
![]()
![]()
![]()
![]()
![]()
![]()
![]()
![]()
![]()
![]()
![]()
![]() EFFECT button
EFFECT button ![]()
![]()
![]() PICTURE MODE button
PICTURE MODE button
ECO+QUIET button
AUTO SYNC button
Displaying and Setting the Break Timer
1 Press POINTER and press P/R/ O/Qon the remote control to move the pointer.
•Press EFFECT to change the pointer icon (5 types).
2 Press POINTER again.
• The pointer will disappear.
Using the Spot Function
1 Press SPOT and press P/R/O/Q on the remote control to move the spot area.
•Press EFFECT to change the spot area size (3 types).
1 Press BREAK TIMER.
•The timer starts to count down from 5 minutes.
On-screen display
Press P/R/O/Q to adjust the
2 length of the break time.
•Increases with P or Q
5 minutes s6 minutes s60 minutes
•Shortens with O or R
4 minutes s3 minutes s1 minute
•The break time can be set in units of one minute (up to 60 minutes).
Canceling the break timer display function
2 Press SPOT again.
• The spot area will disappear.
Switching the Eco+Quiet Mode
Press ECO+QUIET to switch the Eco+Quiet mode between on and off.
•When the Eco+Quiet Mode is set to “ON”, the sound of the cooling fan will turn down, the power consumption will decrease, and the lamp life will extend.
Press BREAK TIMER.
![]() Note
Note
•Break Timer does not function while the pro- jector is operating the “Auto Sync”, “FREEZE” or “AV MUTE” functions.
![]() Note
Note
•Refer to “Lamp Setting” on page 42 for de- tails of the Eco+Quiet mode.
32
