Menu Items

nSCHEDULE

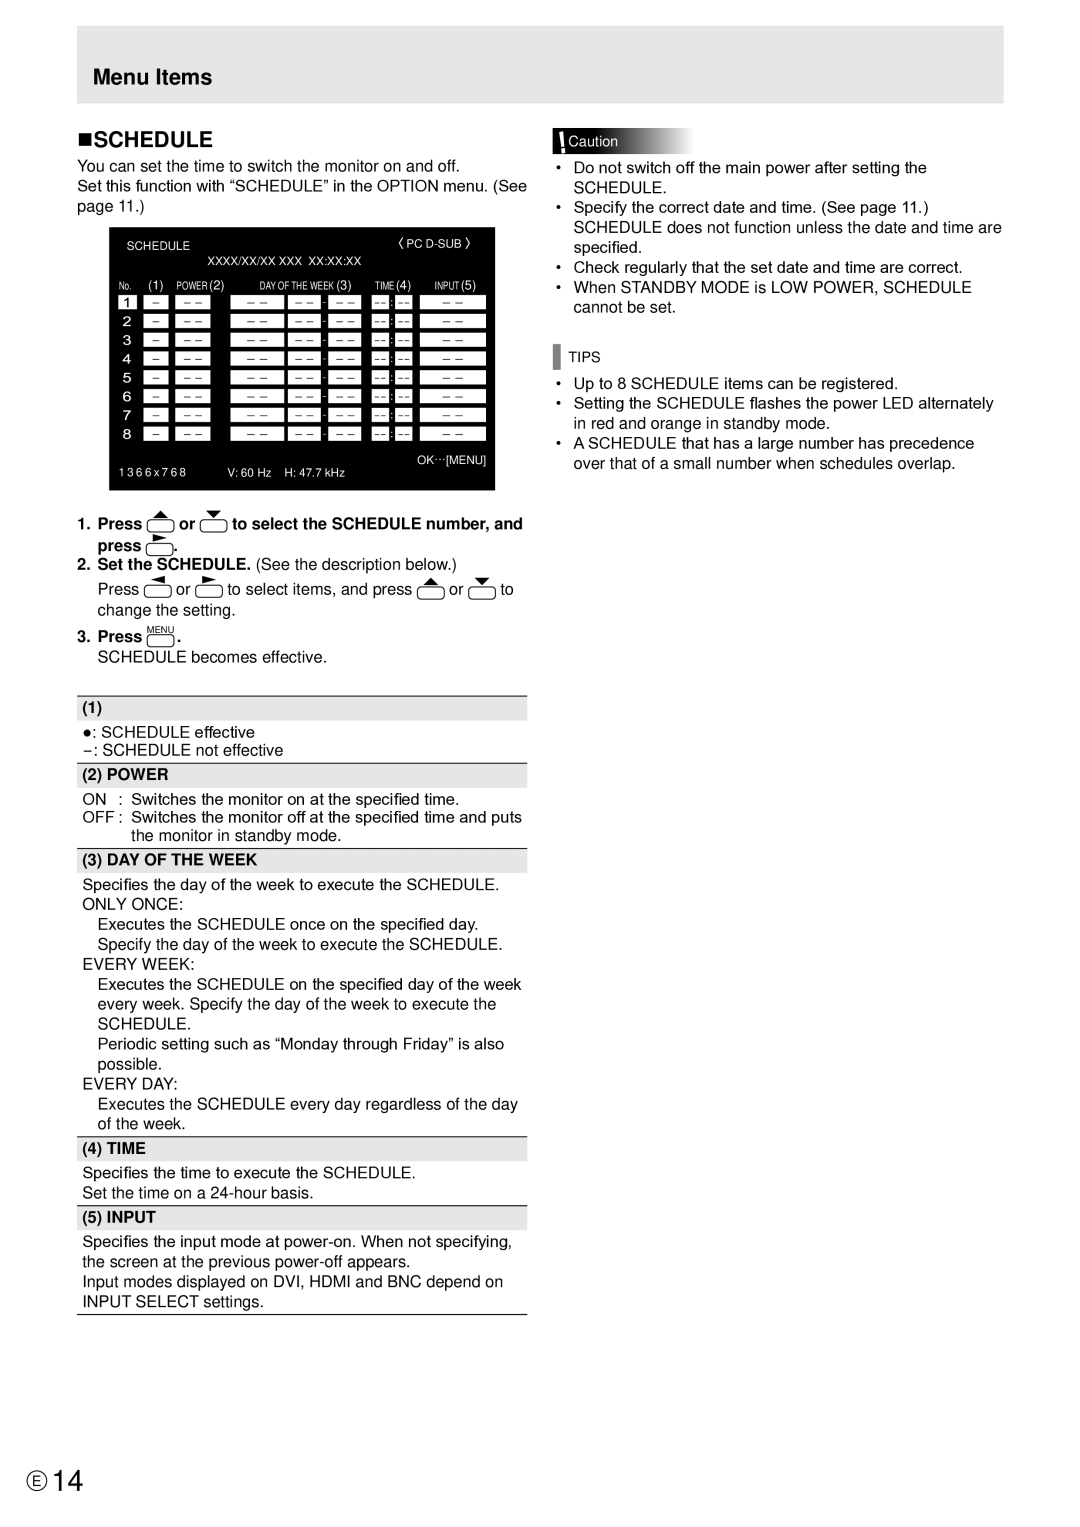
You can set the time to switch the monitor on and off.

Set this function with “SCHEDULE” in the OPTION menu. (See page 11.)

SCHEDULE


PC D-SUB


XXXX/XX/XX XXX XX:XX:XX


No. (1) POWER (2)


DAY OF THE WEEK (3)

TIME(4) INPUT (5)


OK[MENU]

1 3 6 6 x 7 6 8

V: 60 Hz H: 47.7 kHz

1.Press or to select the SCHEDULE number, and press .

2.Set the SCHEDULE. (See the description below.)

Press or to select items, and press or to change the setting.

3.Press MENU .

SCHEDULE becomes effective.

(1)

●: SCHEDULE effective

-: SCHEDULE not effective

(2) POWER

ON : Switches the monitor on at the specified time.

OFF : Switches the monitor off at the specified time and puts the monitor in standby mode.

(3) DAY OF THE WEEK

Specifies the day of the week to execute the SCHEDULE.

ONLY ONCE:

Executes the SCHEDULE once on the specified day.

Specify the day of the week to execute the SCHEDULE. EVERY WEEK:

Executes the SCHEDULE on the specified day of the week

every week. Specify the day of the week to execute the

SCHEDULE.

Periodic setting such as “Monday through Friday” is also

possible.

EVERY DAY:

Executes the SCHEDULE every day regardless of the day of the week.

(4) TIME

Specifies the time to execute the SCHEDULE.

Set the time on a 24-hour basis.

(5) INPUT

Specifies the input mode at power-on. When not specifying,

the screen at the previous power-off appears.

Input modes displayed on DVI, HDMI and BNC depend on INPUT SELECT settings.

Caution

Do not switch off the main power after setting the

SCHEDULE.

Specify the correct date and time. (See page 11.)

SCHEDULE does not function unless the date and time are specified.

Check regularly that the set date and time are correct.

When STANDBY MODE is LOW POWER, SCHEDULE cannot be set.

TIPS

Up to 8 SCHEDULE items can be registered.

Setting the SCHEDULE flashes the power LED alternately in red and orange in standby mode.

A SCHEDULE that has a large number has precedence over that of a small number when schedules overlap.

E14

Page 14
Image 14
Sharp PN-V601 manual Menu Items NSCHEDULE, Power, DAY of the Week, Input

PN-V601 specifications

The Sharp PN-V601 is a cutting-edge display solution that meets the demands of various professional environments. This 60-inch LCD monitor is designed for commercial use, offering a blend of remarkable performance, flexibility, and reliability.

One of the standout features of the PN-V601 is its superb display quality. With a Full HD resolution of 1920 x 1080 pixels, this monitor delivers vibrant colors and sharp images that are essential for presentations, digital signage, and collaborative workspaces. The display utilizes advanced LCD technology, which provides wide viewing angles up to 178 degrees both horizontally and vertically. This ensures that the content remains visible and engaging from various positions in a room.

The PN-V601 is engineered with a sleek and slim design, making it an aesthetically pleasing addition to any environment. Its thin bezels allow for seamless video wall configurations, enabling the creation of large-scale visual displays. When arranged in a multi-screen setup, the PN-V601 ensures minimal gaps between the screens, enhancing the overall viewing experience.

In terms of connectivity, the Sharp PN-V601 is equipped with a wide range of input options, including HDMI, DisplayPort, and DVI-D. This versatility allows for easy integration with external devices such as computers, media players, and video conferencing systems, ensuring that users can present or share information without hassle.

One of the key technologies integrated into the PN-V601 is the advanced image processing capabilities, which enhance image quality through features like fine-tuning of brightness and color correction. This technology ensures that every detail is vividly displayed, making it ideal for showcasing high-definition content.

Moreover, the PN-V601 has been designed for continuous operation, making it suitable for environments that require displays to run around the clock, such as retail displays and control rooms. The robust build quality ensures longevity and durability, reducing maintenance costs over time.

Another notable characteristic is its energy efficiency. The PN-V601 adheres to modern sustainability standards, minimizing power consumption while delivering outstanding performance. This makes it an environmentally friendly choice, aligning with corporate social responsibility initiatives.

Overall, the Sharp PN-V601 offers a powerful combination of elegance, functionality, and advanced technology, making it an exceptional choice for businesses looking to enhance their visual communication capabilities. Whether used for digital signage, presentations, or collaborative work, this display is engineered to impress.