
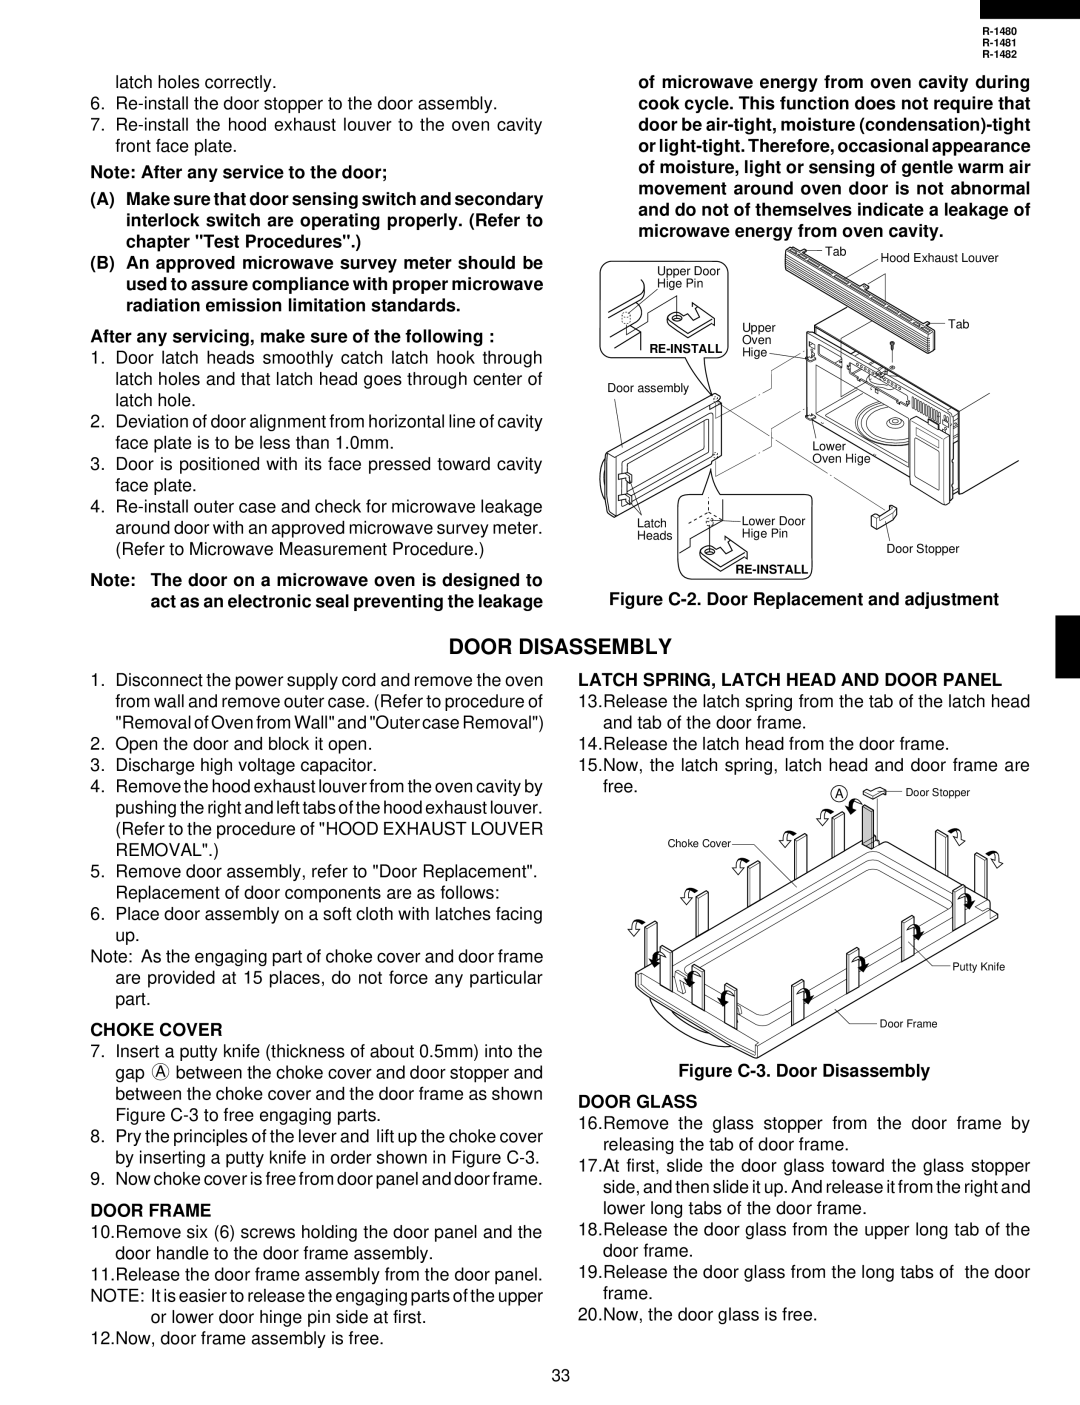
R-1481, R-1482, R-1480 specifications
Sharp R-1480, R-1481, and R-1482 are popular countertop microwave ovens that exemplify innovation in home cooking technology. These models are designed to cater to modern culinary needs, combining functionality, efficiency, and user-friendly features.The Sharp R-1480 stands out with its powerful 900 watts of cooking power, ensuring that meals are cooked evenly and thoroughly. This model includes a spacious 1.5 cubic feet capacity, allowing users to cook larger dishes without hassle. One of the most striking features of the R-1480 is its advanced Sensor Cooking technology. This intelligent feature automatically adjusts cooking time and power levels based on the type of food being prepared, delivering optimal results with minimal effort.
The R-1481 model shares many similarities with the R-1480 but introduces additional features that enhance convenience and usability. It also boasts a 900-watt power output and a 1.5 cubic feet interior. What sets the R-1481 apart is its impressive variety of pre-programmed settings. These settings simplify cooking tasks, giving users one-touch access to options for popular foods such as popcorn, pizza, and frozen vegetables. The auto defrost function is another advantage, allowing for quick thawing of meats and seafood based on weight.
Meanwhile, the Sharp R-1482 takes the features of the R-1481 a step further, adding a few unique characteristics. This model incorporates both microwave and grill functionality, allowing for versatile cooking options. Users can enjoy the benefits of grilling their favorite dishes for a perfect finish and flavor infusion. The R-1482 also includes a user-friendly control panel with a large LCD display, ensuring easy navigation through the cooking process.
Across these models, Sharp emphasizes safety and ease of use. The child lock feature provides peace of mind for families, while the easy-to-clean stainless steel interior promotes hygiene and longevity. All models include a turntable for even cooking and reheating, making it easier to prepare meals uniformly.
In conclusion, the Sharp R-1480, R-1481, and R-1482 microwave ovens combine advanced technology with practical features, catering to a diverse range of cooking needs. These models stand as a testament to Sharp’s commitment to quality and innovation in the kitchen, making them excellent choices for anyone seeking efficiency and versatility in their cooking appliances.