Manuals
/
Sharp
/
Computer Equipment
/
Computer Monitor
Sharp
TINSE1181MPZZ(2) Supplied Components, Preparing the Remote Control Unit and the Touch Pen
Models:
TINSE1181MPZZ(2)
1
7
28
28
Download
28 pages
52.21 Kb
4
5
6
7
8
9
10
11
Install
Fixation du porte-accessoires
Safety Precautions
Safety
Installing the power switch
Page 7
Image 7
Page 6
Page 8
Page 7
Image 7
Page 6
Page 8
Contents
LCD MONITOR MONITEUR LCD MONITOR LCD
ENGLISH FRANÇAIS ESPAÑOL
SETUP MANUAL MANUEL D’INSTALLATION MANUAL DE INSTALACIÓN
PN-L601B
BLUE
FOR CUSTOMERS IN U.K
GREEN-AND-YELLOW
Earth
ENGLISH
Contents
IMPORTANT INFORMATION
DEAR SHARP CUSTOMER
SAFETY PRECAUTIONS
The Power Cord
SAFETY PRECAUTIONS Continued
SAFETY INSTRUCTION
Especially for child safety
For the monitor in horizontal orientation
MOUNTING PRECAUTIONS
Connecting the USB cable Warning
Installing the power switch
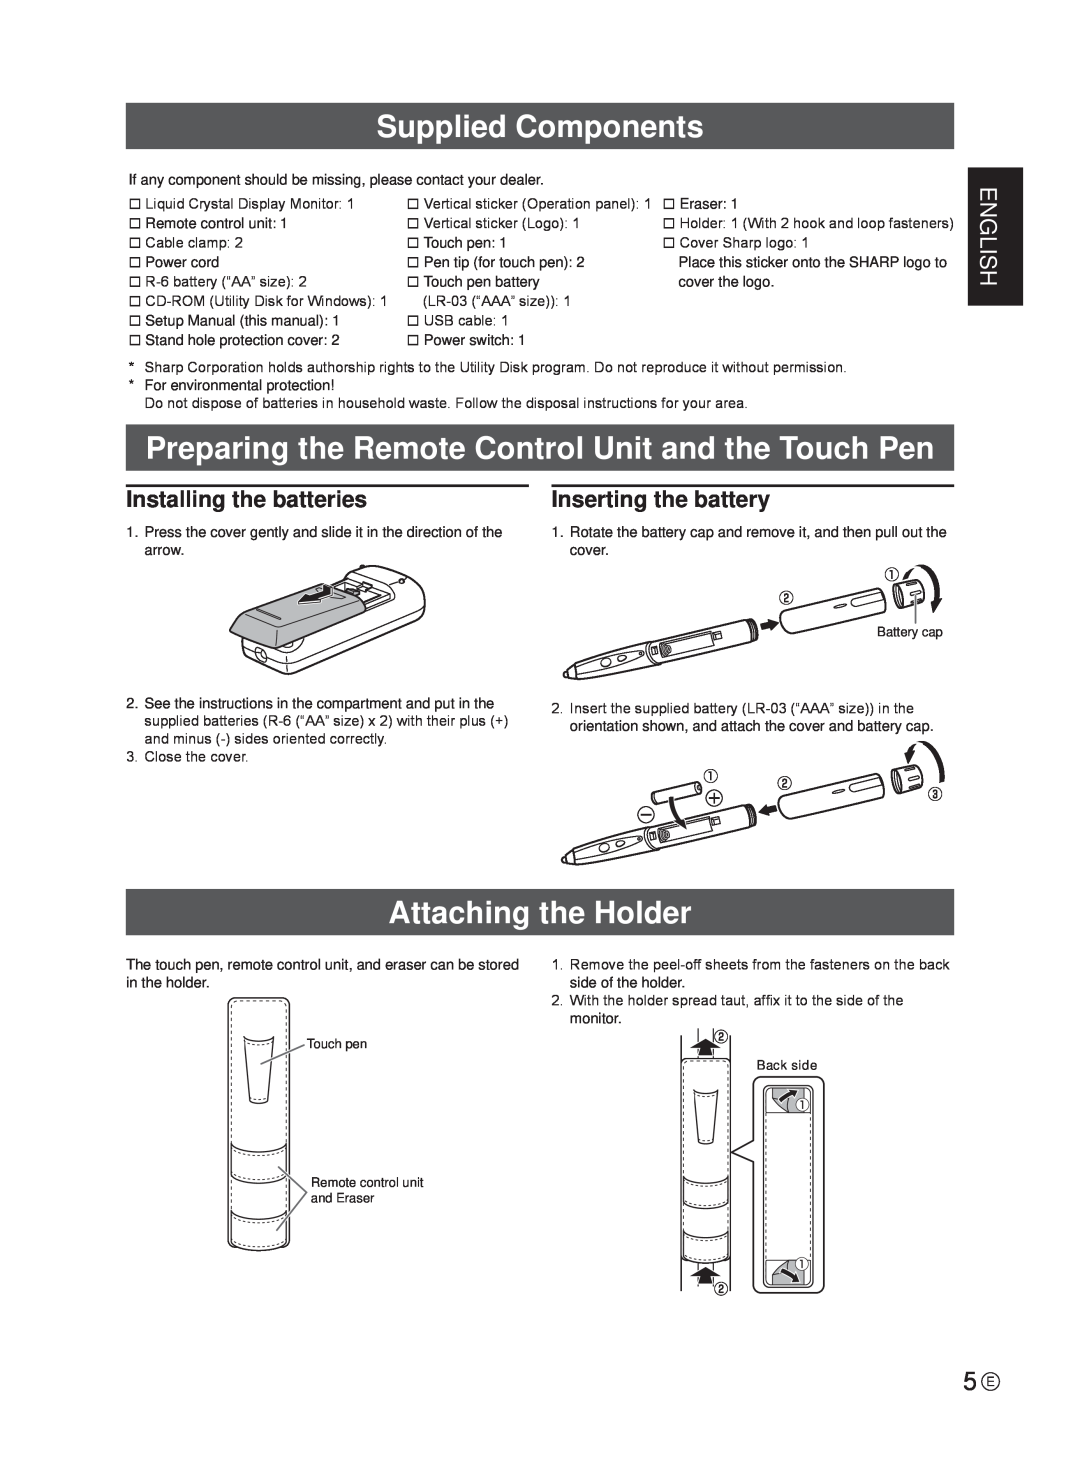
Supplied Components
Preparing the Remote Control Unit and the Touch Pen
Installing the batteries
Inserting the battery
1. AC input terminal 2. Power cord Supplied 3. USB cable
Audio input terminal Factory setting
Connections
Input mode
Main power switch
Turning Power On/Off
Turning on the main power
Turning power on/off
Turning Power On/Off nDate/time setting
FRANÇAIS
Table des matières
INFORMATION IMPORTANTE
CHER CLIENT
PRÉCAUTIONS DE SÉCURITÉ
Le cordon d’alimentation
PRÉCAUTIONS DE SÉCURITÉ Suite
MESURES DE SÉCURITÉ
En particulier pour la sécurité des enfants
Pour le moniteur en position horizontale
Installation de l’interrupteur d’alimentation Avertissement
PRÉCAUTIONS POUR LE MONTAGE
Connexion du câble USB Avertissement
Mise en place des piles
Préparation de la télécommande et du stylet
Fixation du porte-accessoires
Composants fournis
paramètre d’origine
Connexions
Mode d’entrée
Borne d’entrée audio
Interrupteur principal
Mise sous tension et hors tension
Mise sous/hors tension
Mise sous tension de l’interrupteur principal
Mise sous tension et hors tension nRéglage de la date/heure
ESPAÑOL
Índice
INFORMACIÓN IMPORTANTE
ESTIMADO CLIENTE DE SHARP
PRECAUCIONES DE SEGURIDAD
Especialmente para la seguridad de los niños
PRECAUCIONES DE SEGURIDAD Continuación
INSTRUCCIONES DE SEGURIDAD
ESPAÑOL
Instalación del interruptor de encendido
PRECAUCIONES DE MONTAJE
Conexión del cable USB Advertencia
Advertencia
Inserción de la pila
Componentes suministrados
Colocación del soporte
Instalación de las pilas
1. Terminal de entrada de corriente
Conexiones
Modo de entrada
Terminal de entrada de audio ajuste de fábrica
Interruptor primario
Encendido/apagado
Encendido/apagado
Encendido de la alimentación principal
Encendido/apagado nAjuste de fecha y hora
Page
10JKS2 TINSE1181MPZZ2
Top
Page
Image
Contents