Setting the clock (Remote control only) (continued)

5To adjust the hour, press the or button and then

press the ENTER button. Press the or button once to advance the time by 1 hour. Hold it down to advance continuously.

6To adjust the minutes, press the or button and

then press the ENTER button. Press the or button once to advance the time by 1 minute.

To confirm the time display:

Press the CLOCK/TIMER button. The time display will appear for about 5 seconds.

Note:

When power supply is restored after unit is plugged in again or after a power failure, reset the clock (pages 6-7).

To readjust the clock:

Perform “Setting the clock” from step 1. If the “Clock” does not appear in step 2, step 4 (for selecting the 24-hour or 12-hour display) will be skipped.

To change the 24-hour or 12-hour display:

1Clear all the programmed contents. [Refer to “Factory reset, clearing all memory” on page 21 for details.]

2Perform “Setting the clock” from step 1 onwards.

Listening to the iPod or iPhone

Supported iPod and iPhone models:

iPod nano

iPod mini

iPod (5th generation) (Dock connector equipped Click Wheel model)

iPod (4th generation) (Dock connector equipped Click Wheel model)

iPod nano (2nd generation)

iPod nano (3rd generation)

iPod nano (4th generation)

iPod classic

iPod touch

iPod touch (2nd generation)

iPhone

iPhone 3G

Caution:

Please update your iPod and iPhone unit to the latest software version before using it. Please visit Apple’s homepage to download the latest version for your iPod and iPhone.

Notes:

Once the iPod or iPhone is connected to the unit it will begin charging.

Error message “This accessory is not made to work with iPhone” may appear on the iPhone screen when iPhone battery is low.

The message “This accessory is not made to work with iPhone” or “This accessory is not supported by iPhone” may appear on the iPhone screen when the iPhone is not properly docked (eg. slanting) on this product. If this occurs, please remove and re-dock the iPhone.

This product is made for iPhone. To prevent random interference when iPhone is docked, the headphone output is disabled.

You may also experience brief audio interference during incoming calls.

iPod and iPhone adaptor connection

Notes:

Please use the adaptor supplied with your iPod or iPhone unit.

You can use an audio cable to connect your iPod to the

AUDIO IN socket if:


1.

your iPod adaptor does not fit into the iPod dock on the


main unit.


2.

you have an iPod that does not have an iPod adaptor.

3.

you have an iPod that does not have an iPod 30 pin


connector.


iPhone

iPhone

Capacity

Adaptor No.

Description


12

iPhone

4GB & 8GB & 16GB


15

iPhone 3G

8GB & 16GB

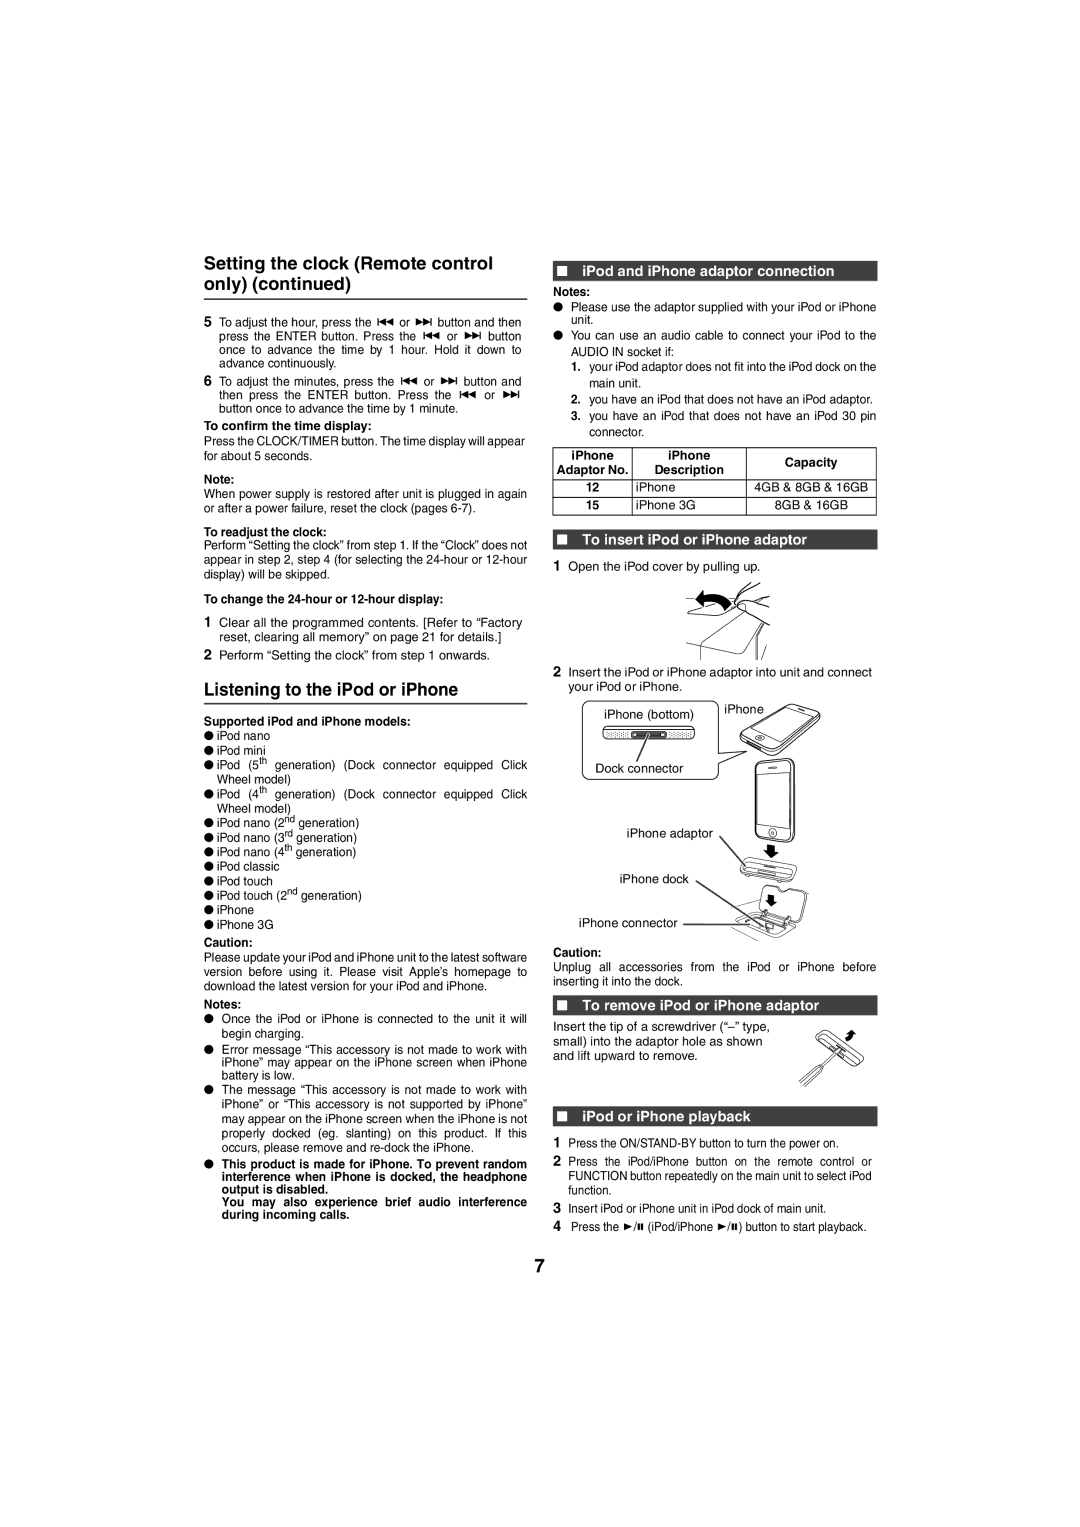
To insert iPod or iPhone adaptor

1Open the iPod cover by pulling up.

2Insert the iPod or iPhone adaptor into unit and connect your iPod or iPhone.

iPhone (bottom)

iPhone


Dock connector


iPhone adaptor

iPhone dock

iPhone connector

Caution:

Unplug all accessories from the iPod or iPhone before inserting it into the dock.

To remove iPod or iPhone adaptor

Insert the tip of a screwdriver (“–” type, small) into the adaptor hole as shown and lift upward to remove.

iPod or iPhone playback

1Press the ON/STAND-BY button to turn the power on.

2Press the iPod/iPhone button on the remote control or FUNCTION button repeatedly on the main unit to select iPod function.

3Insert iPod or iPhone unit in iPod dock of main unit.

4Press the / (iPod/iPhone /) button to start playback.

7

Page 8
Image 8
Sharp XL-HF200PH(BK) Listening to the iPod or iPhone, IPod and iPhone adaptor connection, To insert iPod or iPhone adaptor

XL-HF200PH(BK), XL-HF200PH(S) specifications

The Sharp XL-HF200PH(S) and XL-HF200PH(BK) are sophisticated hi-fi audio systems designed to deliver exceptional sound quality and modern functionality, making them perfect for both casual listeners and audiophiles alike.

One of the standout features of the XL-HF200 series is its powerful audio performance. The system is equipped with a high-output amplifier that ensures clear and dynamic sound across a wide range of frequencies. This is complemented by well-engineered speakers that produce rich bass, crisp midrange, and detailed highs, making it suitable for various music genres.

The design of the XL-HF200PH(S) and XL-HF200PH(BK) models is both elegant and functional. The sleek, compact design allows for easy integration into any living space, whether you're placing it on a shelf or setting it up as part of an entertainment center. The two color options—silver (S) and black (BK)—provide versatility to match your home décor.

In terms of connectivity, the XL-HF200 series excels with multiple options available. It features Bluetooth technology, allowing users to wirelessly stream music from smartphones, tablets, or computers. In addition, there are USB and AUX inputs for connecting various devices, as well as support for CD playback and FM/AM radio. This range of connectivity options ensures that users can enjoy their favorite audio content in a manner that suits their listening preferences.

Users will also find added convenience in the intuitive control interface. The system comes with a remote control that allows for easy operation from a distance. The built-in LCD display provides clear information on playback, making navigation user-friendly.

Moreover, the XL-HF200PH(S) and XL-HF200PH(BK) are designed with energy efficiency in mind, contributing to lower energy consumption without sacrificing performance. The systems adhere to environmental standards, making them a responsible choice for consumers looking to reduce their carbon footprint.

Overall, the Sharp XL-HF200PH(S) and XL-HF200PH(BK) are feature-rich audio systems that combine quality sound, stylish design, and versatile connectivity, catering to a wide range of listening needs. Whether you're enjoying a cozy night in or hosting a gathering, these systems are sure to enhance your audio experience significantly.