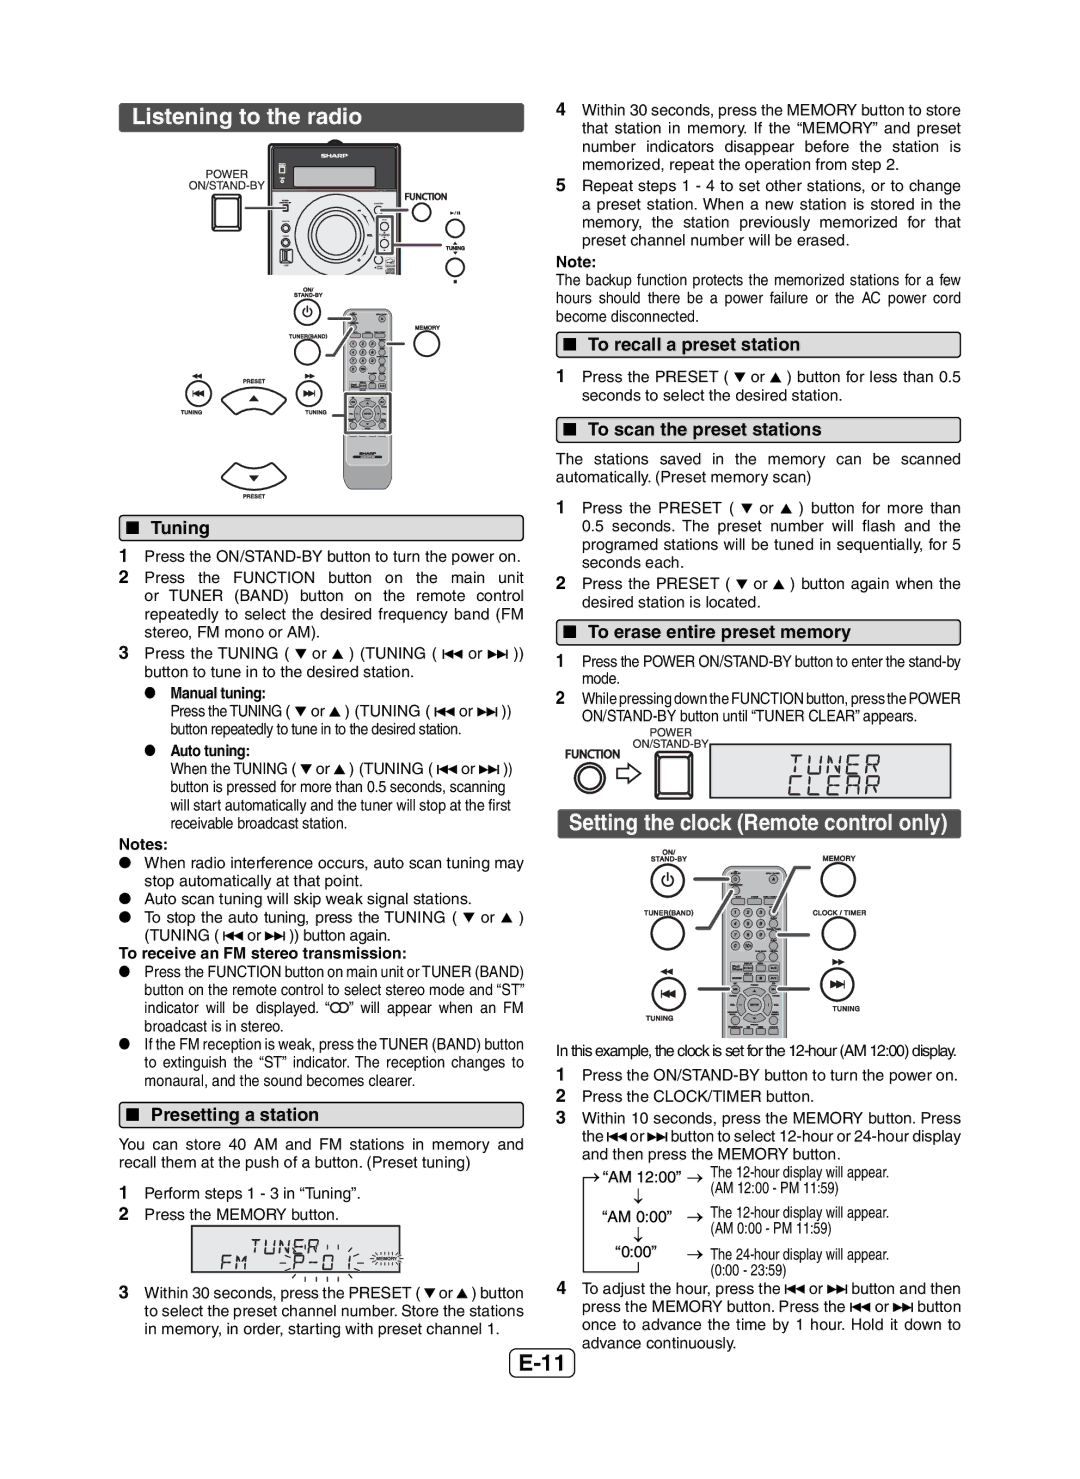
Listening to the radio

QTuning

1Press the ON/STAND-BY button to turn the power on.

2 Press the FUNCTION button on the main unit or TUNER (BAND) button on the remote control repeatedly to select the desired frequency band (FM stereo, FM mono or AM).

3Press the TUNING ( or ) (TUNING ( or )) button to tune in to the desired station.

O Manual tuning:

Press the TUNING ( or ) (TUNING ( or )) button repeatedly to tune in to the desired station.

O Auto tuning:

When the TUNING ( or ) (TUNING ( or )) button is pressed for more than 0.5 seconds, scanning will start automatically and the tuner will stop at the first receivable broadcast station.

Notes:

OWhen radio interference occurs, auto scan tuning may stop automatically at that point.

OAuto scan tuning will skip weak signal stations.

OTo stop the auto tuning, press the TUNING ( or ) (TUNING ( or )) button again.

To receive an FM stereo transmission:

OPress the FUNCTION button on main unit or TUNER (BAND) button on the remote control to select stereo mode and “ST” indicator will be displayed. “” will appear when an FM broadcast is in stereo.

OIf the FM reception is weak, press the TUNER (BAND) button to extinguish the “ST” indicator. The reception changes to monaural, and the sound becomes clearer.

QPresetting a station

You can store 40 AM and FM stations in memory and recall them at the push of a button. (Preset tuning)

1Perform steps 1 - 3 in “Tuning”.

2Press the MEMORY button.

3Within 30 seconds, press the PRESET ( or ) button to select the preset channel number. Store the stations in memory, in order, starting with preset channel 1.

4Within 30 seconds, press the MEMORY button to store that station in memory. If the “MEMORY” and preset number indicators disappear before the station is memorized, repeat the operation from step 2.

5Repeat steps 1 - 4 to set other stations, or to change a preset station. When a new station is stored in the memory, the station previously memorized for that preset channel number will be erased.

Note:

The backup function protects the memorized stations for a few hours should there be a power failure or the AC power cord become disconnected.

QTo recall a preset station

1Press the PRESET ( or ) button for less than 0.5 seconds to select the desired station.

QTo scan the preset stations

The stations saved in the memory can be scanned automatically. (Preset memory scan)

1Press the PRESET ( or ) button for more than 0.5 seconds. The preset number will flash and the programed stations will be tuned in sequentially, for 5 seconds each.

2Press the PRESET ( or ) button again when the desired station is located.

QTo erase entire preset memory

1Press the POWER ON/STAND-BY button to enter the stand-by mode.

2While pressing down the FUNCTION button, press the POWER ON/STAND-BY button until “TUNER CLEAR” appears.

Setting the clock (Remote control only)

In this example, the clock is set for the 12-hour (AM 12:00) display.

1Press the ON/STAND-BY button to turn the power on.

2Press the CLOCK/TIMER button.

3Within 10 seconds, press the MEMORY button. Press the or button to select 12-hour or 24-hour display

and then press the MEMORY button.

The 12-hour display will appear. (AM 12:00 - PM 11:59)

The 12-hour display will appear. (AM 0:00 - PM 11:59)

The 24-hour display will appear. (0:00 - 23:59)

4To adjust the hour, press the or button and then press the MEMORY button. Press the or button once to advance the time by 1 hour. Hold it down to advance continuously.

E-11

Page 12
Image 12
Sharp XLDH259P operation manual Listening to the radio, Setting the clock Remote control only

XLDH259P specifications

The Sharp XLDH259P is a versatile and powerful projector designed to meet the needs of both business professionals and educators. With its compact form factor and high-performance features, it stands out as a reliable choice for presentations, lectures, and other visual displays.

One of its key features is the advanced 4,000 ANSI lumens brightness, which ensures clear and vivid images even in well-lit environments. This makes the XLDH259P ideal for conferences and classrooms where ambient light can be a challenge. Coupled with a high contrast ratio, this projector delivers sharp and detailed images, enhancing the viewing experience for audiences.

Another notable characteristic of the Sharp XLDH259P is its support for Full HD 1080p resolution. This capability is crucial for presentations that require a higher level of detail, such as graphics-heavy slides, videos, and intricate visuals. The projector also supports a variety of resolutions, allowing users to adapt to different content types seamlessly.

The XLDH259P incorporates advanced image processing technologies designed to enhance picture quality further. With features such as image shift, digital keystone correction, and lens zoom, users can easily adjust the projection settings to fit any screen size and distance, ensuring a perfect fit for any environment. This flexibility is particularly important in dynamic settings such as classrooms or multi-purpose conference rooms.

Port connectivity is another strong suit of the Sharp XLDH259P. It is equipped with multiple input options, including HDMI, VGA, and USB, allowing for easy connections to laptops, media players, and other devices. The inclusion of built-in speakers also eliminates the need for separate audio equipment in smaller settings.

Efficiency is yet another hallmark of the XLDH259P. It features a low power consumption mode, which not only reduces operating costs but also extends the life of the lamp. The projector is designed for ease of maintenance, with accessible filters and a long lamp life, ensuring low total cost of ownership.

In summary, the Sharp XLDH259P is a feature-rich projector that excels in brightness, resolution, and connectivity, making it an ideal choice for both professional presentations and educational purposes. Its user-friendly design and advanced technologies offer versatility and performance, ensuring that it meets the demands of any user looking for a reliable projection solution.