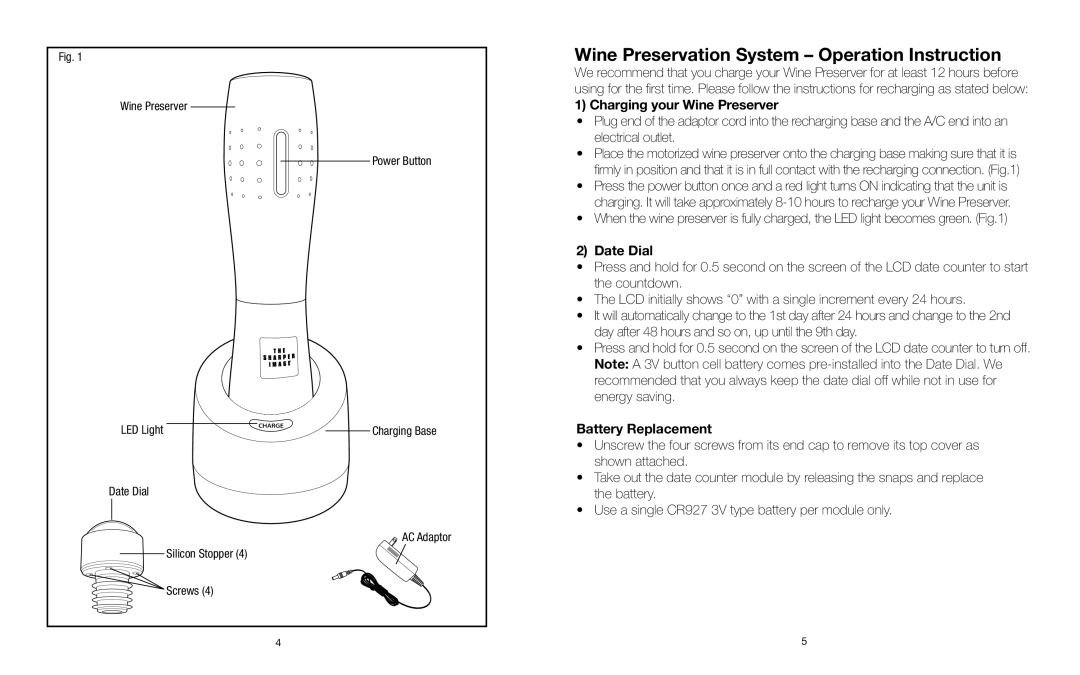
Fig. 1
Wine Preserver
LED Light | CHARGE |
|
Date Dial
Silicon Stopper (4)
![]() Screws (4)
Screws (4)
Power Button
Charging Base
AC Adaptor
Wine Preservation System – Operation Instruction
We recommend that you charge your Wine Preserver for at least 12 hours before using for the first time. Please follow the instructions for recharging as stated below:
1) Charging your Wine Preserver
•Plug end of the adaptor cord into the recharging base and the A/C end into an electrical outlet.
•Place the motorized wine preserver onto the charging base making sure that it is firmly in position and that it is in full contact with the recharging connection. (Fig.1)
•Press the power button once and a red light turns ON indicating that the unit is charging. It will take approximately
•When the wine preserver is fully charged, the LED light becomes green. (Fig.1)
2)Date Dial
•Press and hold for 0.5 second on the screen of the LCD date counter to start the countdown.
•The LCD initially shows “0” with a single increment every 24 hours.
•It will automatically change to the 1st day after 24 hours and change to the 2nd day after 48 hours and so on, up until the 9th day.
•Press and hold for 0.5 second on the screen of the LCD date counter to turn off. Note: A 3V button cell battery comes
Battery Replacement
•Unscrew the four screws from its end cap to remove its top cover as shown attached.
•Take out the date counter module by releasing the snaps and replace the battery.
•Use a single CR927 3V type battery per module only.
4 | 5 |
