■Lamp Replacement
WARNING:
-For continued safety, replace with a lamp assembly of the same type.
-Allow the projector to cool for at least 45 minutes before you open the lamp cover. The inside of the projector can become very hot.
-Do not drop the lamp module or touch the glass bulb! The glass can shatter and cause injury.
Procedure
1 Turn off the projector and disconnect the AC cord. Allow the projector to cool for at least 45 minutes.
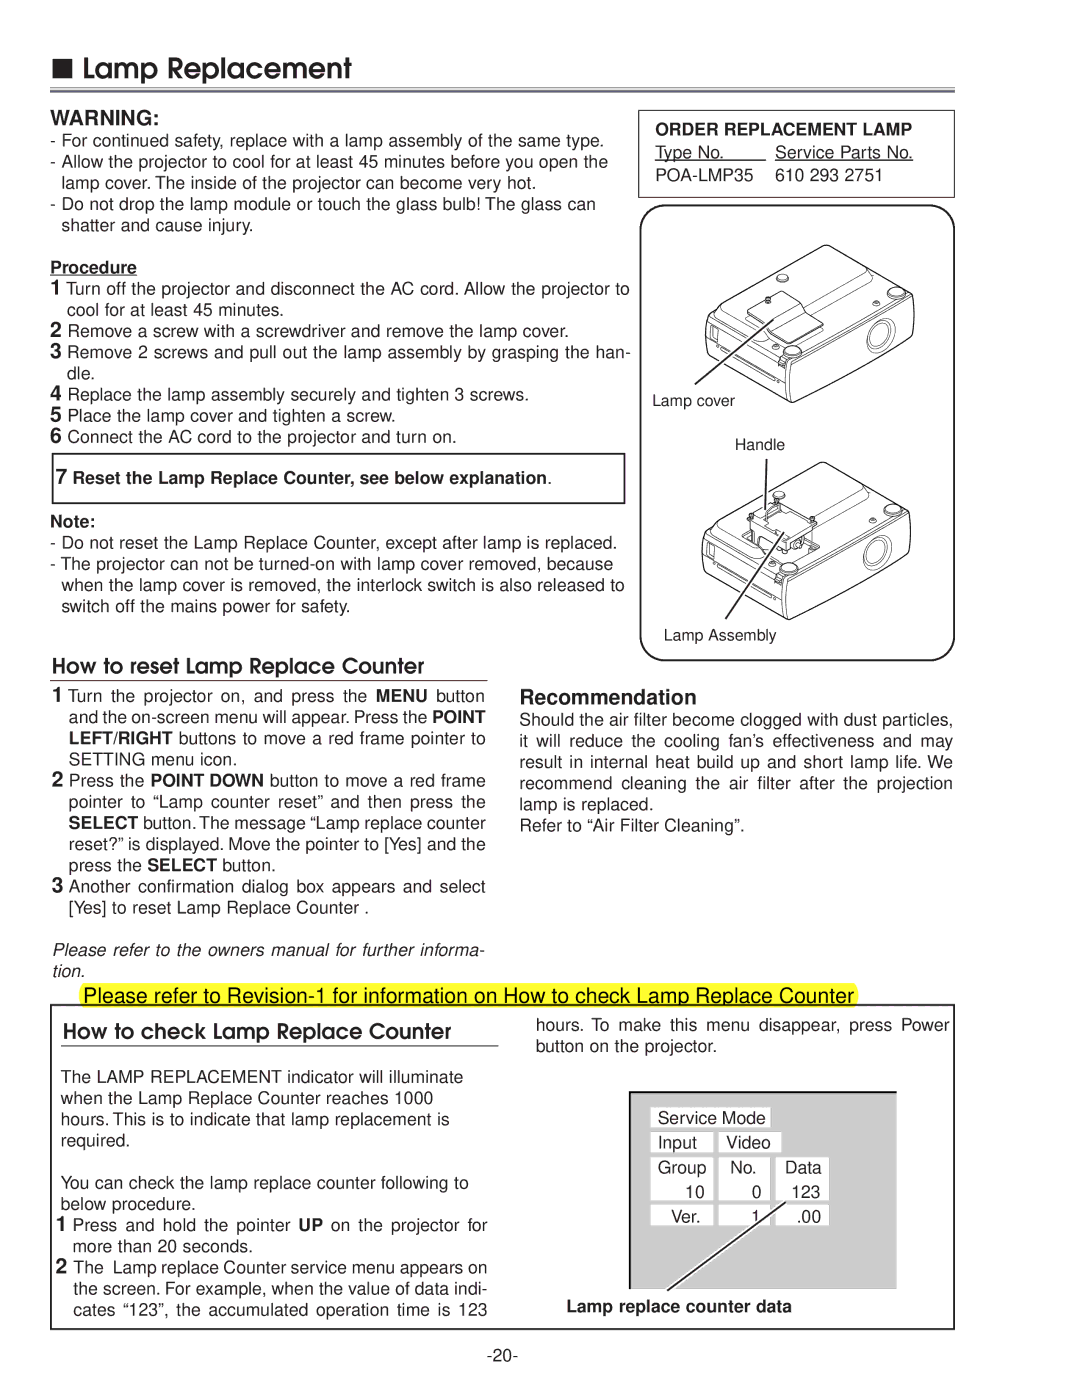
2 Remove a screw with a screwdriver and remove the lamp cover.
3 Remove 2 screws and pull out the lamp assembly by grasping the han- dle.
4 Replace the lamp assembly securely and tighten 3 screws.
5 Place the lamp cover and tighten a screw.
6 Connect the AC cord to the projector and turn on.
7 Reset the Lamp Replace Counter, see below explanation.
Note:
-Do not reset the Lamp Replace Counter, except after lamp is replaced.
-The projector can not be
ORDER REPLACEMENT LAMP
Type No. | Service Parts No. |
610 293 2751 |
Lamp cover
Handle
Lamp Assembly
How to reset Lamp Replace Counter
1 Turn the projector on, and press the MENU button and the
2 Press the POINT DOWN button to move a red frame pointer to “Lamp counter reset” and then press the SELECT button. The message “Lamp replace counter reset?” is displayed. Move the pointer to [Yes] and the press the SELECT button.
3 Another confirmation dialog box appears and select [Yes] to reset Lamp Replace Counter .
Please refer to the owners manual for further informa- tion.
Recommendation
Should the air filter become clogged with dust particles, it will reduce the cooling fan’s effectiveness and may result in internal heat build up and short lamp life. We recommend cleaning the air filter after the projection lamp is replaced.
Refer to “Air Filter Cleaning”.
Please refer to
How to check Lamp Replace Counter
The LAMP REPLACEMENT indicator will illuminate when the Lamp Replace Counter reaches 1000 hours. This is to indicate that lamp replacement is required.
You can check the lamp replace counter following to below procedure.
1 Press and hold the pointer UP on the projector for more than 20 seconds.
2The Lamp replace Counter service menu appears on the screen. For example, when the value of data indi- cates “123”, the accumulated operation time is 123
hours. To make this menu disappear, press Power button on the projector.
|
|
|
|
|
|
|
|
|
|
|
|
|
|
|
|
|
|
|
| Service Mode |
|
|
|
| ||
|
| Input |
| Video |
|
|
| |
|
|
|
|
|
|
|
|
|
|
| Group |
| No. |
| Data |
| |
|
| 10 |
| 0 |
| 123 |
|
|
|
| Ver. |
| 1 |
| .00 |
|
|
|
|
|
|
|
|
|
|
|
|
|
|
|
|
|
|
|
|
Lamp replace counter data
