■LCD Panel/Prism Ass’y Replacement
IMPORTANT NOTICE on LCD Panel/Prism Ass'y Replacement
LCD panels used for this model can not be replaced separately. Do not disassemble the LCD Panel/Prism Ass’y. These LCD panels are installed with precision at the factory. When replacing the LCD panel, should be replaced whole of the LCD panels and prism ass’y at once.
After replacing LCD Panel/Prism ass’y, please check the following adjustments.
-Check the “Condenser Lens Adjustment” , “Condenser
-Check the “White Balance Adjustment” , “Common Center Adjustment” and “Gamma Shift Adjustment” following to chapter “Electrical Adjustment”.
-Check the white uniformity on the screen.
If you find the color shading, please adjust the white uniformity by using the proper computer and “Color Shading Correction” software supplied separately.
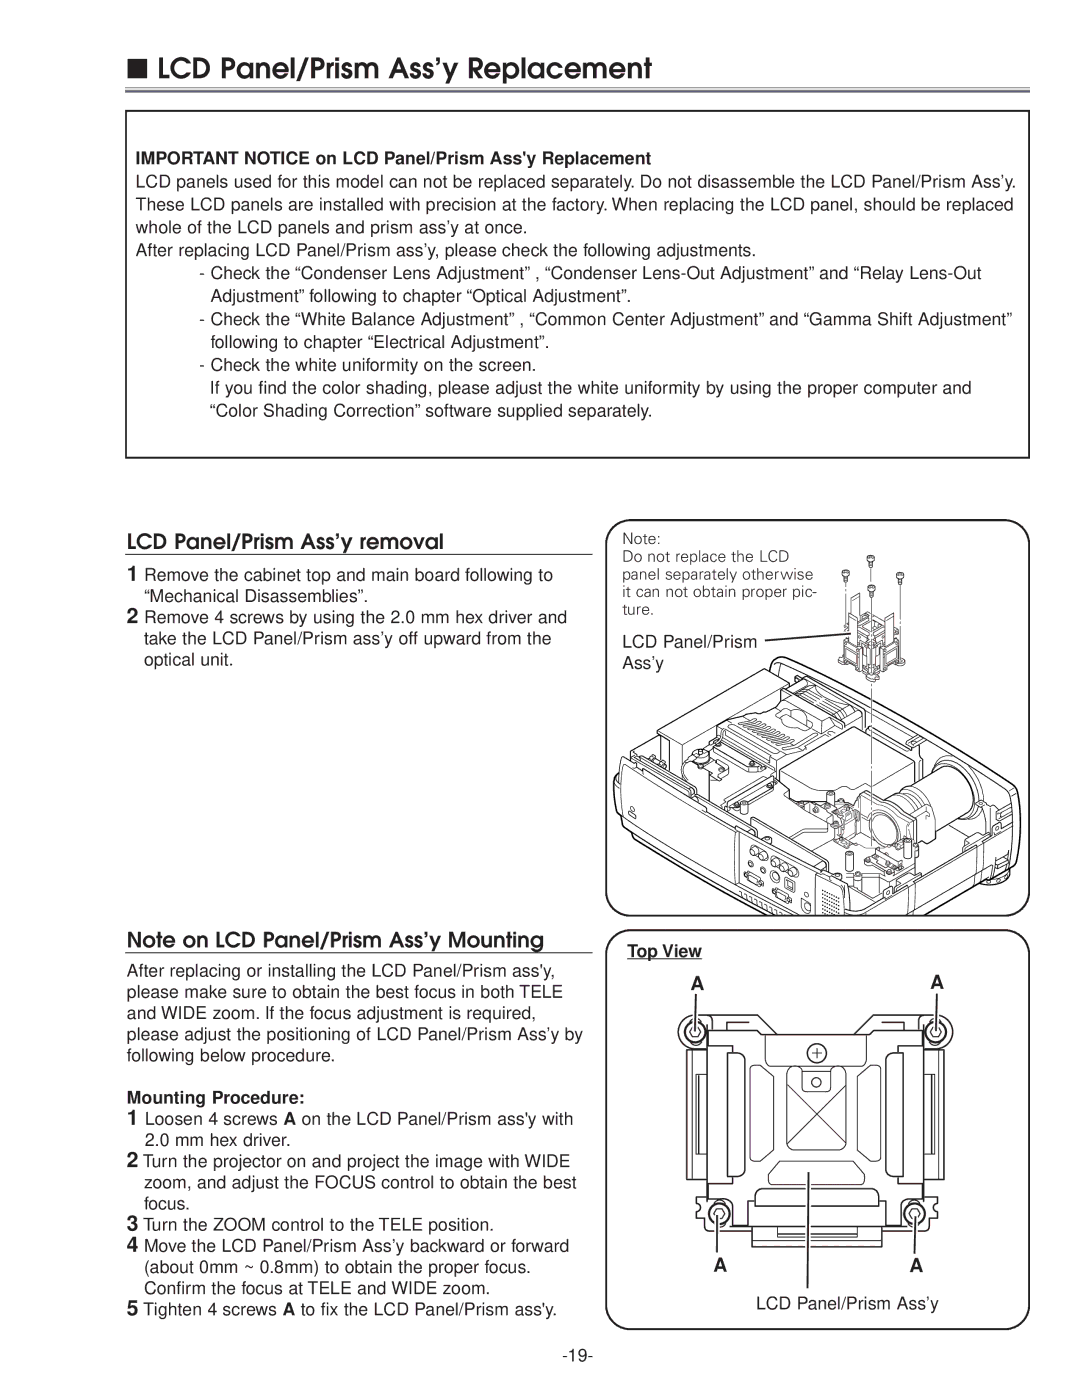
LCD Panel/Prism Ass’y removal
1 Remove the cabinet top and main board following to “Mechanical Disassemblies”.
2 Remove 4 screws by using the 2.0 mm hex driver and take the LCD Panel/Prism ass’y off upward from the optical unit.
Note:
Do not replace the LCD panel separately otherwise it can not obtain proper pic- ture.
LCD Panel/Prism ![]()
![]() Ass’y
Ass’y![]()
Note on LCD Panel/Prism Ass’y Mounting
After replacing or installing the LCD Panel/Prism ass'y, please make sure to obtain the best focus in both TELE and WIDE zoom. If the focus adjustment is required, please adjust the positioning of LCD Panel/Prism Ass’y by following below procedure.
Mounting Procedure:
1 Loosen 4 screws A on the LCD Panel/Prism ass'y with 2.0 mm hex driver.
2 Turn the projector on and project the image with WIDE zoom, and adjust the FOCUS control to obtain the best focus.
3 Turn the ZOOM control to the TELE position.
4 Move the LCD Panel/Prism Ass’y backward or forward (about 0mm ~ 0.8mm) to obtain the proper focus. Confirm the focus at TELE and WIDE zoom.
5 Tighten 4 screws A to fix the LCD Panel/Prism ass'y.
Top View
AA
AA
LCD Panel/Prism Ass’y