Key points to remember when installing your Shaw Direct System:
•Do not drill any holes until you’ve confirmed the best location for the dish.
•Make sure the installation of the dish conforms to local electrical and building codes, zoning requirements and other applicable laws and regulations. If you are unsure, contact your local electrician or building inspector for assistance.
•For possible periodic removal of snow, choose a site that is easily accessible.
•Ensure thereare no visible obstructionsbetween the dish and your line of sightto the satellites. Keep in mind that trees will grow up and outward and may eventually block the signal.
•The maximum allowable length for the
•Use only
•Do not install the dish:
•Under power lines
•Where it may be easily tampered with
•Where it is exposed to high winds, during windy or stormy conditions
Shaw Direct offers a supplementary Self Install Kit, If you have not already purchased our Self Install Kit, you may do so by calling 1.888.554.7827.This kit contains everything you will need to successfully install your Shaw Direct satellite system. Please contact Shaw Direct to order or receive additional information regarding the Self Install Kit.
2. Mounting Locations
Yourdish will typicallybe mountedon a solid base. To ensure your dish doesn’t move in windy conditions, choose a location where it can be securely fastened. The mounting surface should be rigid and solid.
IMPORTANT: The Elliptical Dish has a turn radius of +/_ 35 degrees. If you are mounting the dish on the side of your house, check the assembled dish and mounting pole to see if you can rotate the dish in the desired azimuth setting. If you can’t rotate the dish, choose an alternate location.
Key things to remember when choosing a mounting location:
•The mounting surface should be flat, even and in good condition.
•If you install the dish on the roof or side of your house, be sure to attach the bolts into a building stud, rafter or other solid surface.
•When mounting on the roof of your house,
use an adequate/approved sealant (for your type of roofing material) around the holes where the base of the universalmount meets the mounting surface. This will prevent the roof from leaking. (Consult with a roofing expert to confirm best sealant.)
•We do not recommend:
•Mounting the dish on a railing
•Installing the dish on aluminum or vinyl siding (these are unlikely to be structurally sound)
•Keep grounding requirements in mind (see section 11 for additional information on grounding).
3. Dish Assembly
Step 1: To avoid losing any hardware components, select a clear area on the ground for dish assembly.
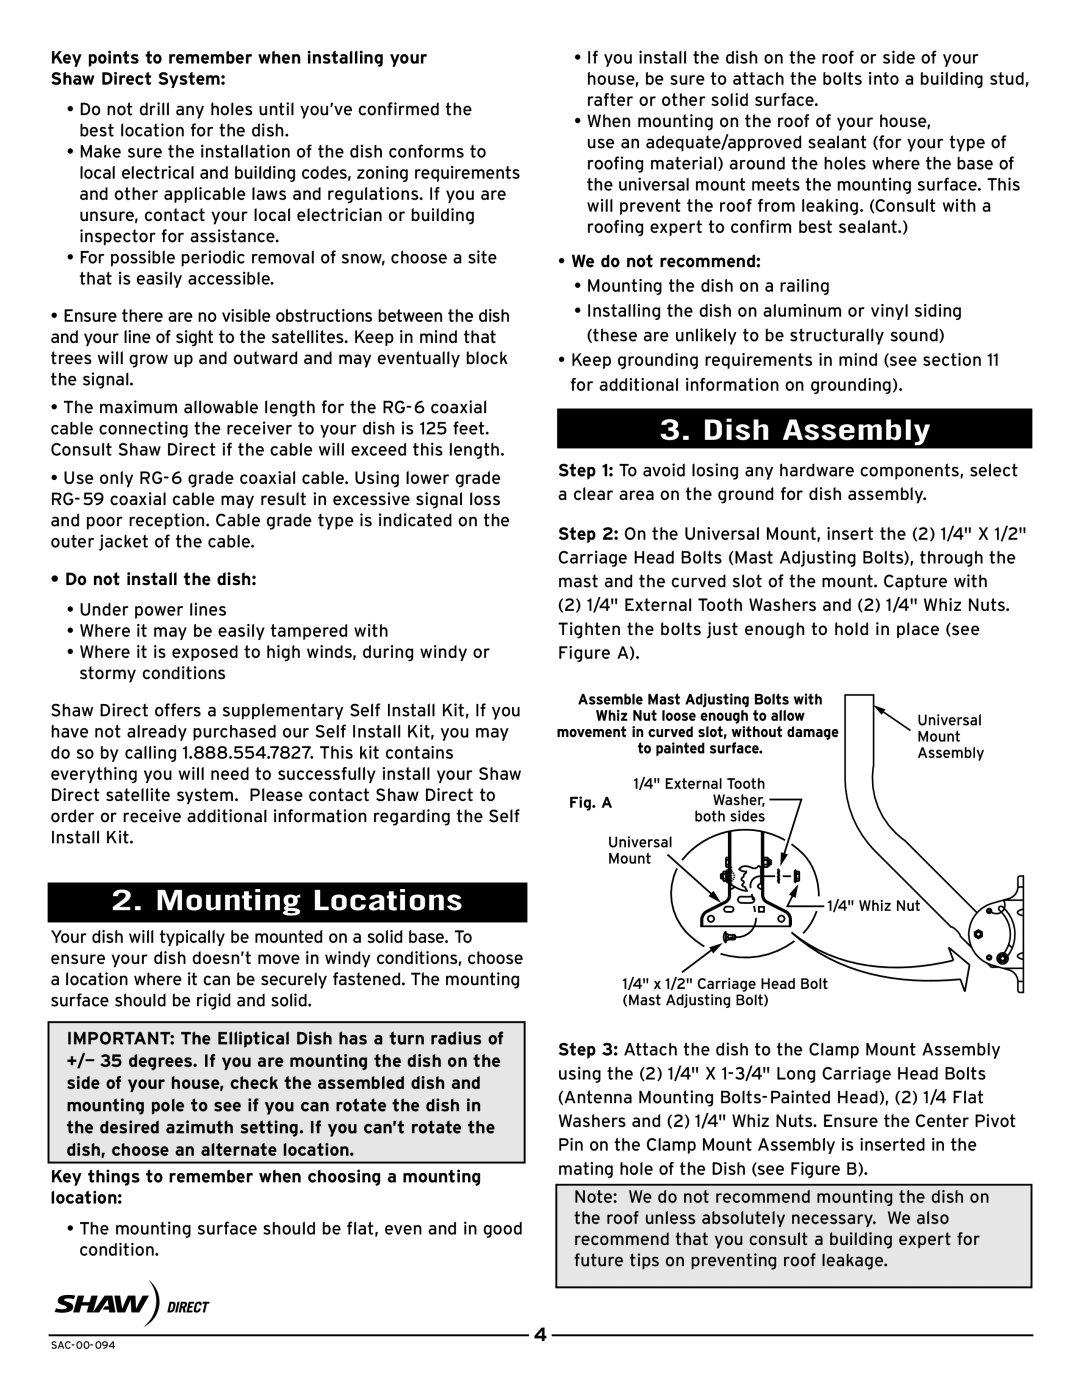
Step 2: On the Universal Mount, insert the (2) 1/4" X 1/2" Carriage Head Bolts (Mast Adjusting Bolts), through the mast and the curved slot of the mount. Capture with
(2)1/4" External Tooth Washers and (2) 1/4" Whiz Nuts. Tighten the bolts just enough to hold in place (see Figure A).
Fig. A
Step 3: Attach the dish to the Clamp Mount Assembly using the (2) 1/4" X
Note: We do not recommend mounting the dish on the roof unless absolutely necessary. We also recommend that you consult a building expert for future tips on preventing roof leakage.
4
