PSM200 specifications
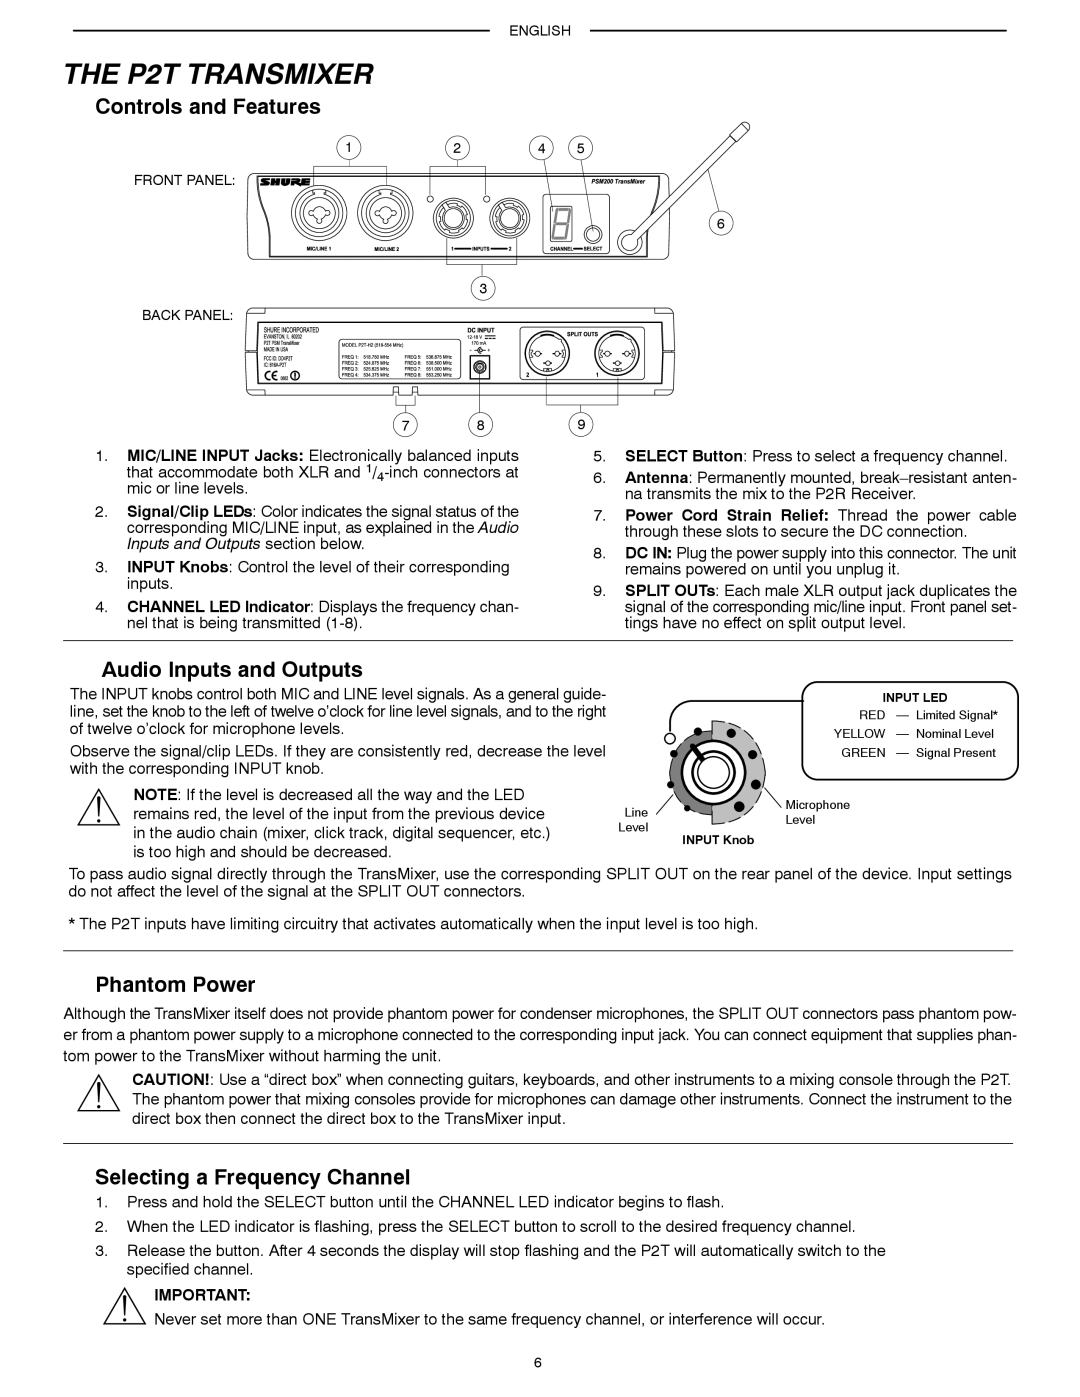
The Shure PSM200 is a professional in-ear monitoring system designed to enhance the performance experience for musicians, sound engineers, and performers. This versatile system provides high-quality audio transmission, allowing users to receive an exceptional mix of sound directly into their ears. The PSM200 is ideal for both on-stage performances and studio environments, offering reliable wireless monitoring with user-friendly features.One of the main features of the Shure PSM200 is its dual-channel receiver, which allows for two separate mixes to be delivered to two different performers. This flexibility is particularly beneficial for bands and groups that require individualized sound levels and content. The PSM200 system operates across a wide frequency range, ensuring clear and consistent audio quality even in crowded environments. With a selection of frequencies to choose from, users can easily find an open channel, minimizing the risk of interference.
The PSM200 is equipped with advanced technologies that enhance its performance. One notable technology is the "Smart Frequency" feature, which enables the system to identify and select the best frequency for transmission automatically. This intelligent frequency management helps to prevent dropouts and signal degradation, ensuring a stable connection during performances. Additionally, the PSM200 features Shure's renowned audio processing, which delivers high-fidelity sound with minimal latency.
Another significant characteristic of the PSM200 is its ergonomic design. The lightweight bodypack receivers are designed for comfort, making them suitable for prolonged use during long sets. With a robust construction, the receivers can endure the wear and tear of live performances while providing reliable operation.
Furthermore, the PSM200 offers an easy-to-use interface with intuitive controls that allow performers to make quick adjustments on the fly. The system also supports a wide range of earphones and earbuds, ensuring users can find the perfect fit and sound profile for their needs.
In conclusion, the Shure PSM200 in-ear monitoring system stands out for its professional audio quality, advanced technologies, and user-oriented design. Whether for live performances or studio sessions, it provides musicians and performers with the tools necessary to achieve optimal sound and enhance their overall performance experience. With its reliable performance and thoughtful features, the PSM200 is a valuable asset for any serious artist or sound engineer.

