6
INSTALLATION
PushHandleFaucet
For easier installation, attach all tubing prior to mounting the faucet.
1.Insert polished faucet base (refer to figure H page 5) onto base of faucet.
2.Install the 1/4” yellow drain tubing onto the 1/4” barb fitting. This tube must be of sufficient length to reach the yellow manifold drain connection.
3.Insert the white 3/8” tubing onto the larger 3/8” barbed fitting, being sure you have enough tubing to reach the drain saddle.
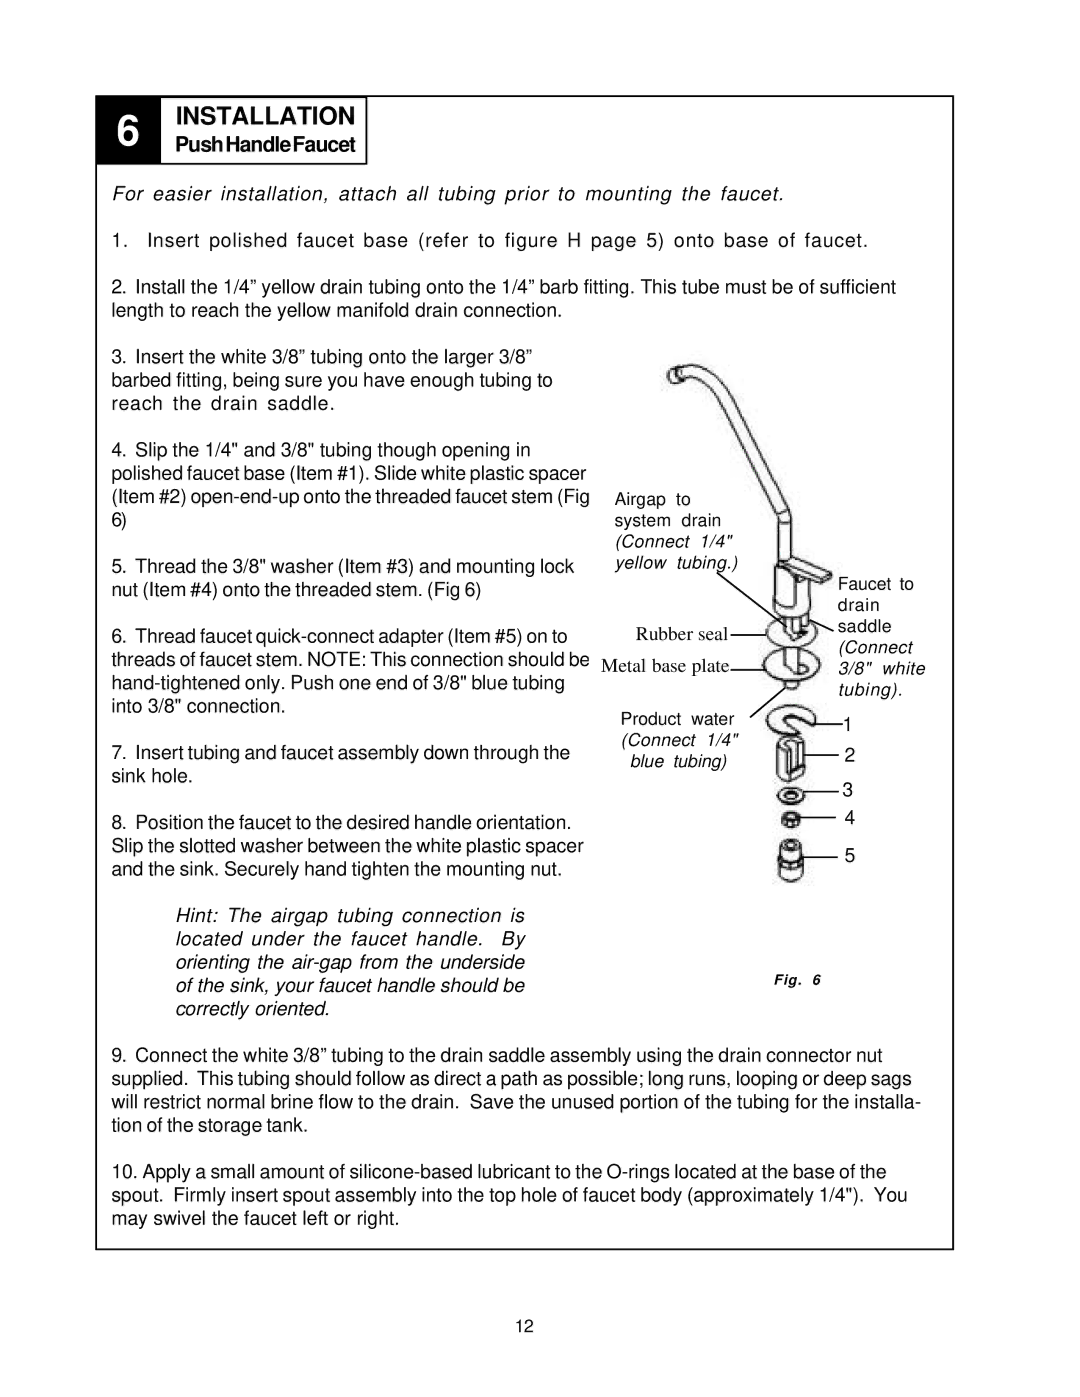
4.Slip the 1/4" and 3/8" tubing though opening in polished faucet base (Item #1). Slide white plastic spacer (Item #2)
5.Thread the 3/8" washer (Item #3) and mounting lock nut (Item #4) onto the threaded stem. (Fig 6)
Airgap to system drain (Connect 1/4" yellow tubing.)
Faucet to drain
6.Thread faucet
7.Insert tubing and faucet assembly down through the sink hole.
8.Position the faucet to the desired handle orientation. Slip the slotted washer between the white plastic spacer and the sink. Securely hand tighten the mounting nut.
Rubber seal Metal base plate
Product water (Connect 1/4" blue tubing)
saddle (Connect 3/8" white tubing).
1
2
3
4
5
Hint: The airgap tubing connection is located under the faucet handle. By orienting the
of the sink, your faucet handle should beFig. 6 correctly oriented.
9.Connect the white 3/8” tubing to the drain saddle assembly using the drain connector nut supplied. This tubing should follow as direct a path as possible; long runs, looping or deep sags will restrict normal brine flow to the drain. Save the unused portion of the tubing for the installa- tion of the storage tank.
10.Apply a small amount of
12