SIIG 
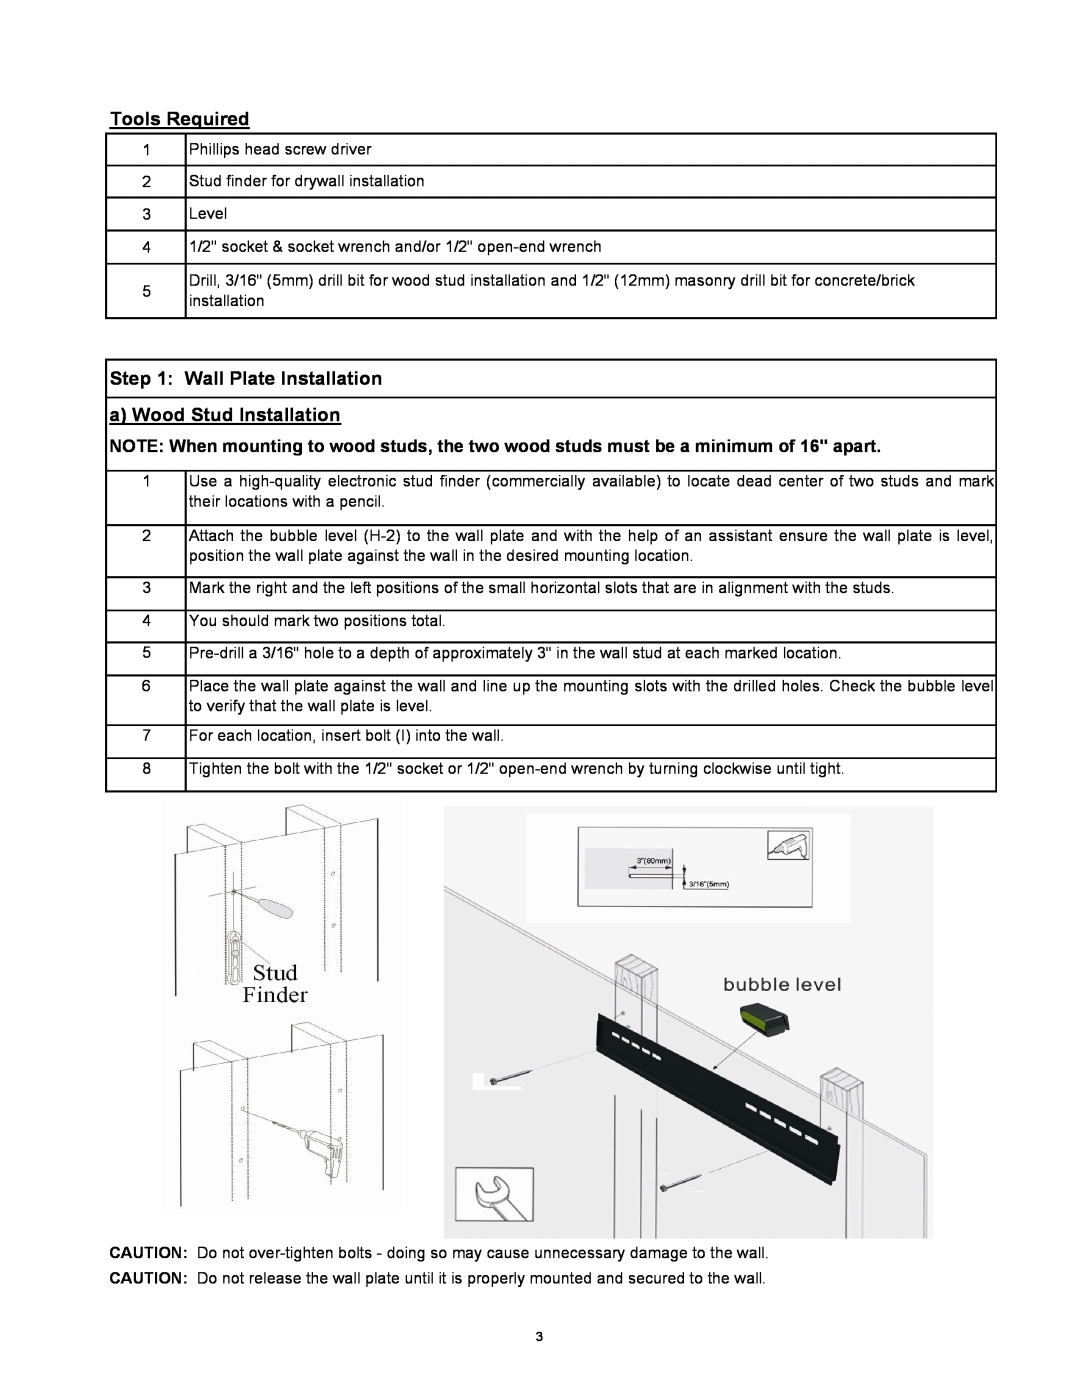
L734, L704, L733, L732 Tools Required, Wall Plate Installation a Wood Stud Installation

Models: L732 L734

1 8
Download 8 pages 787 b
Page 3
Image 3
Tools Required

Tools Required

1Phillips head screw driver

2Stud finder for drywall installation

3Level

41/2" socket & socket wrench and/or 1/2" open-end wrench

Drill, 3/16" (5mm) drill bit for wood stud installation and 1/2" (12mm) masonry drill bit for concrete/brick

5installation

Step 1: Wall Plate Installation

a) Wood Stud Installation

NOTE: When mounting to wood studs, the two wood studs must be a minimum of 16" apart.

1Use a high-quality electronic stud finder (commercially available) to locate dead center of two studs and mark their locations with a pencil.

2Attach the bubble level (H-2) to the wall plate and with the help of an assistant ensure the wall plate is level, position the wall plate against the wall in the desired mounting location.

3Mark the right and the left positions of the small horizontal slots that are in alignment with the studs.

4You should mark two positions total.

5Pre-drill a 3/16" hole to a depth of approximately 3" in the wall stud at each marked location.

6Place the wall plate against the wall and line up the mounting slots with the drilled holes. Check the bubble level to verify that the wall plate is level.

7For each location, insert bolt (I) into the wall.

8Tighten the bolt with the 1/2" socket or 1/2" open-end wrench by turning clockwise until tight.

CAUTION: Do not over-tighten bolts - doing so may cause unnecessary damage to the wall.

CAUTION: Do not release the wall plate until it is properly mounted and secured to the wall.

3

Page 3
Image 3
SIIG L734, L704, L733, L732 installation instructions Tools Required, Wall Plate Installation a Wood Stud Installation