b) Concrete/Brick Installation
NOTE: The concrete anchors must be used for concrete installation.
1Attach the bubble level
2Mark four holes to be used for securing the mount and place the wall plate aside.
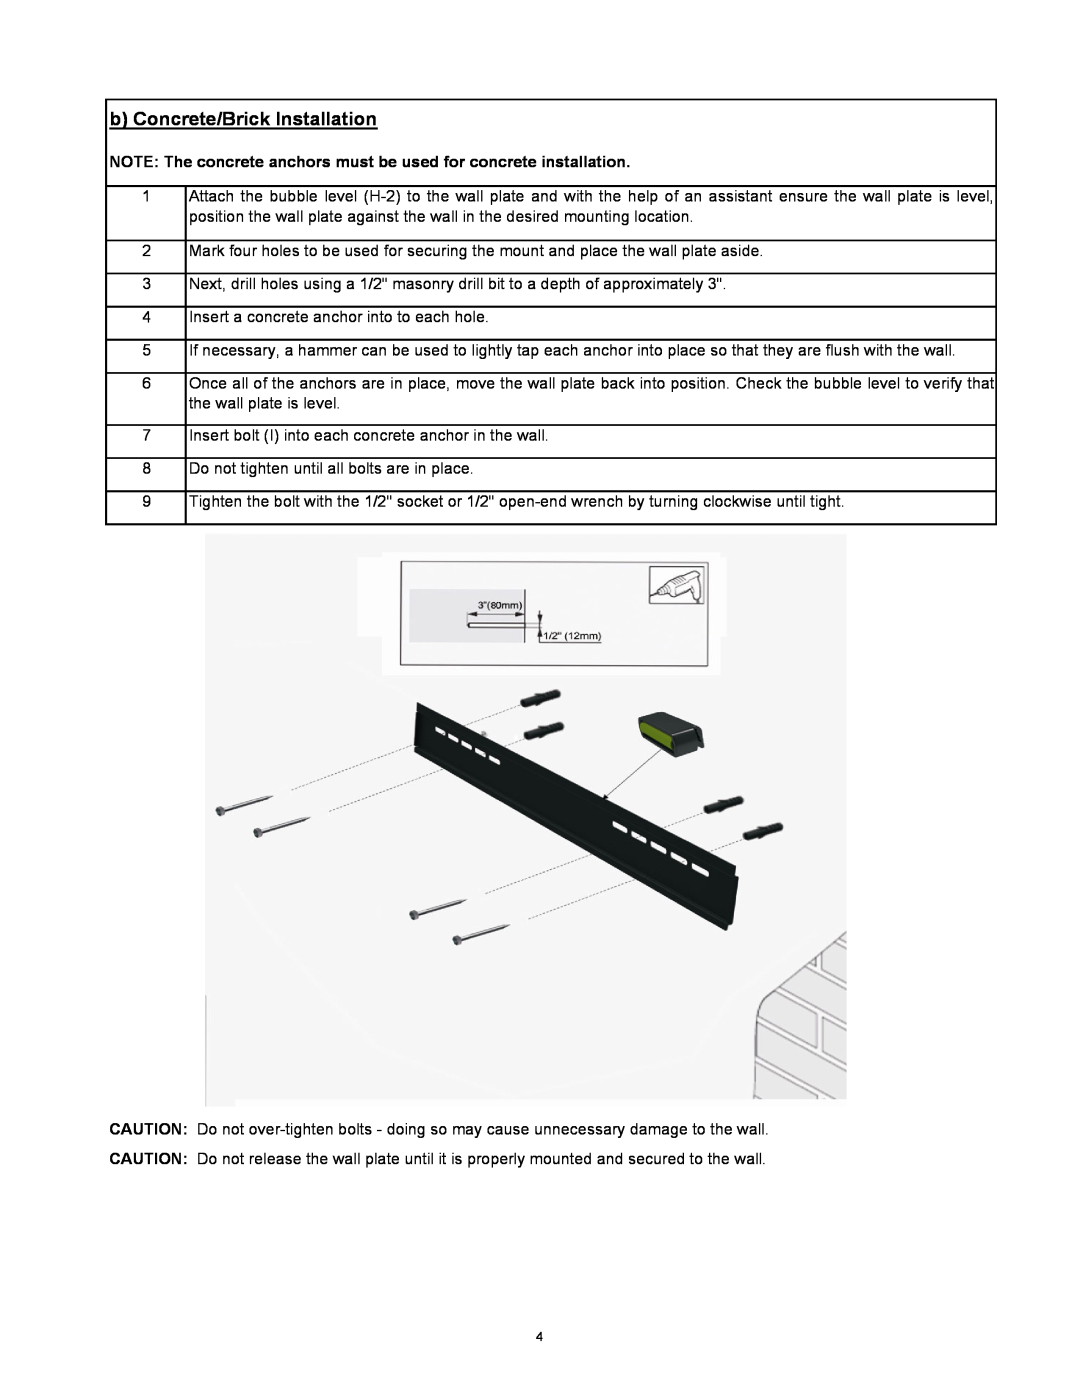
3Next, drill holes using a 1/2" masonry drill bit to a depth of approximately 3".
4Insert a concrete anchor into to each hole.
5If necessary, a hammer can be used to lightly tap each anchor into place so that they are flush with the wall.
6Once all of the anchors are in place, move the wall plate back into position. Check the bubble level to verify that the wall plate is level.
7Insert bolt (I) into each concrete anchor in the wall.
8Do not tighten until all bolts are in place.
9Tighten the bolt with the 1/2" socket or 1/2"
CAUTION: Do not
CAUTION: Do not release the wall plate until it is properly mounted and secured to the wall.
4