
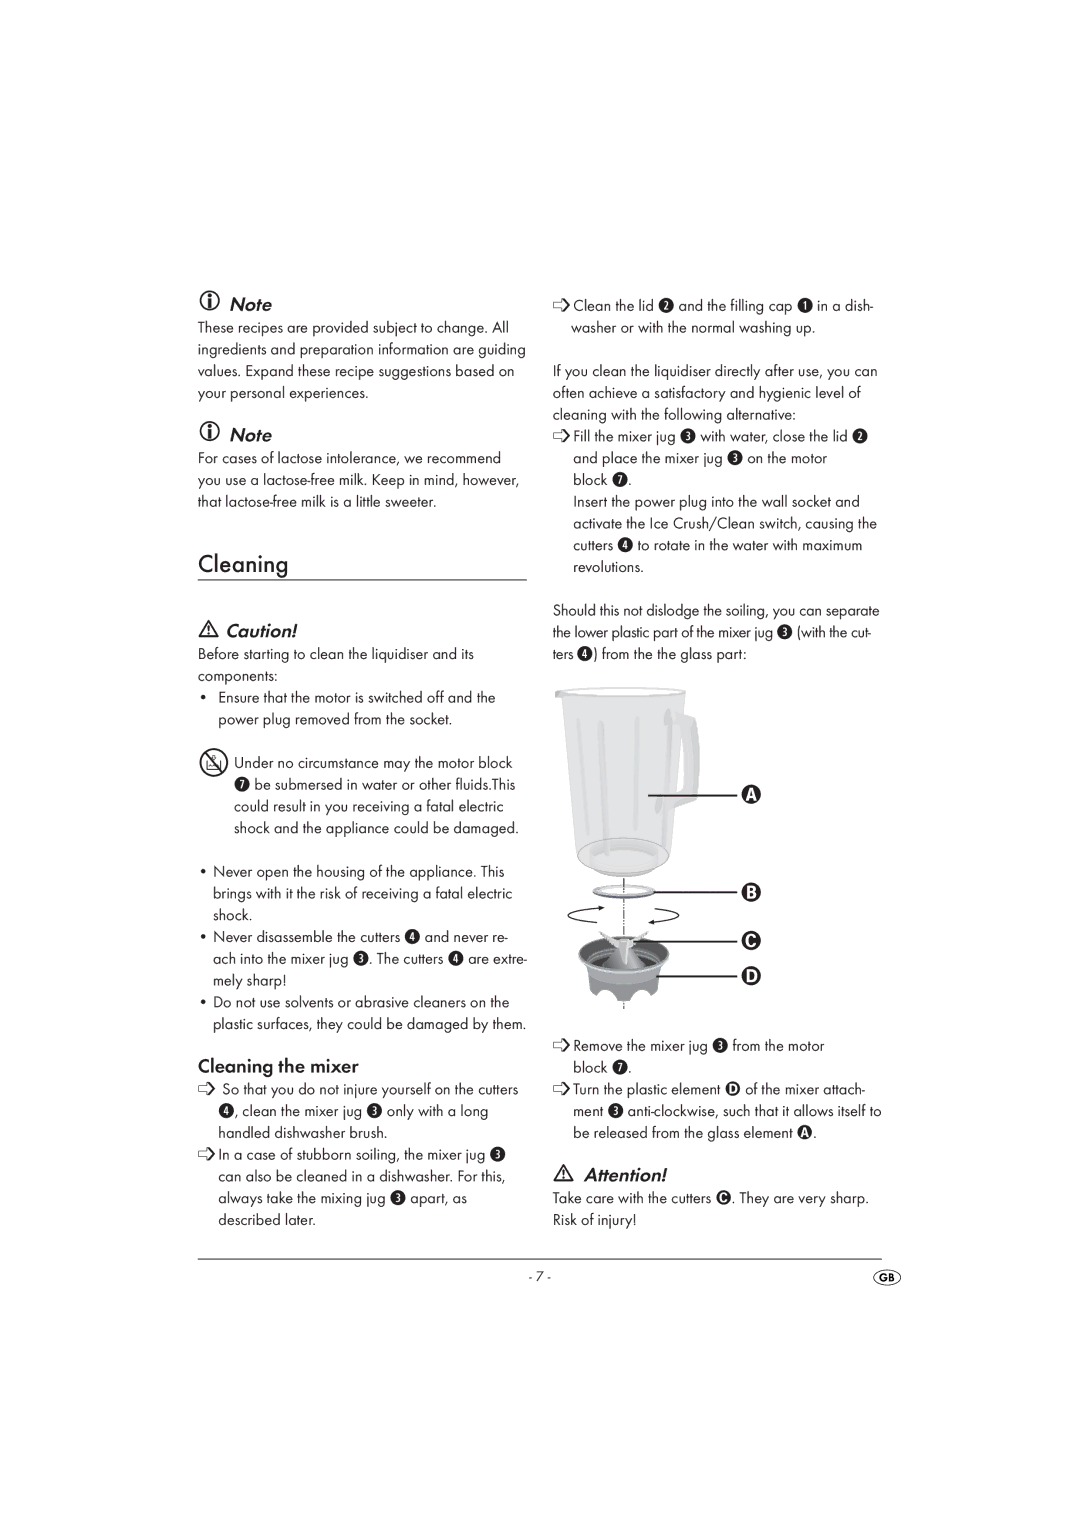
SSM 550 B1 specifications
The Silvercrest SSM 550 B1 is a state-of-the-art kitchen appliance designed to cater to the needs of home cooks and culinary enthusiasts. This innovative device combines advanced technology with user-friendly features, making food preparation simpler and more efficient.One of the standout features of the Silvercrest SSM 550 B1 is its powerful motor, which provides ample strength for various cooking tasks. The motor ensures that the device operates smoothly and can handle a wide range of ingredients, from soft fruits to tougher vegetables. This versatility is further enhanced by multiple speed settings, allowing users to choose the perfect speed for their specific needs.
The appliance is equipped with a large capacity mixing bowl that can accommodate significant quantities of ingredients, making it ideal for preparing big batches of dough, batter, or even silky-smooth sauces. The bowl is designed with ergonomic features, which make it easy to pour and handle without spills.
A key aspect of the Silvercrest SSM 550 B1 is its sleek design, which not only makes it an attractive addition to any kitchen but also emphasizes functionality. The appliance is constructed from high-quality materials that ensure durability and longevity. Its compact size allows for easy storage, making it convenient for those with limited kitchen space.
The SSM 550 B1 comes with a variety of attachments and accessories, including dough hooks, mixing whisks, and beating blades. This multifunctionality enables users to tackle different recipes and cooking styles with ease. The attachments are easy to switch out, promoting a seamless cooking experience. Additionally, many components are dishwasher-safe, simplifying the cleanup process.
Safety is also a priority with the Silvercrest SSM 550 B1. It features an overload protection system, which automatically shuts off the appliance in case of excessive strain, preventing damage and ensuring safe operation.
Overall, the Silvercrest SSM 550 B1 stands out as a versatile and reliable kitchen companion. Its combination of power, design, and user-friendly features makes it an excellent choice for anyone looking to elevate their cooking experience. Whether you're a seasoned chef or a novice home cook, this appliance is equipped to help you achieve impressive results in the kitchen.