HT3000E
4 INSTALLATION
Position the projector on a stable, suitable platform or utilise the optional bracket for a fixed ceiling installation.
WARNING: If using the ceiling mount bracket, scrupulously observe the safety instructions included with the bracket itself. If using a bracket other than that supplied by SIM2 Multimedia, make sure that the projector is at least 65 mm below the ceiling and that the bracket does not obstruct the air vents (intake and outlet).
If the projected image is not level, adjust the feet on its base to obtain a level position, lining up the base of the projected image to the base of the projection screen (Fig. 6).
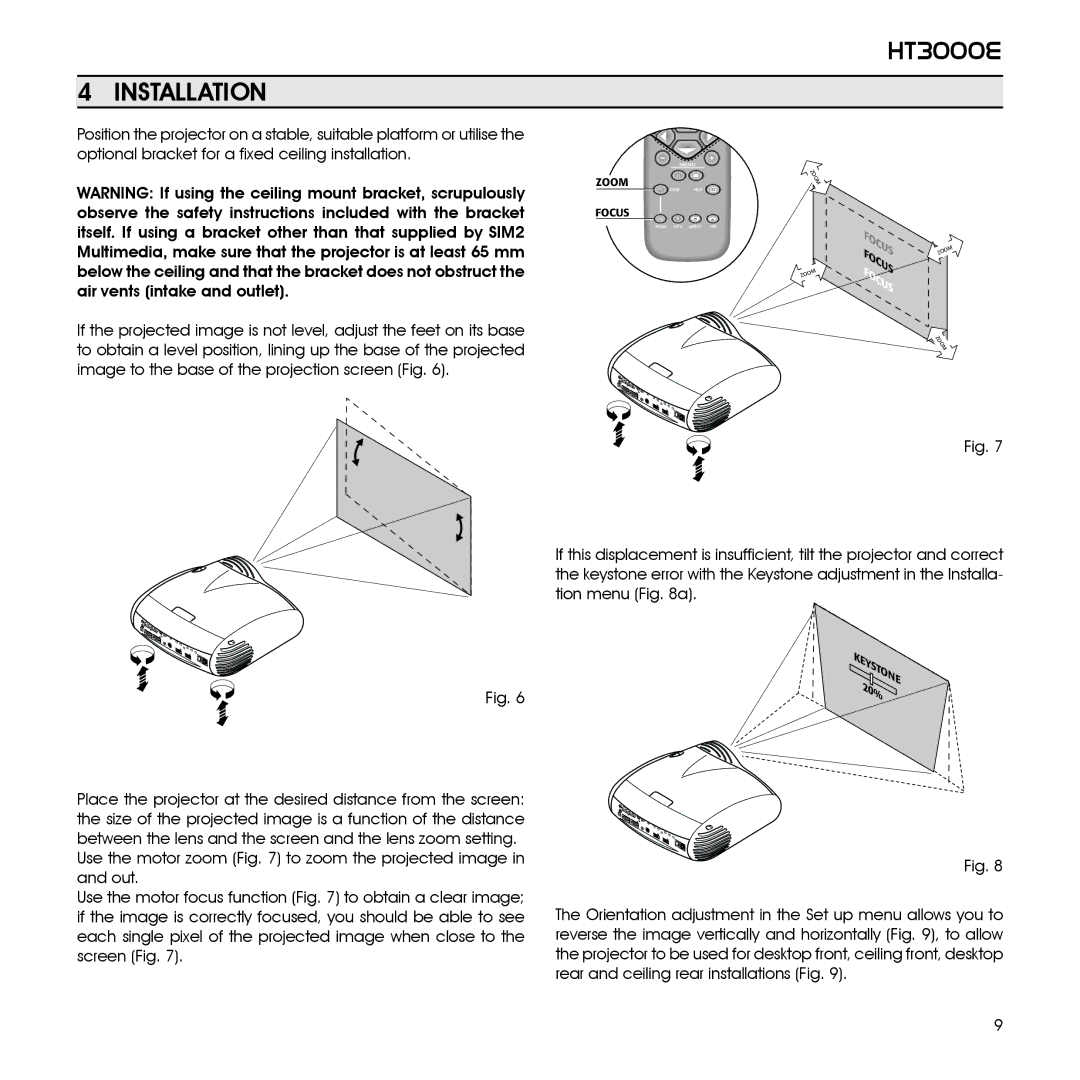
ZOOM |
| ZO |
| OM | |
F1 | ZOOM | HELP |
FOCUS |
|
|
F2 |
|
|
FOCUS | AUTO | ASPECT VCR |
|
| ZOOM |
S FOCU FOCUSS FOCU
ZOOM
Z
OOM
Fig. 7
Fig. 6
If this displacement is insufficient, tilt the projector and correct the keystone error with the Keystone adjustment in the Installa- tion menu (Fig. 8a).
KE |
|
|
Y |
|
|
ST |
| |
| ON | |
20 | % | E |
| ||
|
| |
Place the projector at the desired distance from the screen: the size of the projected image is a function of the distance between the lens and the screen and the lens zoom setting. Use the motor zoom (Fig. 7) to zoom the projected image in and out.
Use the motor focus function (Fig. 7) to obtain a clear image; if the image is correctly focused, you should be able to see each single pixel of the projected image when close to the screen (Fig. 7).
Fig. 8
The Orientation adjustment in the Set up menu allows you to reverse the image vertically and horizontally (Fig. 9), to allow the projector to be used for desktop front, ceiling front, desktop rear and ceiling rear installations (Fig. 9).
9