Manuals
/
Sirius Satellite Radio
/
Home Audio
/
Satellite Radio
Sirius Satellite Radio
SRS-2VB
installation manual
Adjusting and Aiming the Antenna
Models:
SRS-2VB
1
11
20
20
Download
20 pages
45.36 Kb
8
9
10
11
12
13
14
15
Troubleshooting
Install
Warranty
Adjustment
Page 11
Image 11
Page 10
Page 12
Page 11
Image 11
Page 10
Page 12
Contents
For Use With One or Two SIRIUS Radios
SIRIUS Home Signal Distribution Kit
Installation Manual
for Satellite Radio
Box Contents
OUT1OUT2
Tools Required
Caution and Warnings
Splitter Port Identification
Page
ARMPOD A
Antenna Installation
BASE
SOUTH
NORTHEAST
NORTHWEST
Adapter Cable
RG-174
RG-6
Roof Mount
3. Antenna Mounting Options
Wall Mount
Mast Mount
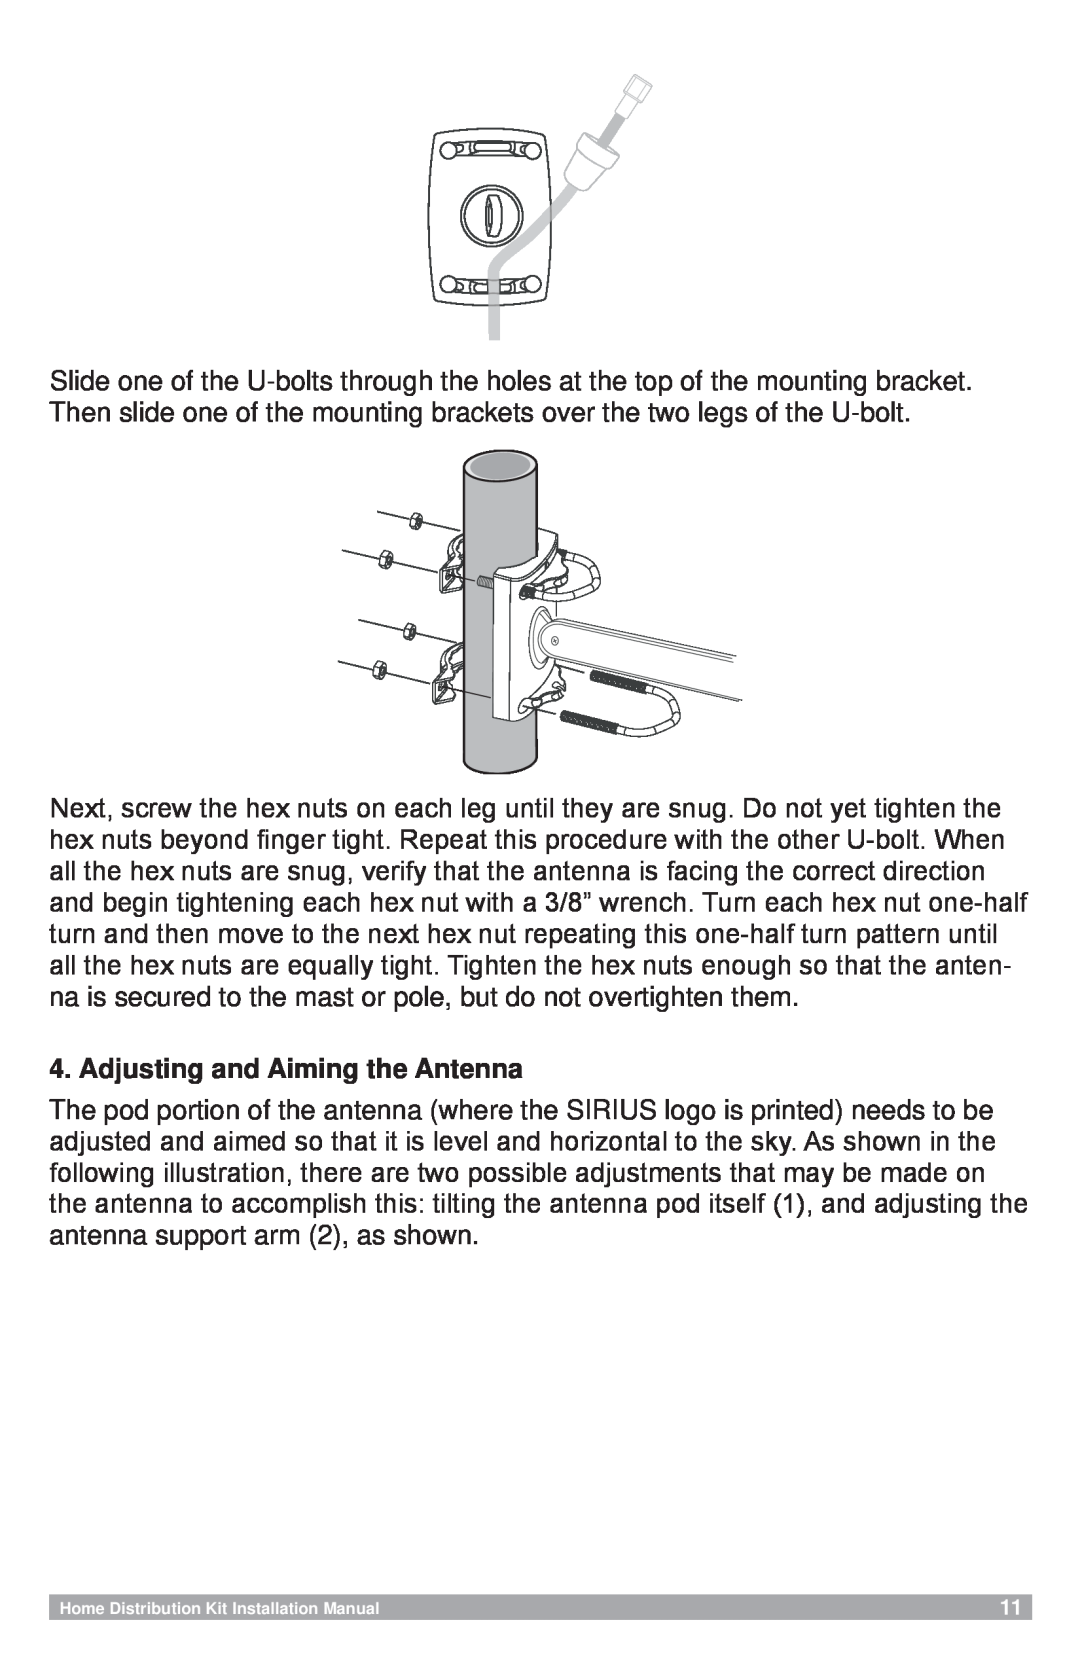
4. Adjusting and Aiming the Antenna
Antenna Pod
Cable Installation
Adjustment
Adjustment Screw
OUT2
Use terminator if no second receiver
OUT2
OUT1
OUT2
Home Distribution Kit Installation Manual
OUT2
OUT1
Antenna Specifications
Troubleshooting
1221 Avenue of the Americas New York, NY
SIRIUS Satellite Radio
SHDK1
90 DAY LIMITED WARRANTY
Satellite Radio Accessory
Page
Top
Page
Image
Contents