Installation Procedures
This installation section is broken into several sections. The first section de- scribes how to install the SIRIUS antenna and is the same for all configurations. After installing the antenna, follow the Combiner/Splitter installation procedure section for your particular configuration.
SIRIUS Antenna Installation Procedure
A successful antenna installation consists of four steps: First, assembling the antenna; Second, determining a location for the antenna; Third, choosing a mounting option; and Fourth, adjusting and aiming the antenna. Please read the following four sections before beginning the antenna installation so that you understand the entire installation process.
1. Assembling the Antenna
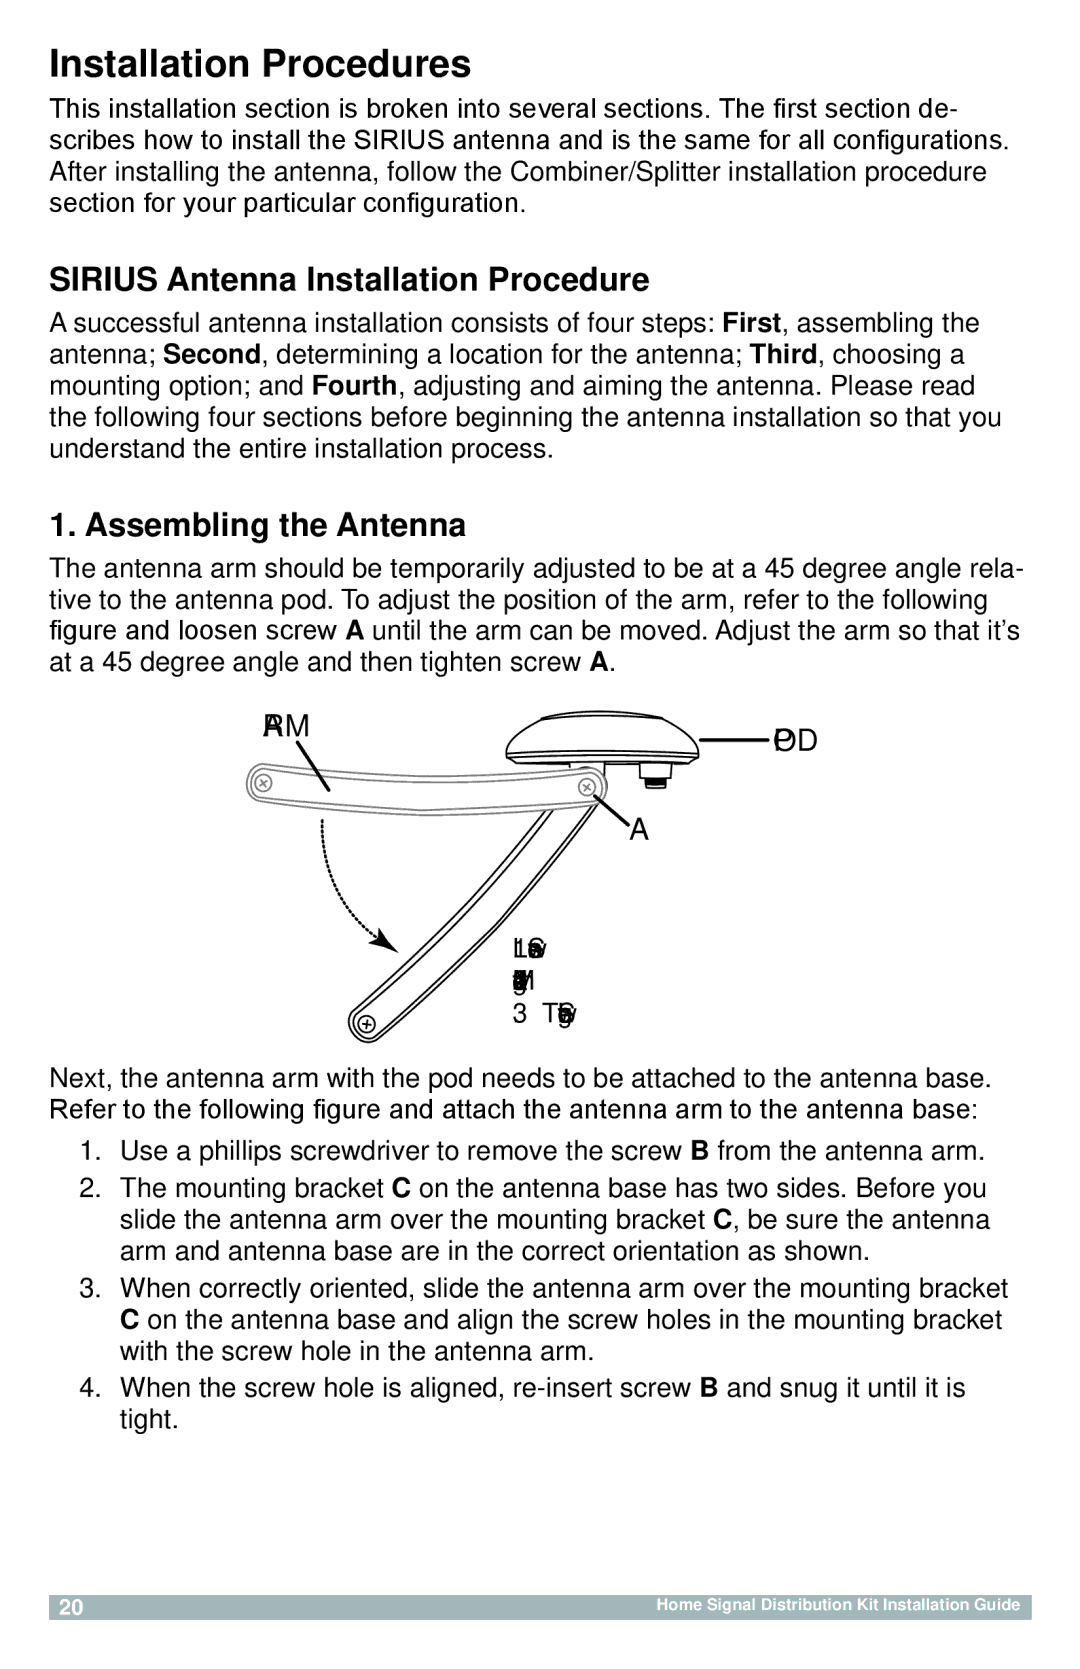
The antenna arm should be temporarily adjusted to be at a 45 degree angle rela- tive to the antenna pod. To adjust the position of the arm, refer to the following figure and loosen screw A until the arm can be moved. Adjust the arm so that it’s at a 45 degree angle and then tighten screw A.
ARMPOD
![]() A
A
1. Loosen Screw
2.Move arm to 45 degrees
3.Tighten Screw
Next, the antenna arm with the pod needs to be attached to the antenna base. Refer to the following figure and attach the antenna arm to the antenna base:
1.Use a phillips screwdriver to remove the screw B from the antenna arm.
2.The mounting bracket C on the antenna base has two sides. Before you slide the antenna arm over the mounting bracket C, be sure the antenna arm and antenna base are in the correct orientation as shown.
3.When correctly oriented, slide the antenna arm over the mounting bracket C on the antenna base and align the screw holes in the mounting bracket with the screw hole in the antenna arm.
4.When the screw hole is aligned,
20 | Home Signal Distribution Kit Installation Guide |