SM 1619X04086
ADJUSTABLE CLUTCH
Your tool features 16 clutch settings. Output torque will increase as the clutch ring, is rotated
from 1 to 15. The drill “ ![]()
![]() ” position will lock up the clutch to permit drilling and driving for heavyduty work (Fig. 1).
” position will lock up the clutch to permit drilling and driving for heavyduty work (Fig. 1).
BRAKE
When the trigger switch is released it activates the brake to stop the chuck quickly. This is especially useful in the repetitive driving and removal of screws.
RELEASING AND INSERTING
BATTERY PACK
Release battery pack from tool by pressing on both sides of the battery release tabs and pull downwards. Before inserting battery pack, remove protective cap from battery pack. To insert battery, align battery and slide battery pack into tool until it locks into position. Do not force.
CHARGING BATTERY PACK
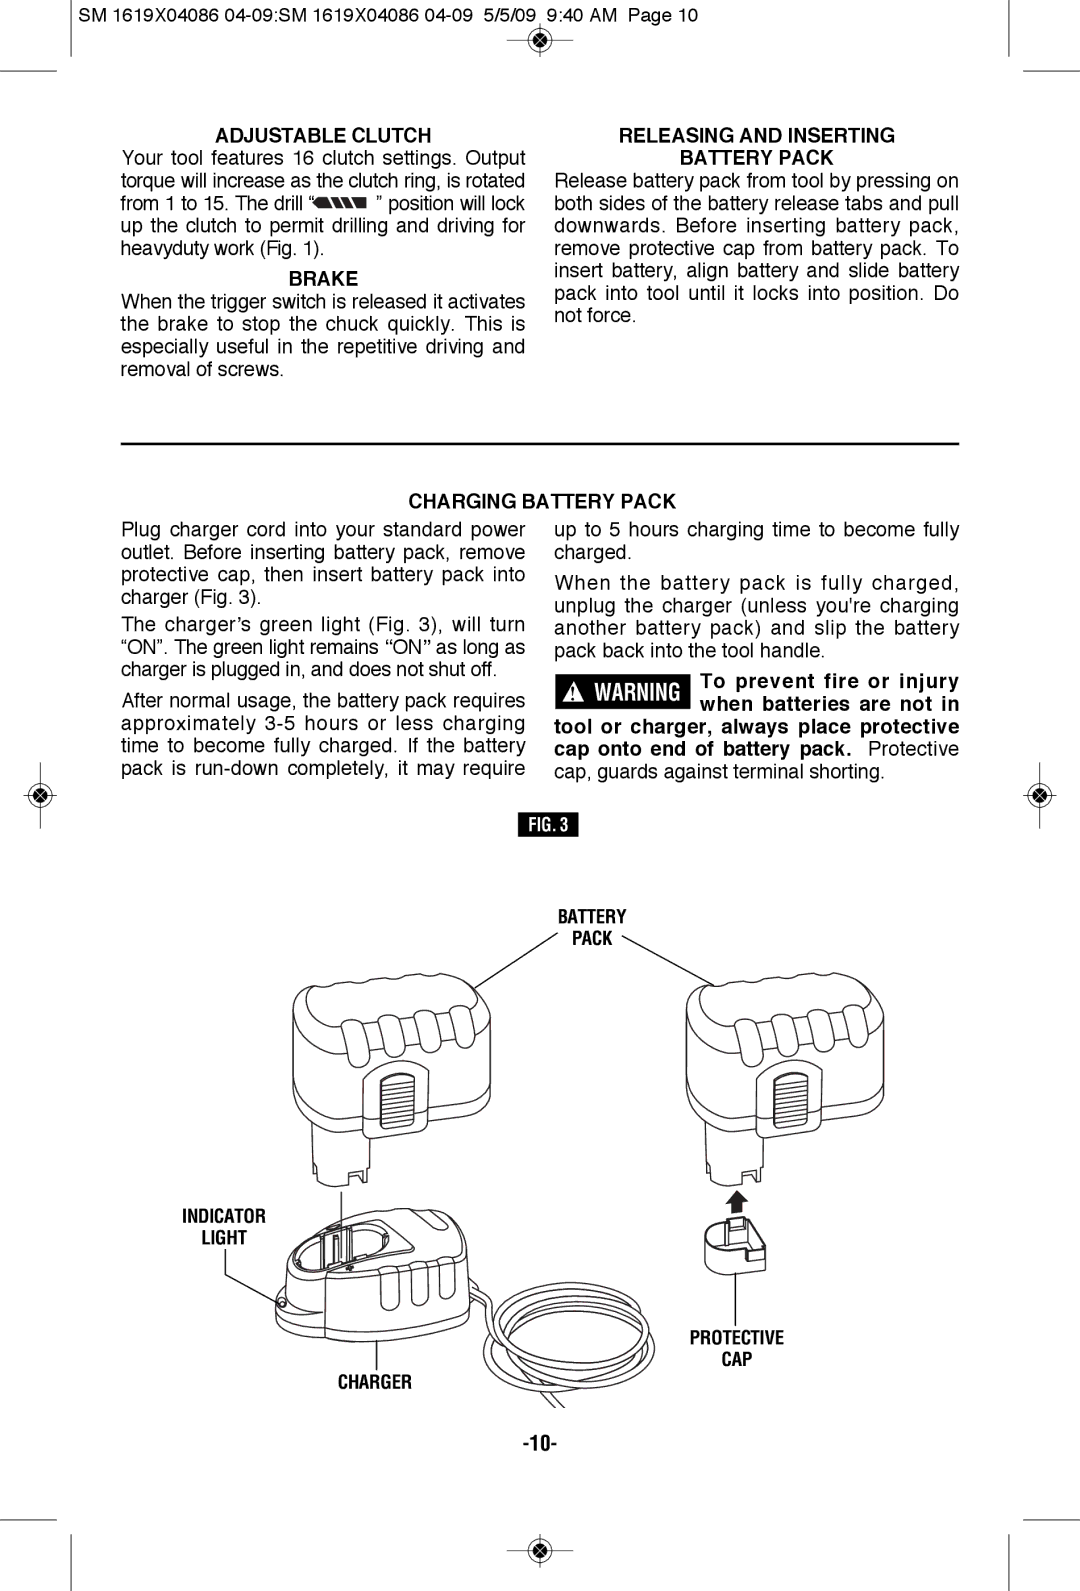
Plug charger cord into your standard power outlet. Before inserting battery pack, remove protective cap, then insert battery pack into charger (Fig. 3).
The charger’s green light (Fig. 3), will turn “ON”. The green light remains ‘‘ON’’ as long as charger is plugged in, and does not shut off.
After normal usage, the battery pack requires approximately
INDICATOR
LIGHT
CHARGER
up to 5 hours charging time to become fully charged.
When the battery pack is fully charged, unplug the charger (unless you're charging another battery pack) and slip the battery pack back into the tool handle.
!WARNING To prevent fire or injury when batteries are not in
tool or charger, always place protective cap onto end of battery pack. Protective cap, guards against terminal shorting.
FIG. 3
