SM 1619X00551
IMPORTANT CHARGING NOTES
1.The battery pack accepts only about 80% of its maximum capacity with its first few charge cycles. However, after the first few charge cycles, the battery will charge to full capacity.
2.The charger was designed to fast charge the battery only when the battery temperature is between 40˚F (4˚C) and 105˚F (41˚C).
3.A substantial drop in operating time per charge may mean that the battery pack is nearing the end of its life and should be replaced.
4.If you anticipate long periods (i.e. a month or more) of
Remember to unplug charger during storage period.
5.If battery does not charge properly:
a.Check for voltage at outlet by plugging in some other electrical device.
b.Check to see if outlet is connected to a light switch which turns power “off” when lights are turned off.
c.Check battery pack terminals for dirt. Clean with cotton swab and alcohol if necessary.
d.If you still do not get proper charging, take or send tool, battery pack and charger to your local Skil Service Center. See “Tools, Electric” in the Yellow Pages for names and addresses.
Note: Use of charger’s or battery packs not sold by Skil will void the warranty.
Operating Tips
You will extend the life of your bits and do neater work if you always put the bit in contact with the work before pulling the trigger. During the operation, hold the tool firmly and exert light, steady pressure. Too
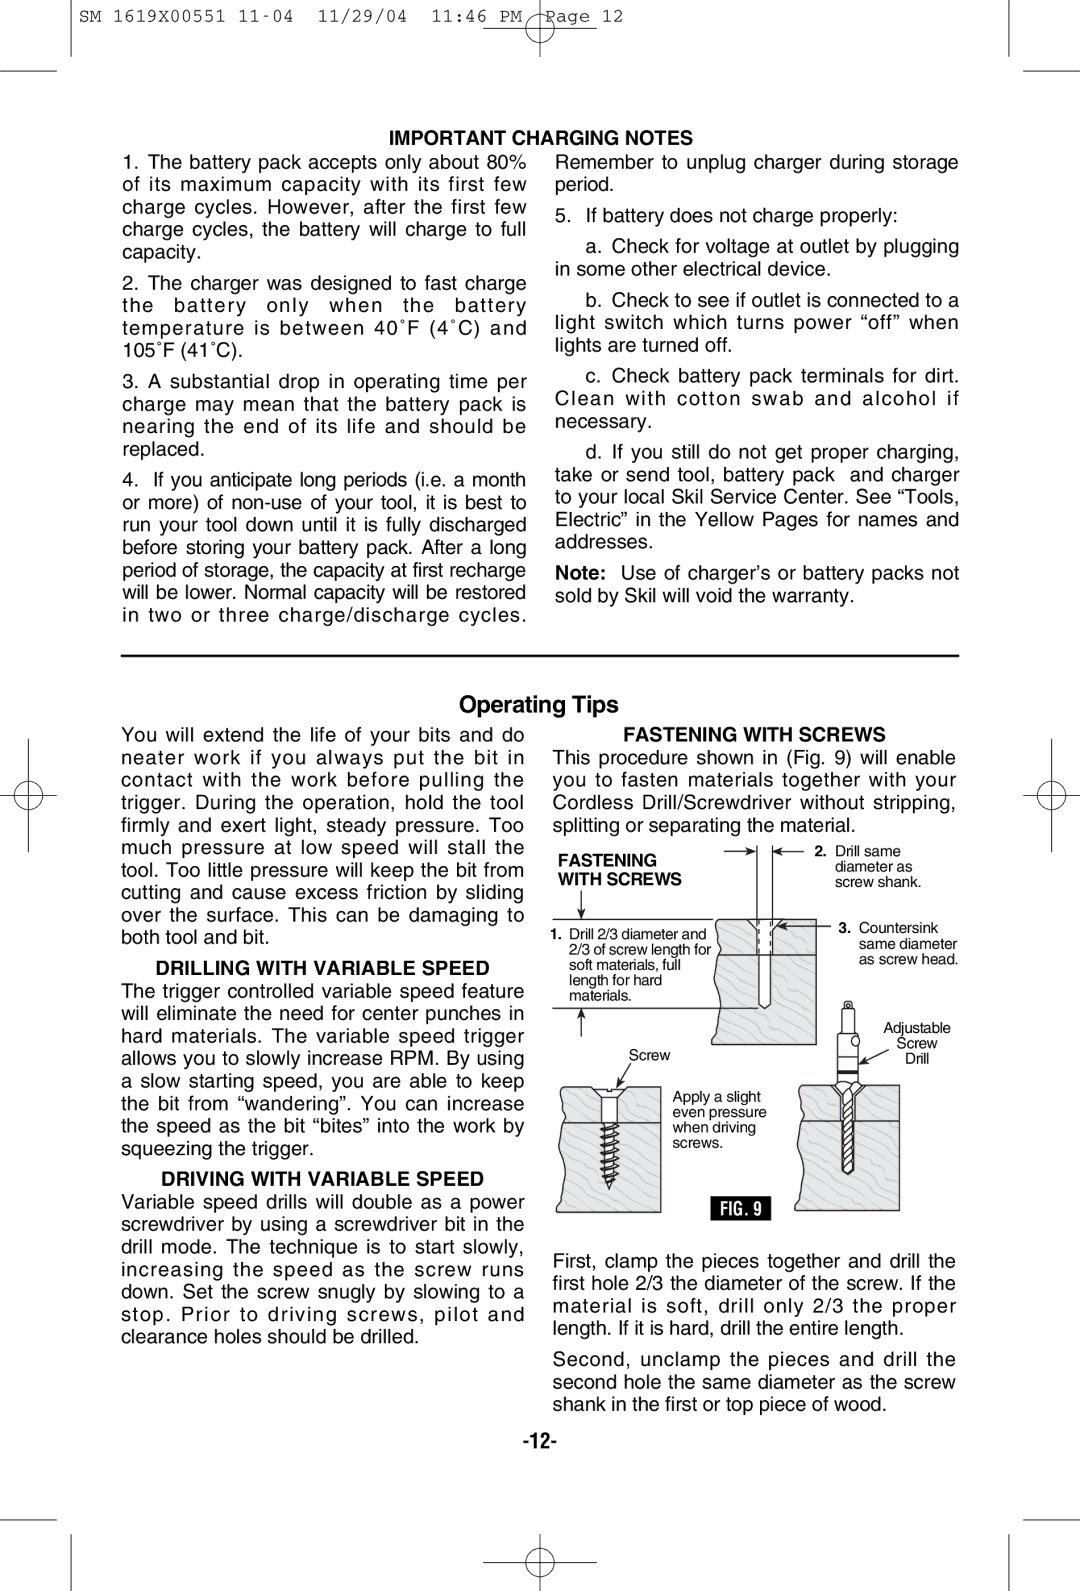
FASTENING WITH SCREWS
This procedure shown in (Fig. 9) will enable you to fasten materials together with your Cordless Drill/Screwdriver without stripping, splitting or separating the material.
much pressure at low speed will stall the tool. Too little pressure will keep the bit from cutting and cause excess friction by sliding over the surface. This can be damaging to both tool and bit.
DRILLING WITH VARIABLE SPEED
The trigger controlled variable speed feature will eliminate the need for center punches in hard materials. The variable speed trigger allows you to slowly increase RPM. By using a slow starting speed, you are able to keep the bit from “wandering”. You can increase the speed as the bit “bites” into the work by squeezing the trigger.
FASTENING
WITH SCREWS
1.Drill 2/3 diameter and 2/3 of screw length for soft materials, full length for hard materials.
Screw
Apply a slight even pressure when driving screws.
2.Drill same diameter as screw shank.
3.Countersink same diameter as screw head.
Adjustable
Screw
Drill
DRIVING WITH VARIABLE SPEED
Variable speed drills will double as a power screwdriver by using a screwdriver bit in the drill mode. The technique is to start slowly, increasing the speed as the screw runs down. Set the screw snugly by slowing to a stop. Prior to driving screws, pilot and clearance holes should be drilled.
FIG. 9
First, clamp the pieces together and drill the first hole 2/3 the diameter of the screw. If the material is soft, drill only 2/3 the proper length. If it is hard, drill the entire length.
Second, unclamp the pieces and drill the second hole the same diameter as the screw shank in the first or top piece of wood.