SM 1619X03409
INSERTING BITS
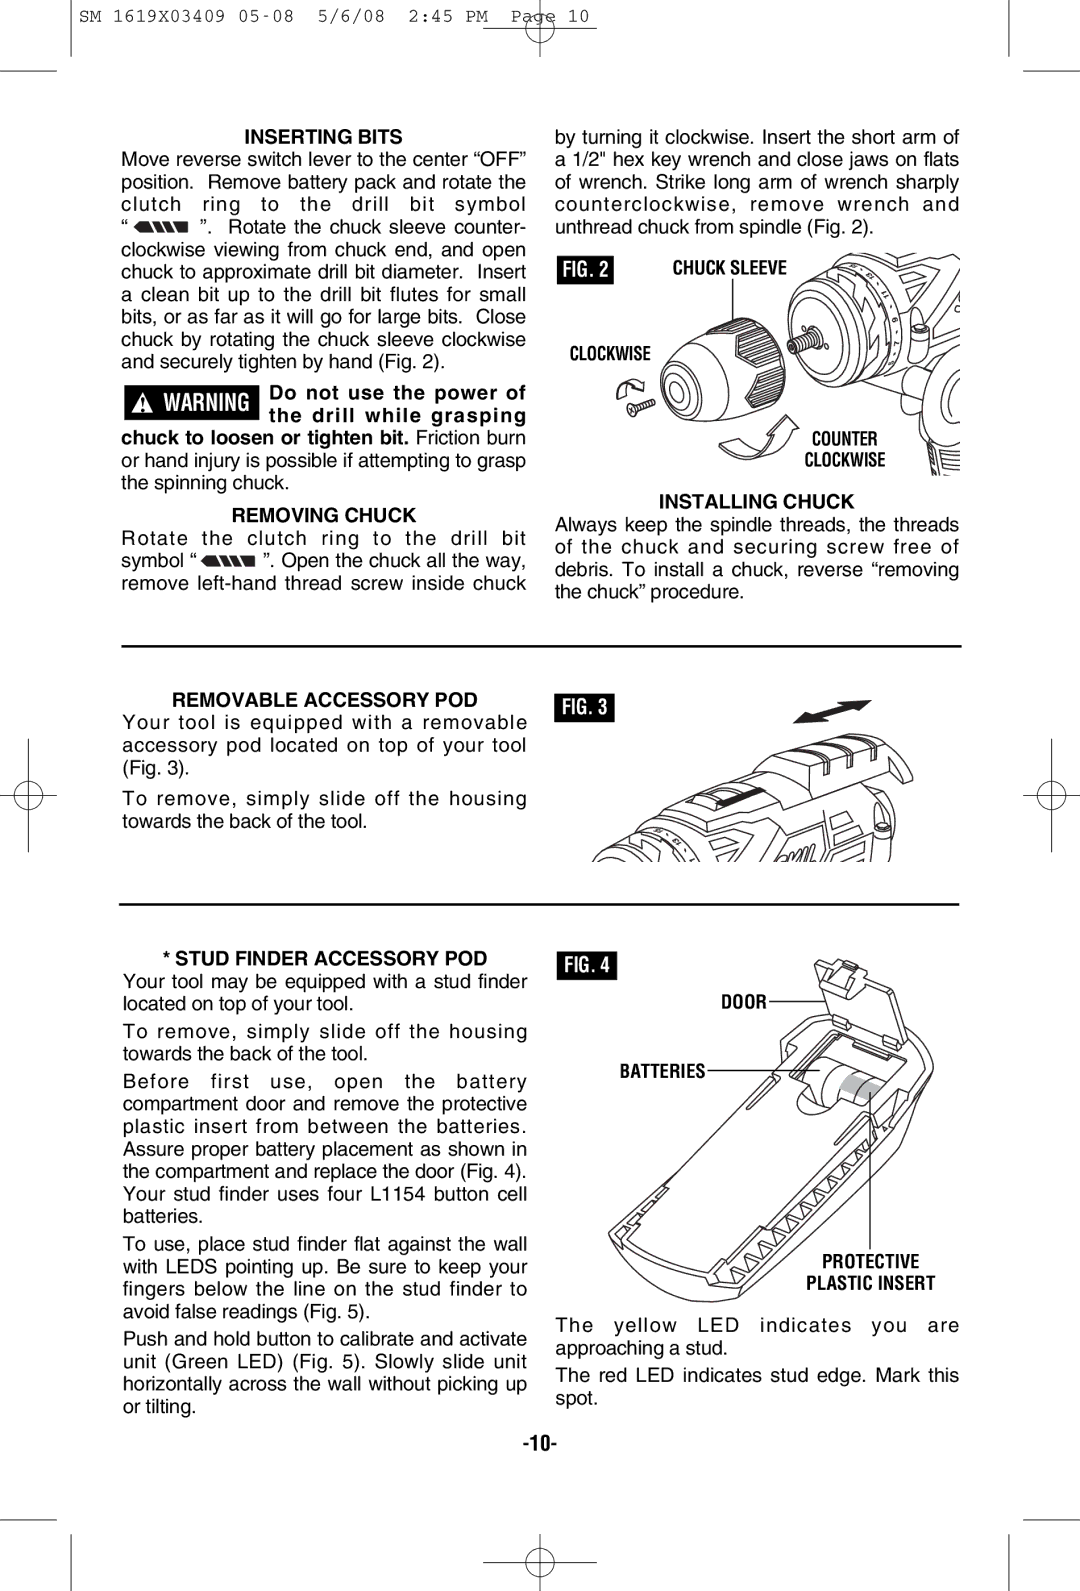
Move reverse switch lever to the center “OFF” position. Remove battery pack and rotate the clutch ring to the drill bit symbol
“![]()
![]() ”. Rotate the chuck sleeve counter- clockwise viewing from chuck end, and open chuck to approximate drill bit diameter. Insert a clean bit up to the drill bit flutes for small bits, or as far as it will go for large bits. Close chuck by rotating the chuck sleeve clockwise and securely tighten by hand (Fig. 2).
”. Rotate the chuck sleeve counter- clockwise viewing from chuck end, and open chuck to approximate drill bit diameter. Insert a clean bit up to the drill bit flutes for small bits, or as far as it will go for large bits. Close chuck by rotating the chuck sleeve clockwise and securely tighten by hand (Fig. 2).
!WARNING Do not use the power of the drill while grasping
chuck to loosen or tighten bit. Friction burn or hand injury is possible if attempting to grasp the spinning chuck.
REMOVING CHUCK
Rotate the clutch ring to the drill bit
symbol “ ![]()
![]() ”. Open the chuck all the way, remove
”. Open the chuck all the way, remove
by turning it clockwise. Insert the short arm of a 1/2" hex key wrench and close jaws on flats of wrench. Strike long arm of wrench sharply counterclockwise, remove wrench and unthread chuck from spindle (Fig. 2).
FIG. 2 | CHUCK SLEEVE | |
|
|
|
CLOCKWISE
COUNTER
CLOCKWISE
INSTALLING CHUCK
Always keep the spindle threads, the threads of the chuck and securing screw free of debris. To install a chuck, reverse “removing the chuck” procedure.
REMOVABLE ACCESSORY POD | FIG. 3 |
Your tool is equipped with a removable accessory pod located on top of your tool (Fig. 3).
To remove, simply slide off the housing towards the back of the tool.
*STUD FINDER ACCESSORY POD Your tool may be equipped with a stud finder located on top of your tool.
To remove, simply slide off the housing towards the back of the tool.
Before first use, open the battery compartment door and remove the protective plastic insert from between the batteries. Assure proper battery placement as shown in the compartment and replace the door (Fig. 4). Your stud finder uses four L1154 button cell batteries.
To use, place stud finder flat against the wall with LEDS pointing up. Be sure to keep your fingers below the line on the stud finder to avoid false readings (Fig. 5).
Push and hold button to calibrate and activate unit (Green LED) (Fig. 5). Slowly slide unit horizontally across the wall without picking up or tilting.
FIG. 4
DOOR
BATTERIES
PROTECTIVE
PLASTIC INSERT
The yellow LED indicates you are approaching a stud.
The red LED indicates stud edge. Mark this spot.