4.SET TIMER DURATION (CONT)
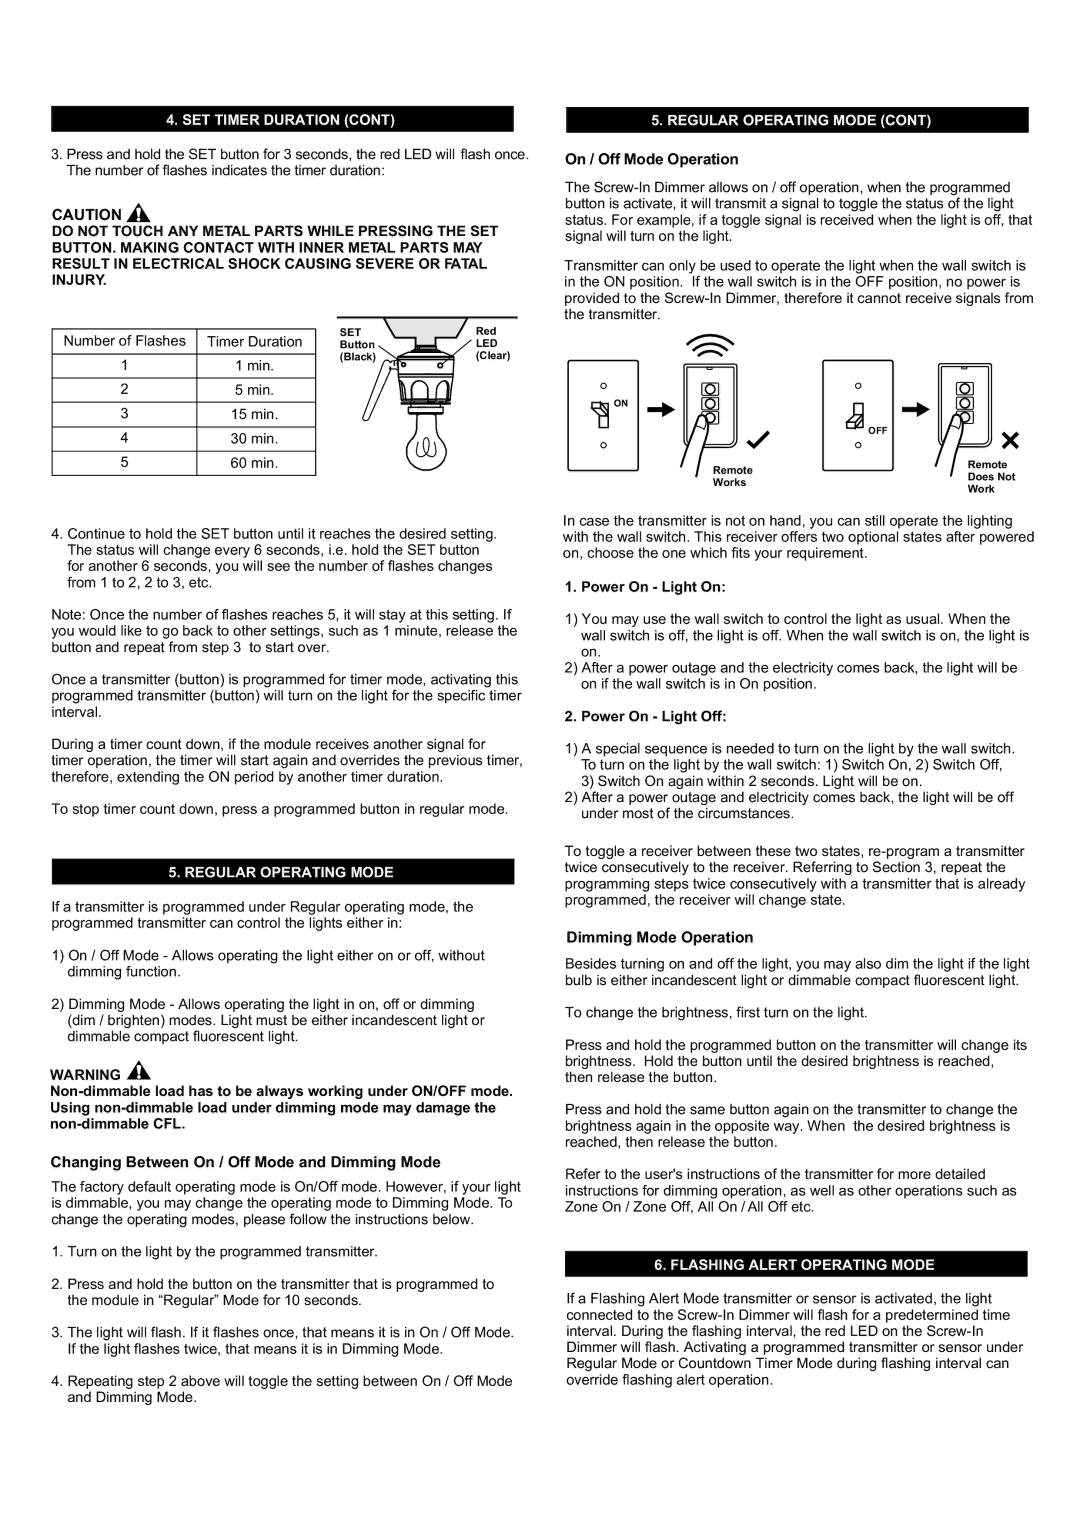
3.Press and hold the SET button for 3 seconds, the red LED will flash once. The number of flashes indicates the timer duration:
CAUTION ![]()
DO NOT TOUCH ANY METAL PARTS WHILE PRESSING THE SET BUTTON. MAKING CONTACT WITH INNER METAL PARTS MAY RESULT IN ELECTRICAL SHOCK CAUSING SEVERE OR FATAL INJURY.
Number of Flashes | Timer Duration | SET | Red |
Button | LED | ||
1 | 1 min. | (Black) | (Clear) |
|
| ||
2 | 5 min. |
|
|
3 | 15 min. |
|
|
4 | 30 min. |
|
|
5. REGULAR OPERATING MODE (CONT)
On / Off Mode Operation
The
Transmitter can only be used to operate the light when the wall switch is in the ON position. If the wall switch is in the OFF position, no power is provided to the
![]() ON
ON
OFF
5 | 60 min. |
Remote
Remote
Works
Does Not Work
4.Continue to hold the SET button until it reaches the desired setting. The status will change every 6 seconds, i.e. hold the SET button for another 6 seconds, you will see the number of flashes changes from 1 to 2, 2 to 3, etc.
Note: Once the number of flashes reaches 5, it will stay at this setting. If you would like to go back to other settings, such as 1 minute, release the button and repeat from step 3 to start over.
Once a transmitter (button) is programmed for timer mode, activating this programmed transmitter (button) will turn on the light for the specific timer interval.
During a timer count down, if the module receives another signal for timer operation, the timer will start again and overrides the previous timer, therefore, extending the ON period by another timer duration.
To stop timer count down, press a programmed button in regular mode.
5. REGULAR OPERATING MODE
If a transmitter is programmed under Regular operating mode, the programmed transmitter can control the lights either in:
1)On / Off Mode - Allows operating the light either on or off, without dimming function.
2)Dimming Mode - Allows operating the light in on, off or dimming (dim / brighten) modes. Light must be either incandescent light or dimmable compact fluorescent light.
WARNING ![]()
Changing Between On / Off Mode and Dimming Mode
The factory default operating mode is On/Off mode. However, if your light is dimmable, you may change the operating mode to Dimming Mode. To change the operating modes, please follow the instructions below.
1.Turn on the light by the programmed transmitter.
2.Press and hold the button on the transmitter that is programmed to the module in “Regular” Mode for 10 seconds.
3.The light will flash. If it flashes once, that means it is in On / Off Mode. If the light flashes twice, that means it is in Dimming Mode.
4.Repeating step 2 above will toggle the setting between On / Off Mode and Dimming Mode.
In case the transmitter is not on hand, you can still operate the lighting with the wall switch. This receiver offers two optional states after powered on, choose the one which fits your requirement.
1. Power On - Light On:
1)You may use the wall switch to control the light as usual. When the wall switch is off, the light is off. When the wall switch is on, the light is on.
2)After a power outage and the electricity comes back, the light will be on if the wall switch is in On position.
2. Power On - Light Off:
1)A special sequence is needed to turn on the light by the wall switch. To turn on the light by the wall switch: 1) Switch On, 2) Switch Off, 3) Switch On again within 2 seconds. Light will be on.
2)After a power outage and electricity comes back, the light will be off under most of the circumstances.
To toggle a receiver between these two states,
Dimming Mode Operation
Besides turning on and off the light, you may also dim the light if the light bulb is either incandescent light or dimmable compact fluorescent light.
To change the brightness, first turn on the light.
Press and hold the programmed button on the transmitter will change its brightness. Hold the button until the desired brightness is reached, then release the button.
Press and hold the same button again on the transmitter to change the brightness again in the opposite way. When the desired brightness is reached, then release the button.
Refer to the user's instructions of the transmitter for more detailed instructions for dimming operation, as well as other operations such as Zone On / Zone Off, All On / All Off etc.
6. FLASHING ALERT OPERATING MODE
If a Flashing Alert Mode transmitter or sensor is activated, the light connected to the