Instructions for the Installer
3.Electrical connection
Check that the power supply line voltage and size are as specified on the nameplate underneath the appliance's casing. This nameplate must never be removed.
The plug on the end of the power supply lead and the wall socket must be of the same type and comply with the relevant regulations. Check that the power supply line is properly earthed.
Pass the power supply cable through the rear of the cabinet, taking care that it does not touch the bottom case of the hob, or the oven (if any) built in underneath it.
The appliance's power supply line must be fitted with an omnipolar breaking device with contact gap of at least 3 mm, located in an easily accessible position close to the appliance itself.
The use of reductions, adapters or junctions is not recommended.
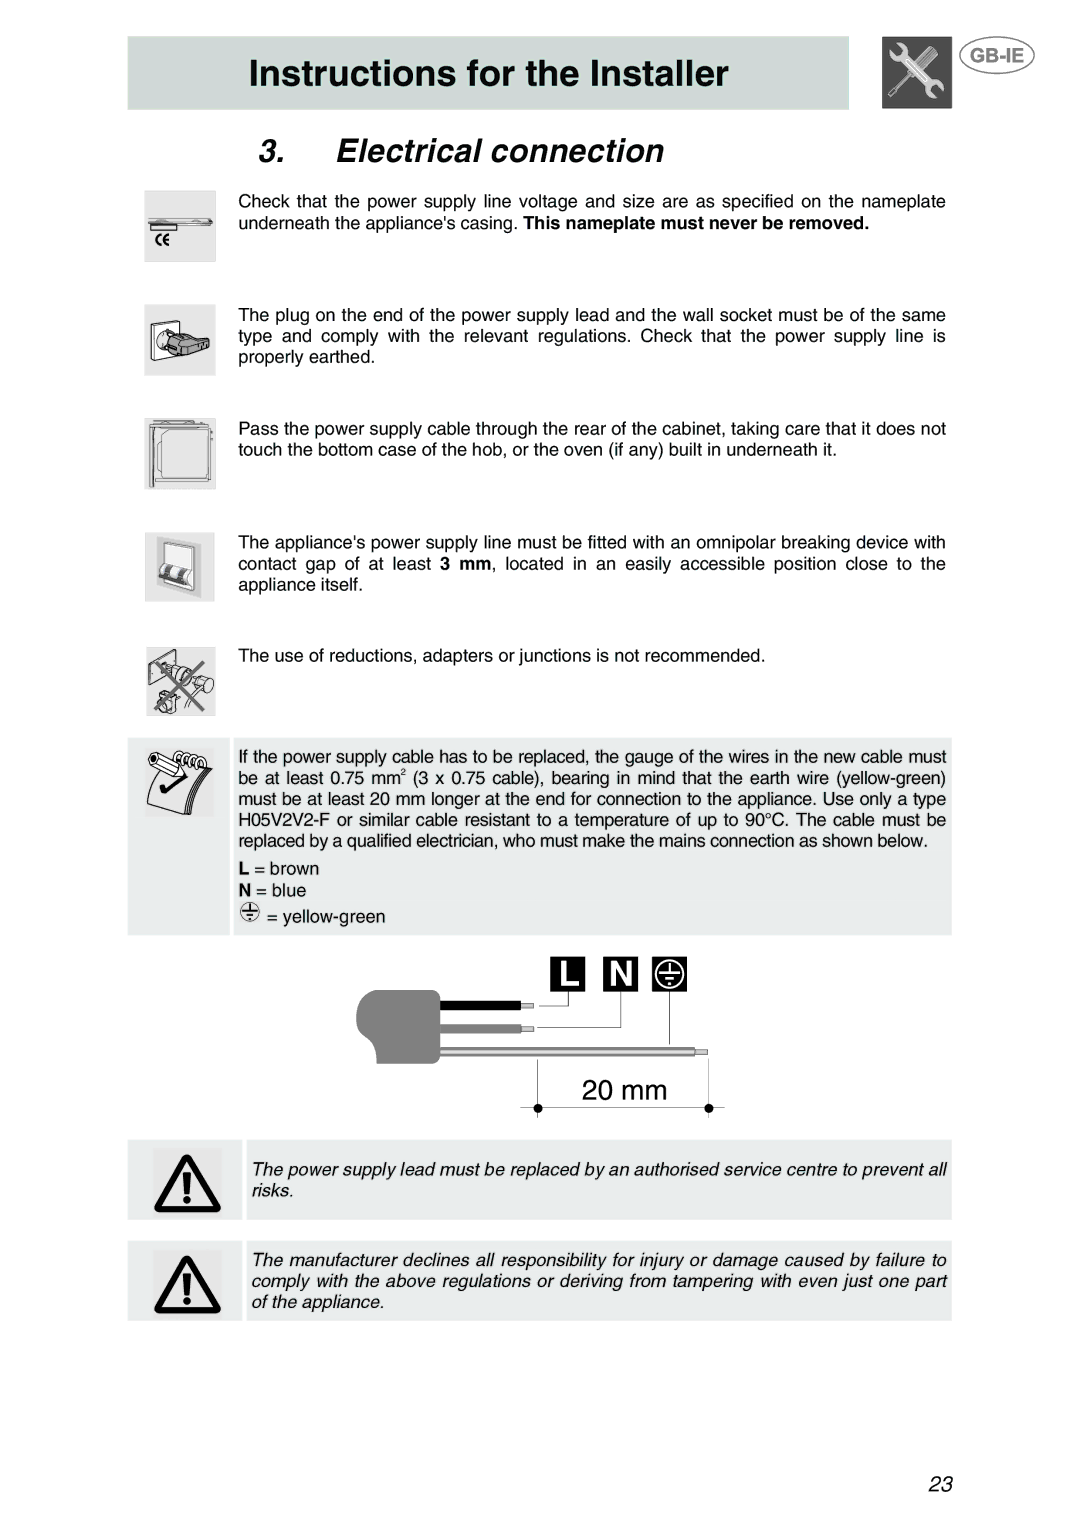
If the power supply cable has to be replaced, the gauge of the wires in the new cable must be at least 0.75 mm2 (3 x 0.75 cable), bearing in mind that the earth wire
L = brown N = blue
![]() =
=
The power supply lead must be replaced by an authorised service centre to prevent all risks.
The manufacturer declines all responsibility for injury or damage caused by failure to comply with the above regulations or deriving from tampering with even just one part of the appliance.
23