3. INSTRUCTIONS FOR THE INSTALLER
C. FITTING
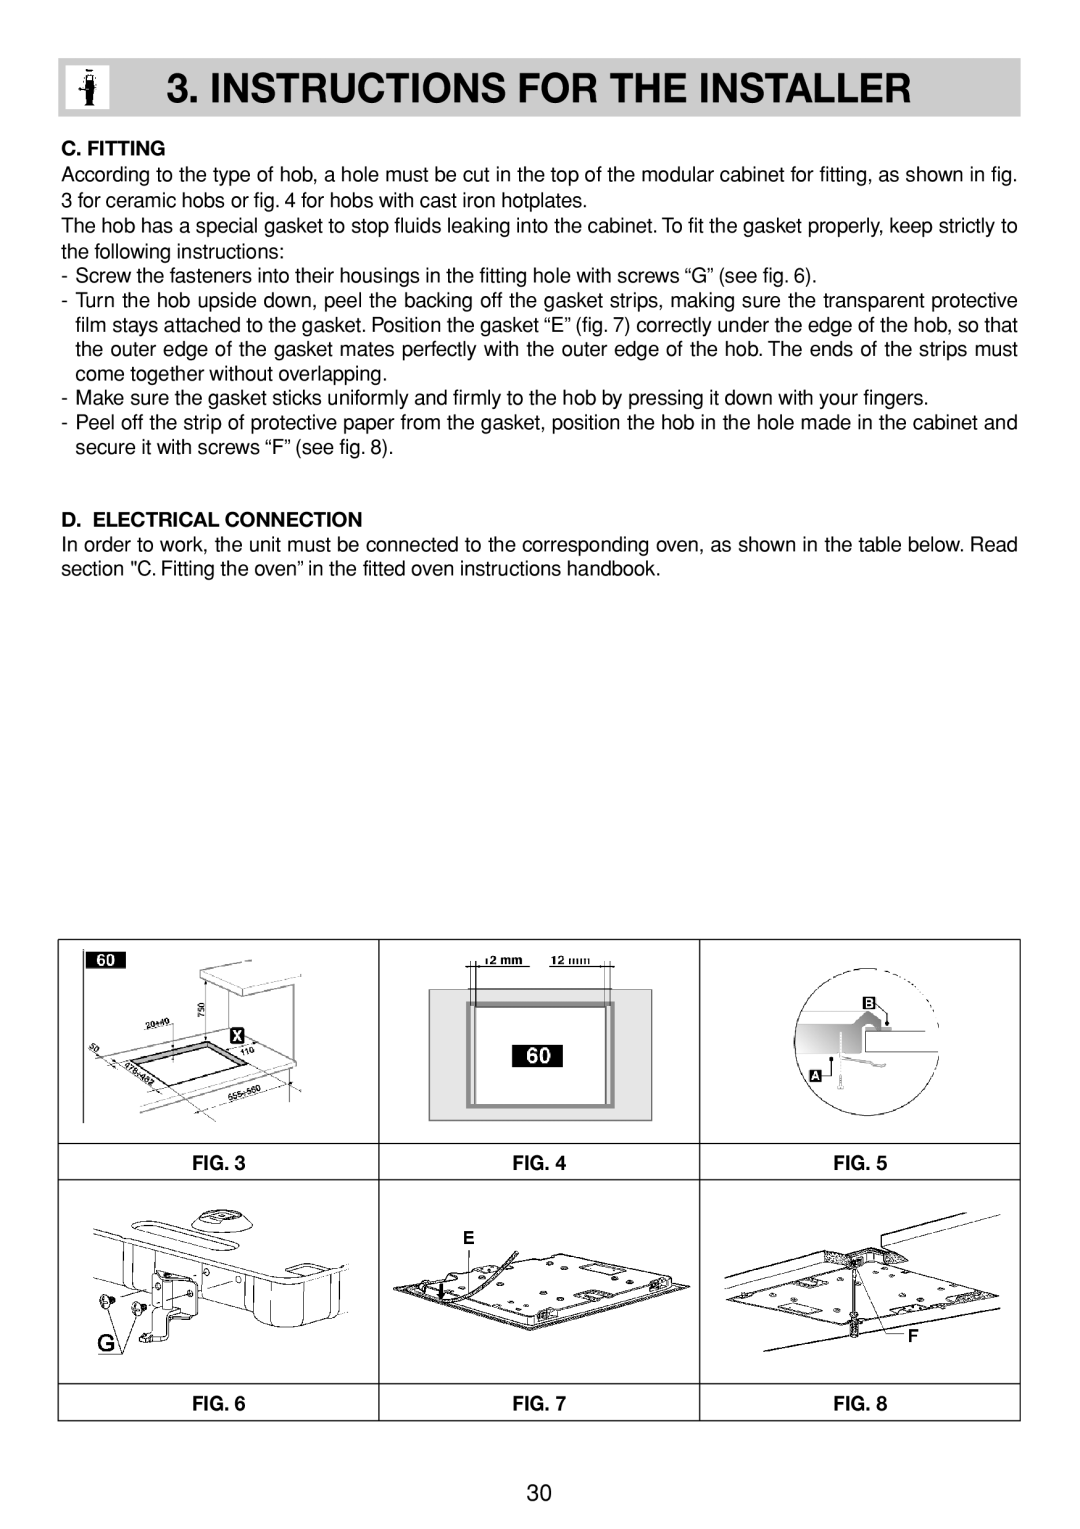
According to the type of hob, a hole must be cut in the top of the modular cabinet for fitting, as shown in fig. 3 for ceramic hobs or fig. 4 for hobs with cast iron hotplates.
The hob has a special gasket to stop fluids leaking into the cabinet. To fit the gasket properly, keep strictly to the following instructions:
-Screw the fasteners into their housings in the fitting hole with screws “G” (see fig. 6).
-Turn the hob upside down, peel the backing off the gasket strips, making sure the transparent protective film stays attached to the gasket. Position the gasket “E” (fig. 7) correctly under the edge of the hob, so that the outer edge of the gasket mates perfectly with the outer edge of the hob. The ends of the strips must come together without overlapping.
-Make sure the gasket sticks uniformly and firmly to the hob by pressing it down with your fingers.
-Peel off the strip of protective paper from the gasket, position the hob in the hole made in the cabinet and secure it with screws “F” (see fig. 8).
D. ELECTRICAL CONNECTION
In order to work, the unit must be connected to the corresponding oven, as shown in the table below. Read section "C. Fitting the oven” in the fitted oven instructions handbook.
FIG. 3
FIG. 4
FIG. 5
FIG. 6
FIG. 7
FIG. 8
30