Inserting a New Correcting Cassette
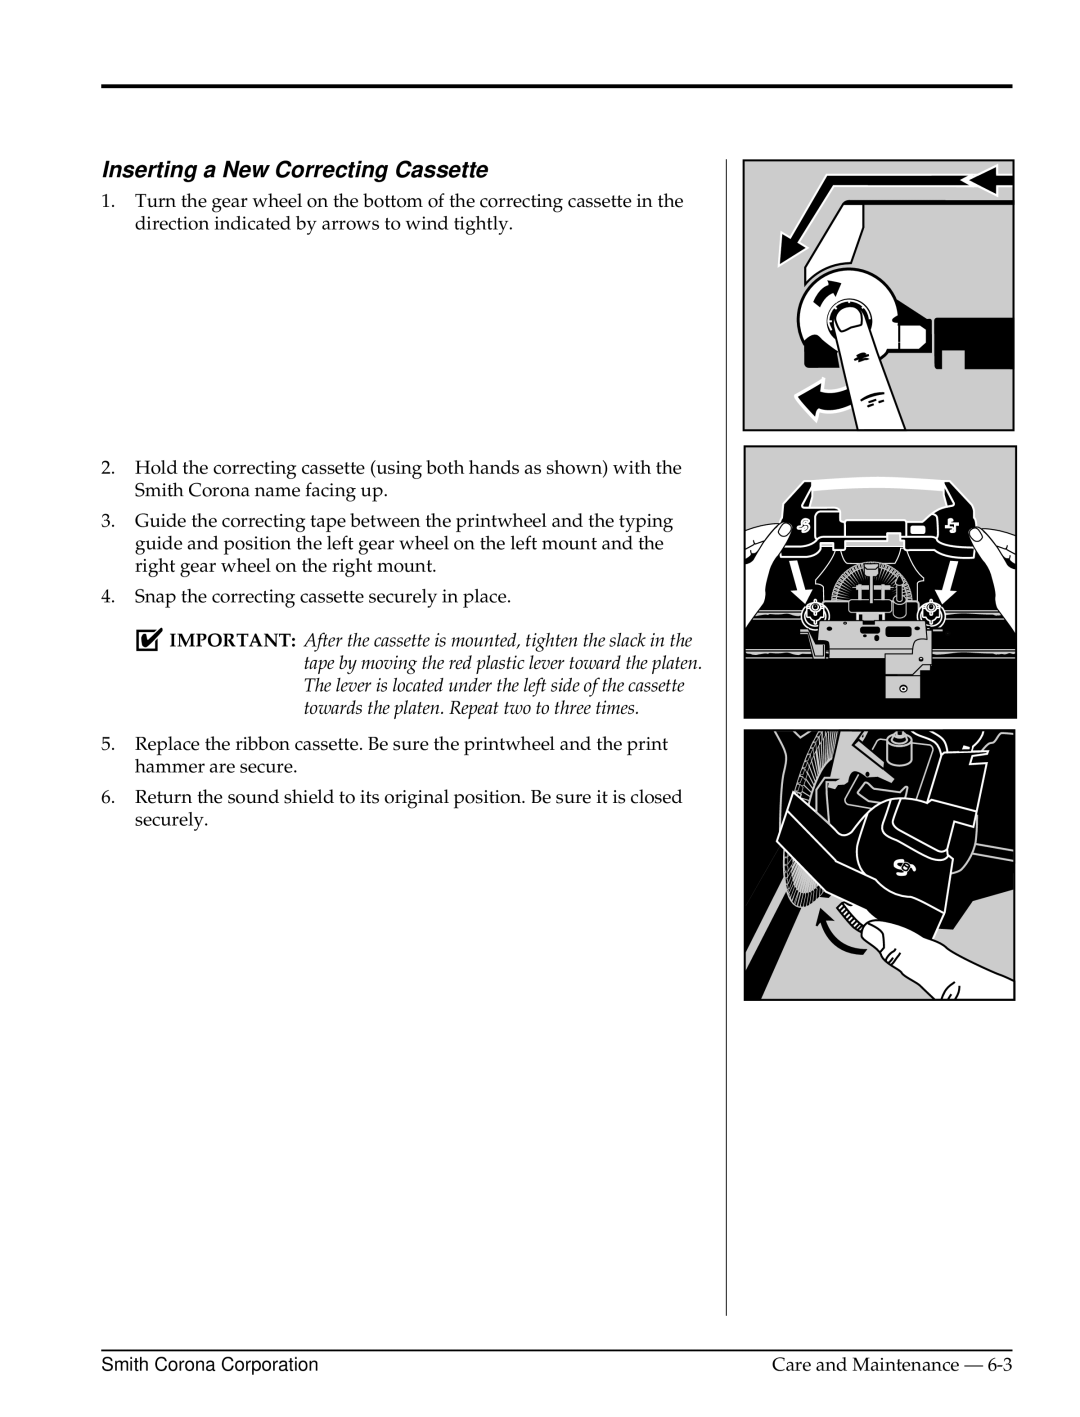
1.Turn the gear wheel on the bottom of the correcting cassette in the direction indicated by arrows to wind tightly.
2.Hold the correcting cassette (using both hands as shown) with the Smith Corona name facing up.
3.Guide the correcting tape between the printwheel and the typing guide and position the left gear wheel on the left mount and the right gear wheel on the right mount.
4.Snap the correcting cassette securely in place.
![]()
![]() IMPORTANT: After the cassette is mounted, tighten the slack in the tape by moving the red plastic lever toward the platen. The lever is located under the left side of the cassette towards the platen. Repeat two to three times.
IMPORTANT: After the cassette is mounted, tighten the slack in the tape by moving the red plastic lever toward the platen. The lever is located under the left side of the cassette towards the platen. Repeat two to three times.
5.Replace the ribbon cassette. Be sure the printwheel and the print hammer are secure.
6.Return the sound shield to its original position. Be sure it is closed securely.
Smith Corona Corporation | Care and Maintenance — |