020230 specifications
Snapper 020230 is an advanced tool designed specifically for efficiency and precision in various applications, particularly within the landscaping and gardening sector. Known for its robust performance and innovative features, the Snapper 020230 has quickly gained popularity among both professionals and DIY enthusiasts.One of the standout features of the Snapper 020230 is its powerful engine. Equipped with a reliable Briggs & Stratton engine, this tool delivers consistent power, making it capable of handling tough mowing tasks with ease. The engine is designed for optimal performance, offering high torque and fuel efficiency, allowing users to achieve longer operating times without frequent refueling.
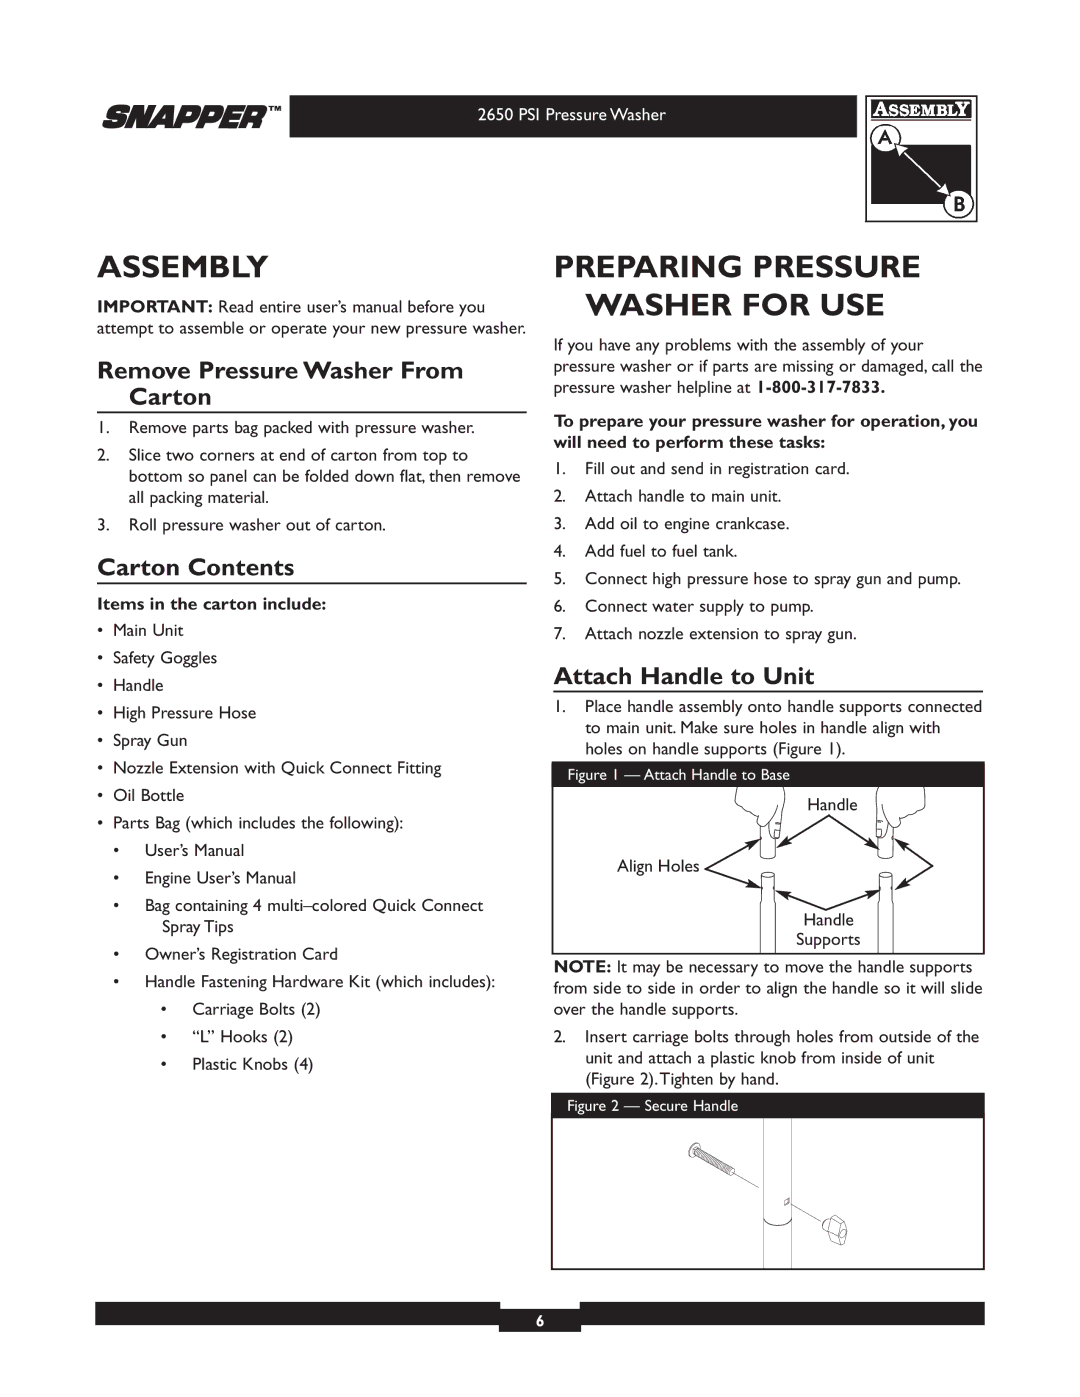
The design of the Snapper 020230 emphasizes user comfort and control. It boasts an ergonomic handle that provides a comfortable grip, reducing fatigue during prolonged use. The adjustable height settings allow users to customize the cutting height according to their preferences, ensuring a clean and even cut every time.
Another significant characteristic is the cutting deck, which measures 21 inches in width. This size is perfectly balanced for maneuverability and efficiency, allowing users to navigate tight spaces while still covering substantial ground. The deck design also incorporates a mulching feature, enabling grass clippings to be finely chopped and returned to the lawn, promoting healthier growth.
In addition to its physical features, the Snapper 020230 integrates modern technologies that enhance its functionality. The easy-start system is designed to minimize the effort needed to start the engine, ensuring that users can get to work quickly. Moreover, the dual-bagging system enables efficient collection of grass clippings, reducing clean-up time.
Durability is another key characteristic of the Snapper 020230. Constructed with high-quality materials, this tool is built to withstand the rigors of regular use in challenging outdoor conditions. Its rust-resistant components ensure longevity while maintaining peak performance through various weather scenarios.
Overall, the Snapper 020230 stands out for its powerful engine, user-friendly design, and advanced technologies. Whether for commercial landscaping projects or personal gardening, this tool is engineered to deliver exceptional results, making it a worthy investment for anyone looking to enhance their lawn care experience. With its combination of efficiency, durability, and innovative features, the Snapper 020230 is a reliable choice for any outdoor enthusiast.