Snapper 5600W Portable Generator
![]() CAUTION
CAUTION
• Always wear eye protection when installing/removing
NOTE: Check oil often during engine
NOTE: The generator assembly rotates on a prelubricated and sealed ball bearing that requires no additional lubrication for the life of the bearing.
6.Repeat step 3 through 5 to secure second wheel.
7.Attach vibration mounts to support leg with
8.Tip generator so that engine side is down.
9.Remove existing hardware from left unit vibration mount with 13mm wrench. Use same hardware to attach support leg.
10.Attach other side of support leg with a M8 x 20 mm capscrew and M8 lock nut.
11.On support leg end of generator, slide handle onto center of top of frame.
12.Attach handle using two long (M8 x 45mm) cap screws and two locking hex nuts.Tighten with a 1/2” or 13mm socket and wrench.
13.Return generator to normal operating position (resting on wheels and support leg).
14.Check that tires are inflated to value marked on tire or within 15 and 40 psi.
BEFORE STARTING THE ENGINE
Add Engine Oil
•Place generator on a level surface.
•Refer to engine operator’s manual and follow oil recommendations and instructions.
CAUTION
Any attempt to crank or start the engine before it has been properly filled with the recommended oil will result in equipment failure.
•Refer to engine operator’s manual for oil fill information.
•Damage to equipment resulting from failure to follow this instruction will void warranty.
Add Fuel
NOTE: This gasoline engine is certified to operate on
gasoline. Exhaust Emission Control System: EM (Engine Modifications).
![]() WARNING
WARNING
Fuel and its vapors are extremely flammable and explosive.
Fire or explosion can cause severe burns or death.
WHEN ADDING FUEL
•Turn generator OFF and let it cool at least 2 minutes before removing fuel cap. Loosen cap slowly to relieve pressure in tank.
•Fill fuel tank outdoors.
•DO NOT overfill tank. Allow space for fuel expansion.
•Keep fuel away from sparks, open flames, pilot lights, heat, and other ignition sources.
•DO NOT light a cigarette or smoke.
1.Use clean, fresh, regular UNLEADED fuel with a minimum of 85 octane. DO NOT use fuel which contains Methanol. DO NOT mix oil with fuel.
2.Clean area around fuel fill cap, remove cap.
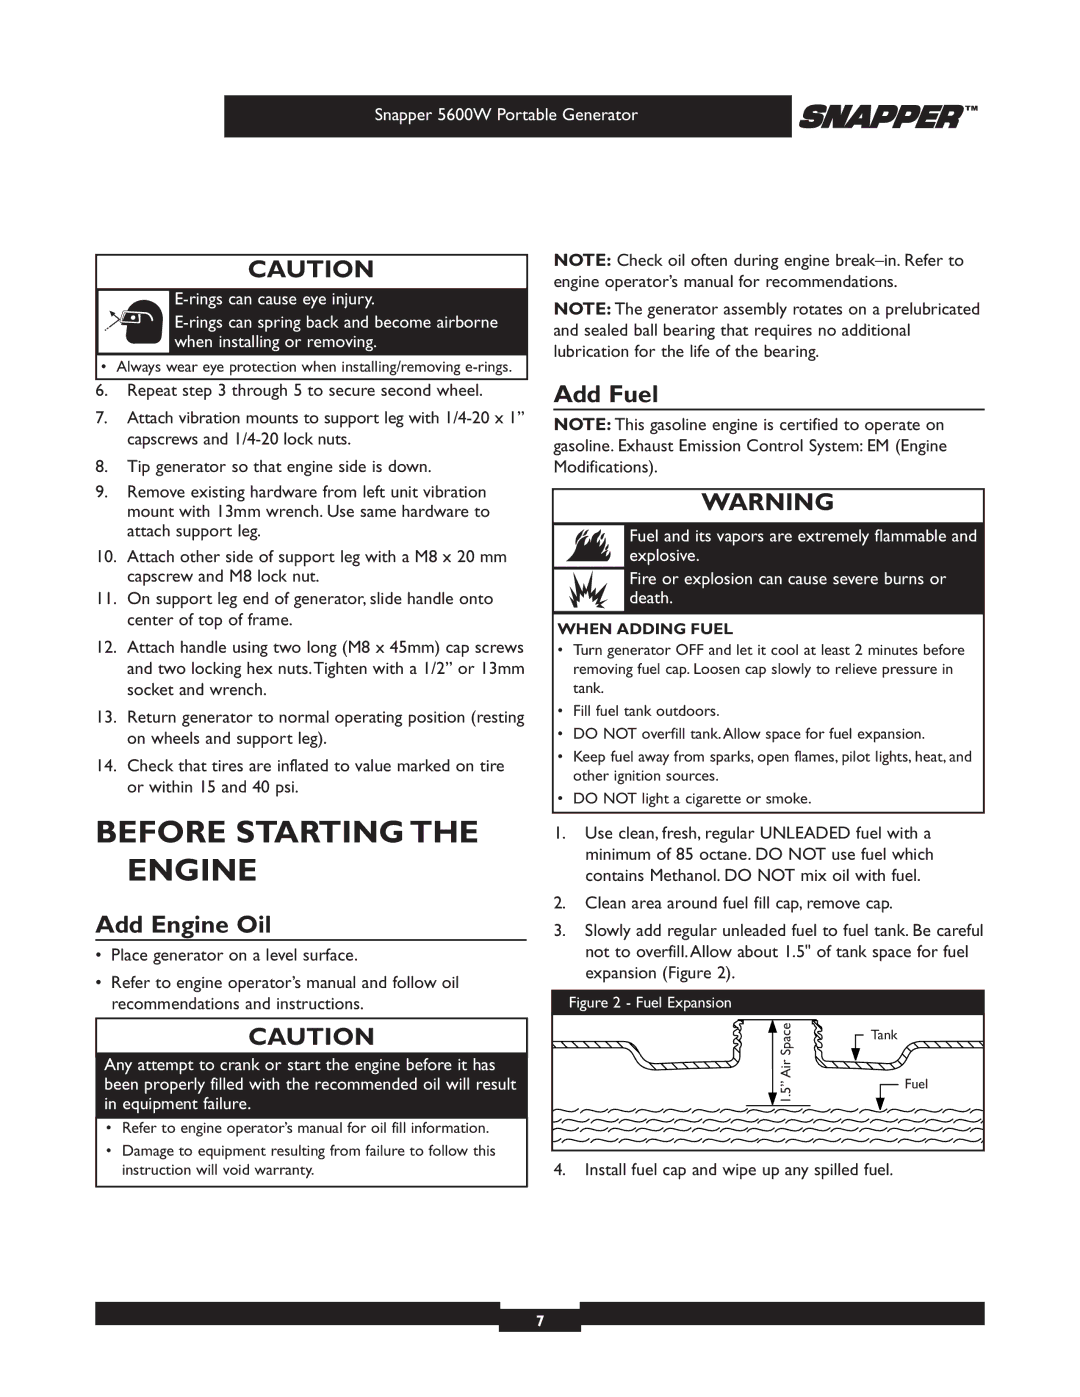
3.Slowly add regular unleaded fuel to fuel tank. Be careful not to overfill. Allow about 1.5" of tank space for fuel expansion (Figure 2).
Figure 2 - Fuel Expansion
| AirSpace | Tank |
|
|
| Fuel | |
| 1.5” |
| |
|
|
| |
4. | Install fuel cap and wipe up any spilled fuel. |
| |
7