Snapper 3500 PSI Pressure Washer
•If the choke lever has been moved to the “Choke” position to start the engine, gradually move it to the “Run” position as the engine warms up.
•Attach the nozzle extension to the spray gun. Tighten by hand (Figure 13).
Figure 13 — Connect Nozzle Extension to Spray Gun
•Select the desired quick connect nozzle and insert it into the end of the nozzle extension (see “How To Use the Nozzles”).
•Disengage the safety latch on the spray gun.
How to Stop Your Pressure Washer
•Move the throttle lever to the “Slow” position.
•Move the fuel valve to the “Off” position.
•Wait for the engine to idle down.
•Move the rocker switch to the “Stop” position.
•Simply shutting off the engine will not release pressure in the system. Squeeze trigger on the spray gun to relieve pressure in the hose.
How to Use the Nozzles
![]() CAUTION! Never exchange nozzles without locking the safety latch on the trigger.
CAUTION! Never exchange nozzles without locking the safety latch on the trigger.
The
Follow these instructions to change nozzles:
•Engage the safety latch on the spray gun.
•Pull back the collar on the
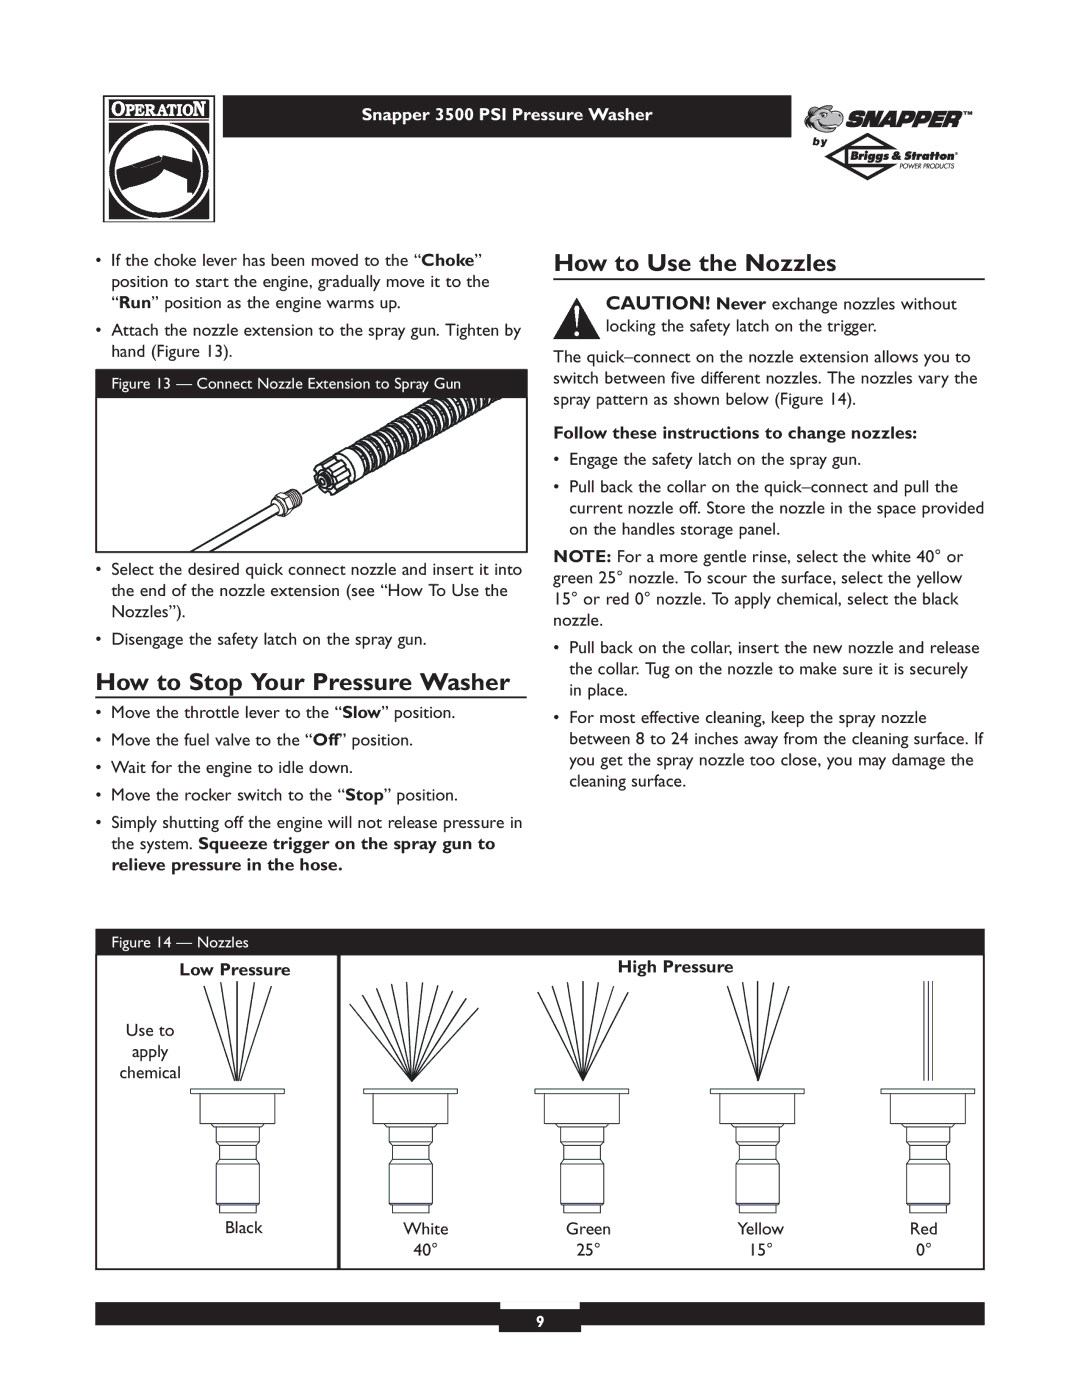
NOTE: For a more gentle rinse, select the white 40° or green 25° nozzle. To scour the surface, select the yellow 15° or red 0° nozzle. To apply chemical, select the black nozzle.
•Pull back on the collar, insert the new nozzle and release the collar. Tug on the nozzle to make sure it is securely in place.
•For most effective cleaning, keep the spray nozzle between 8 to 24 inches away from the cleaning surface. If you get the spray nozzle too close, you may damage the cleaning surface.
Figure 14 — Nozzles
Low Pressure
Use to
apply
chemical
High Pressure
Black
White | Green | Yellow | Red |
40° | 25° | 15° | 0° |
9