
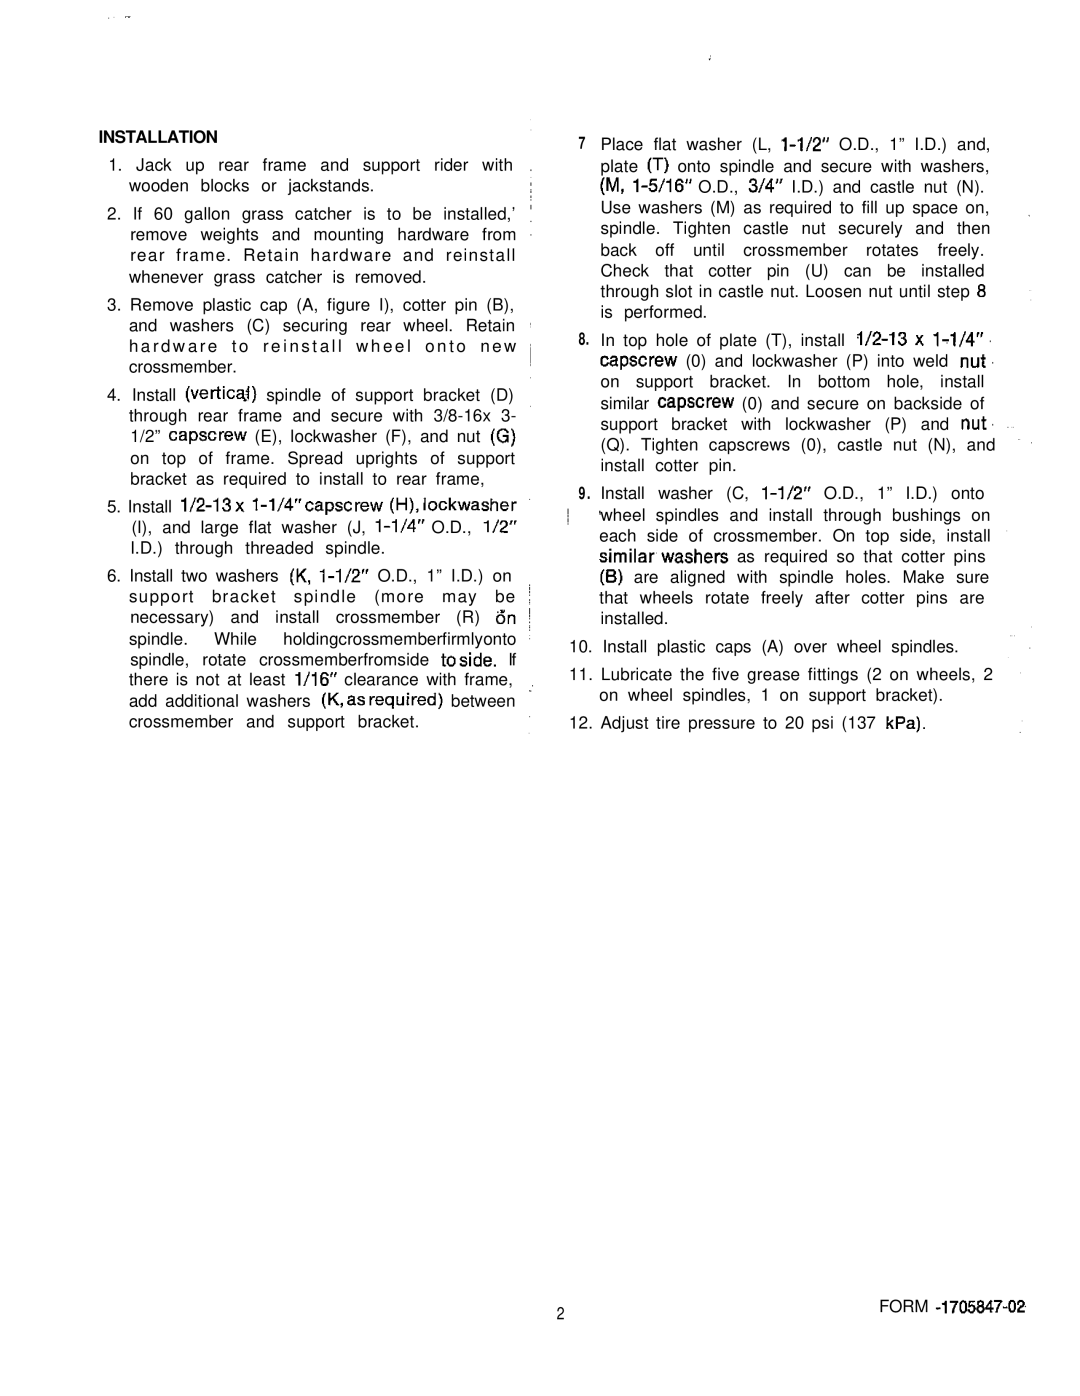
1691852 specifications
Snapper 1691852 is an innovative and versatile lawn mower designed to meet the diverse needs of homeowners and professional landscapers alike. This mower stands out in the market due to its unique combination of features, advanced technologies, and user-friendly characteristics that enhance the mowing experience.One of the main features of the Snapper 1691852 is its powerful engine, which provides reliable performance for efficient grass cutting. The mower is equipped with a robust Briggs & Stratton engine that delivers ample power, allowing it to tackle a variety of grass types and terrains. This level of power ensures that users can complete their mowing tasks quickly and effectively.
Another remarkable aspect of the Snapper 1691852 is its cutting deck design. The mower features a wide cutting deck that offers a larger cutting path, allowing users to cover more ground in less time. Additionally, the deck is adjustable, enabling operators to select from multiple cutting heights. This flexibility allows for precise mowing tailored to individual lawn needs, whether for a close trim or a more leisurely cut.
The Snapper 1691852 integrates several advanced technologies that enhance its performance and ease of use. The auto-choke system simplifies engine starting, eliminating the need for manual adjustments and ensuring the mower operates smoothly every time it's needed. The rear bagging system further contributes to its efficiency by collecting grass clippings as you mow, leaving lawns looking tidy.
Handling the Snapper 1691852 is made easier by its ergonomic design. The mower features an adjustable handle that provides optimal comfort during operation, reducing fatigue during extended mowing sessions. The lightweight construction makes it easy to maneuver in tight spaces, while the durable wheels ensure stability on various terrains.
Moreover, the mower's build quality is robust, designed to withstand the rigors of regular use. With quality components and materials, the Snapper 1691852 promises longevity and reliability, making it a worthwhile investment for homeowners looking for a dependable mowing solution.
In summary, Snapper 1691852 combines a powerful engine, a versatile cutting deck, user-friendly technologies, and ergonomic design to provide an exceptional mowing experience. Its blend of efficiency, ease of use, and durability makes it an ideal choice for both residential and professional landscaping needs.