Maintenance (Continued)
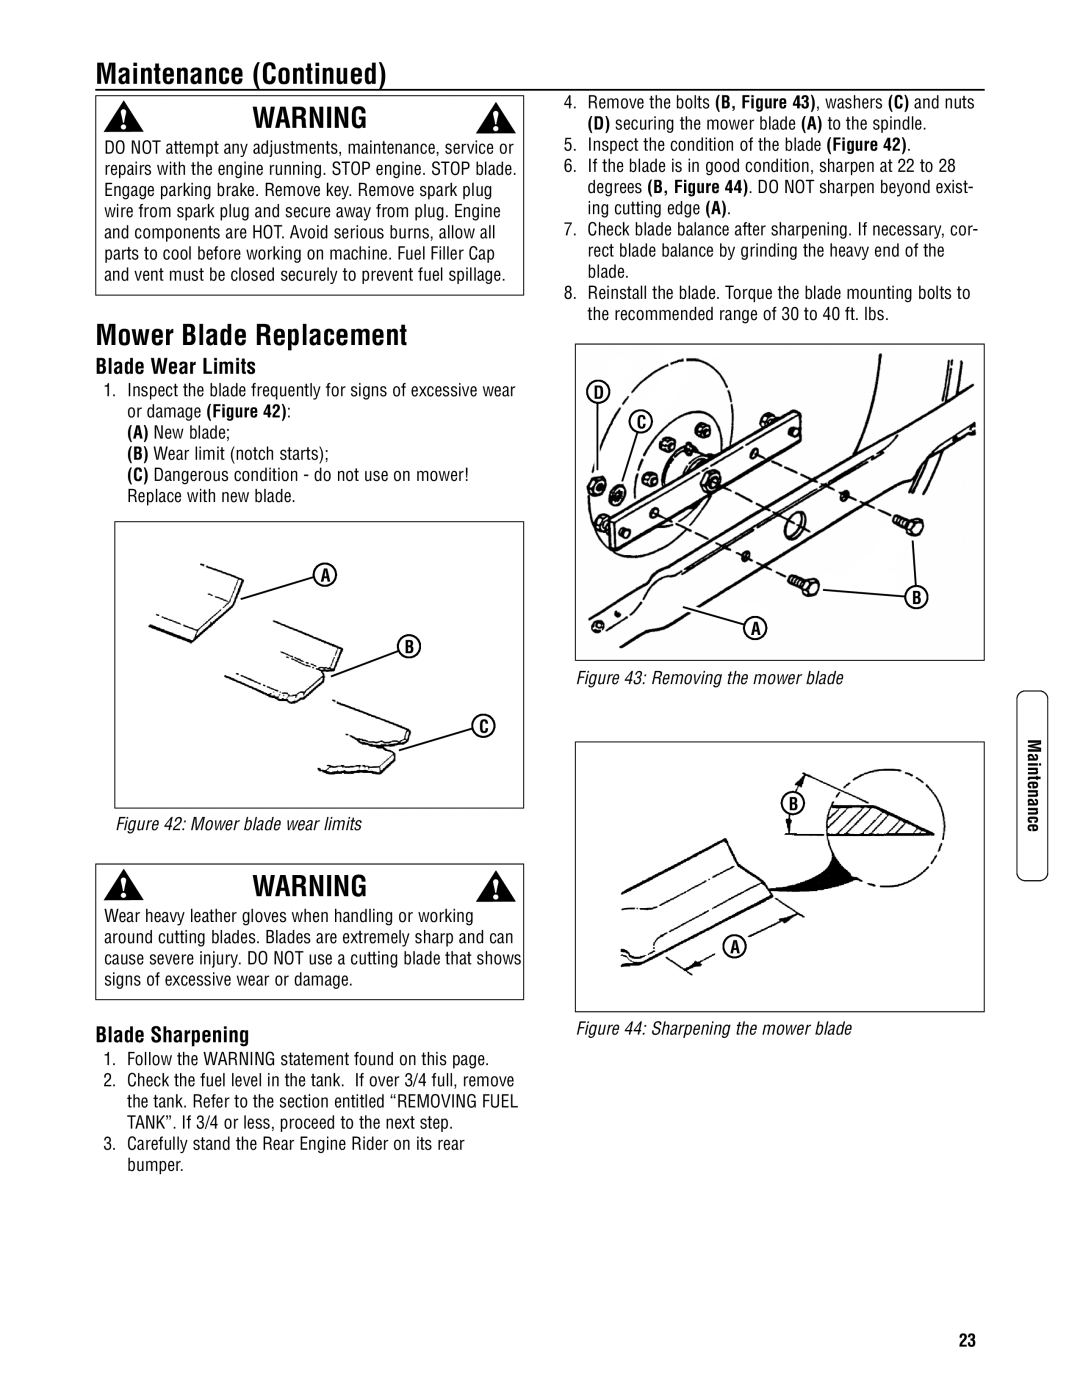
! | WARNING | ! | 4. | Remove the bolts (B, Figure 43), washers (C) and nuts |
| (D) securing the mower blade (A) to the spindle. | |||
DO NOT attempt any adjustments, maintenance, service or | 5. | Inspect the condition of the blade (Figure 42). | ||
repairs with the engine running. STOP engine. STOP blade. | 6. | If the blade is in good condition, sharpen at 22 to 28 | ||
Engage parking brake. Remove key. Remove spark plug |
| degrees (B, Figure 44). DO NOT sharpen beyond exist- | ||
wire from spark plug and secure away from plug. Engine |
| ing cutting edge (A). | ||
and components are HOT. Avoid serious burns, allow all | 7. | Check blade balance after sharpening. If necessary, cor- | ||
parts to cool before working on machine. Fuel Filler Cap |
| rect blade balance by grinding the heavy end of the | ||
and vent must be closed securely to prevent fuel spillage. |
| blade. | ||
|
|
| 8. | Reinstall the blade. Torque the blade mounting bolts to |
|
|
| ||
|
|
|
| the recommended range of 30 to 40 ft. lbs. |
Mower Blade Replacement
Blade Wear Limits |
| |
1. Inspect the blade frequently for signs of excessive wear | D | |
or damage (Figure 42): | C | |
(A) New blade; | ||
| ||
(B) Wear limit (notch starts); |
| |
(C) Dangerous condition - do not use on mower! |
| |
Replace with new blade. |
| |
A |
| |
| B |
A |
B |
Figure 43: Removing the mower blade
|
|
| C |
| |
|
|
|
|
| B |
| Figure 42: Mower blade wear limits |
|
| ||
|
|
|
| ||
|
|
|
|
| |
! | WARNING | ! |
|
| |
Wear heavy leather gloves when handling or working |
|
|
| ||
around cutting blades. Blades are extremely sharp and can |
| A | |||
cause severe injury. DO NOT use a cutting blade that shows |
| ||||
|
| ||||
signs of excessive wear or damage. |
|
|
| ||
|
|
|
|
|
|
|
|
|
|
|
|
Blade Sharpening |
|
|
| Figure 44: Sharpening the mower blade | |
1.Follow the WARNING statement found on this page.
2.Check the fuel level in the tank. If over 3/4 full, remove the tank. Refer to the section entitled “REMOVING FUEL TANK”. If 3/4 or less, proceed to the next step.
3.Carefully stand the Rear Engine Rider on its rear bumper.
Maintenance
23
