Section 3 - MAINTENANCE
3.3SERVICE - EVERY 25 OPERATING HOURS (Continued from previous page)
3.3.9. DIFFERENTIAL/CHAIN CASE - LUBRICATION 1. Check the fill/level plug, for cracks and wear. Replace fill/level plug if signs of wear are visible.
IMPORTANT: If the Rear Engine Rider will be on its rear bumper for longer than two hours, remove the battery. Refer to Section “BATTERY REMOVAL”.
2.To check lubricant, remove fill/level plug and visually inspect for lubricant on the internal parts of the differential. If no lubricant is visible on the internal parts of the differential, add “SNAPPER Transmission” grease as needed. See Figure 3.7.
DIFFERENTIAL
FILL
PLUG
LEVEL
PLUG
FIGURE 3.7
IMPORTANT: Overfilling of the differential with lubricant will cause lubricant to leak onto drive components of the Rear Engine Rider.
WARNING
DO NOT attempt any adjustments, maintenance, service or repairs with the engine running. STOP engine. STOP blade. Engage parking brake. Remove key. Remove spark plug wire from spark plug and secure away from plug. Engine and components are HOT. Avoid serious burns, allow all parts to cool before working on machine. Fuel Filler Cap and vent must be closed securely to prevent fuel spillage.
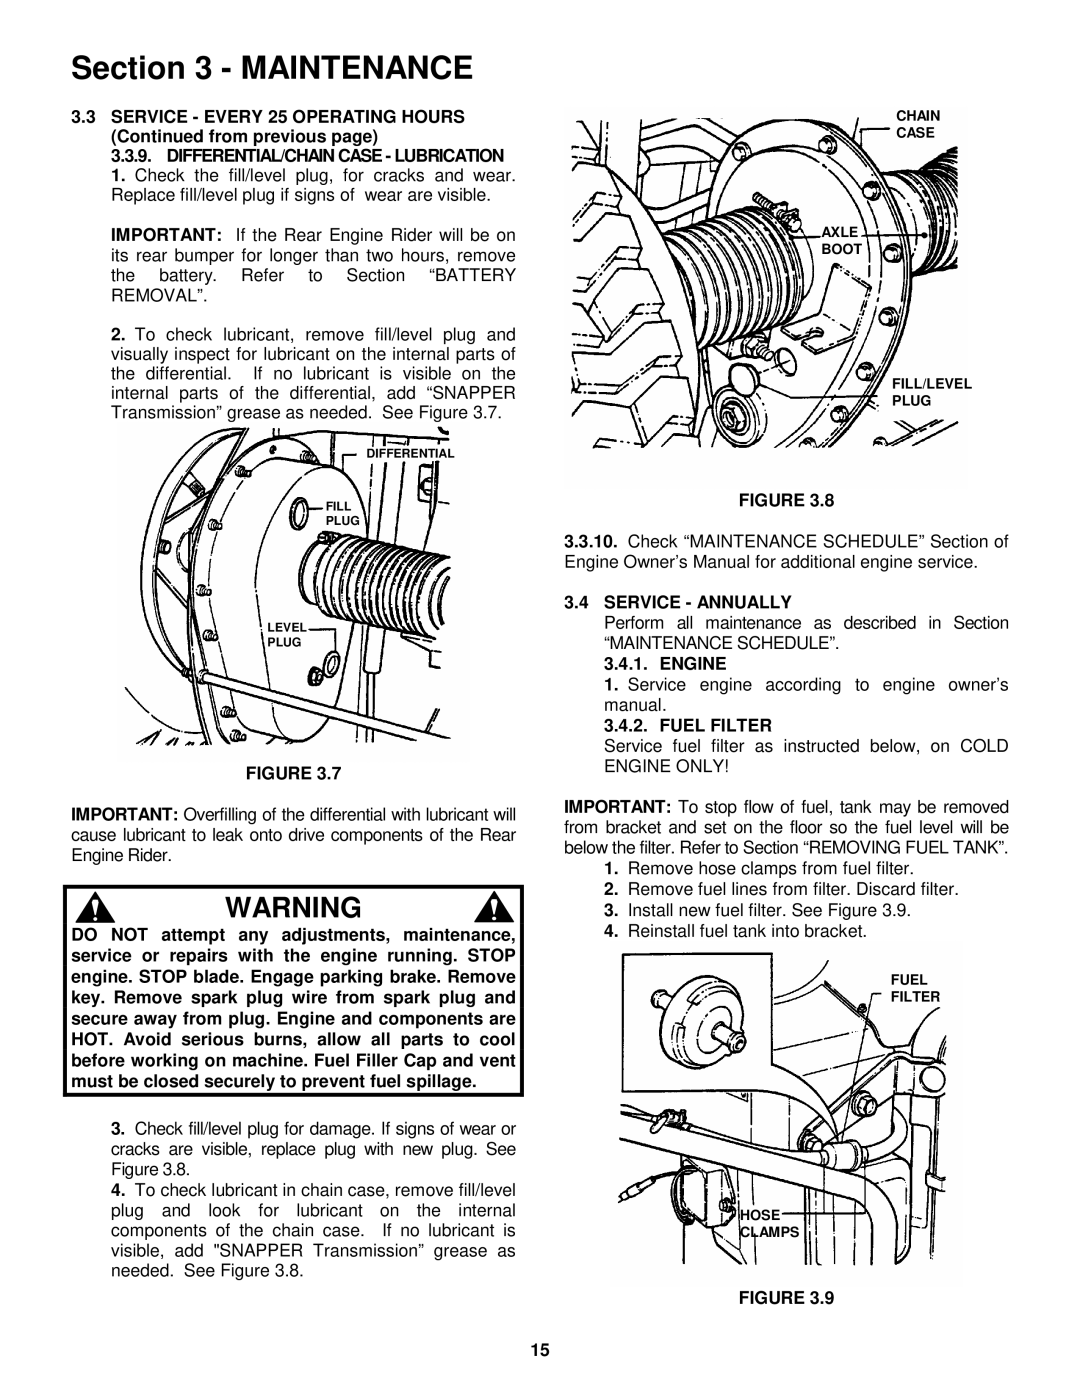
3.Check fill/level plug for damage. If signs of wear or cracks are visible, replace plug with new plug. See Figure 3.8.
4.To check lubricant in chain case, remove fill/level plug and look for lubricant on the internal components of the chain case. If no lubricant is visible, add "SNAPPER Transmission” grease as needed. See Figure 3.8.
CHAIN
CASE
AXLE
BOOT
FILL/LEVEL
PLUG
FIGURE 3.8
3.3.10.Check “MAINTENANCE SCHEDULE” Section of Engine Owner’s Manual for additional engine service.
3.4SERVICE - ANNUALLY
Perform all maintenance as described in Section
“MAINTENANCE SCHEDULE”.
3.4.1. ENGINE
1.Service engine according to engine owner’s manual.
3.4.2. FUEL FILTER
Service fuel filter as instructed below, on COLD ENGINE ONLY!
IMPORTANT: To stop flow of fuel, tank may be removed from bracket and set on the floor so the fuel level will be below the filter. Refer to Section “REMOVING FUEL TANK”.
1.Remove hose clamps from fuel filter.
2.Remove fuel lines from filter. Discard filter.
3.Install new fuel filter. See Figure 3.9.
4.Reinstall fuel tank into bracket.
FUEL
FILTER
HOSE
CLAMPS
FIGURE 3.9
15