
ELT180H33IBV specifications
The Snapper ELT180H33IBV is an exceptional lawn mower designed for efficiency and ease of use, making it an ideal choice for homeowners looking to maintain their lawns with minimal effort. This mower is part of Snapper’s reputation for producing reliable and high-performance outdoor power equipment, delivering a robust solution for lawn care enthusiasts.One of the standout features of the ELT180H33IBV is its powerful engine. It is equipped with a 180cc Briggs & Stratton engine, providing ample horsepower to tackle various mowing tasks with ease. This engine is designed for efficiency, ensuring that users can mow larger areas without frequent refueling, which significantly enhances productivity during mowing sessions.
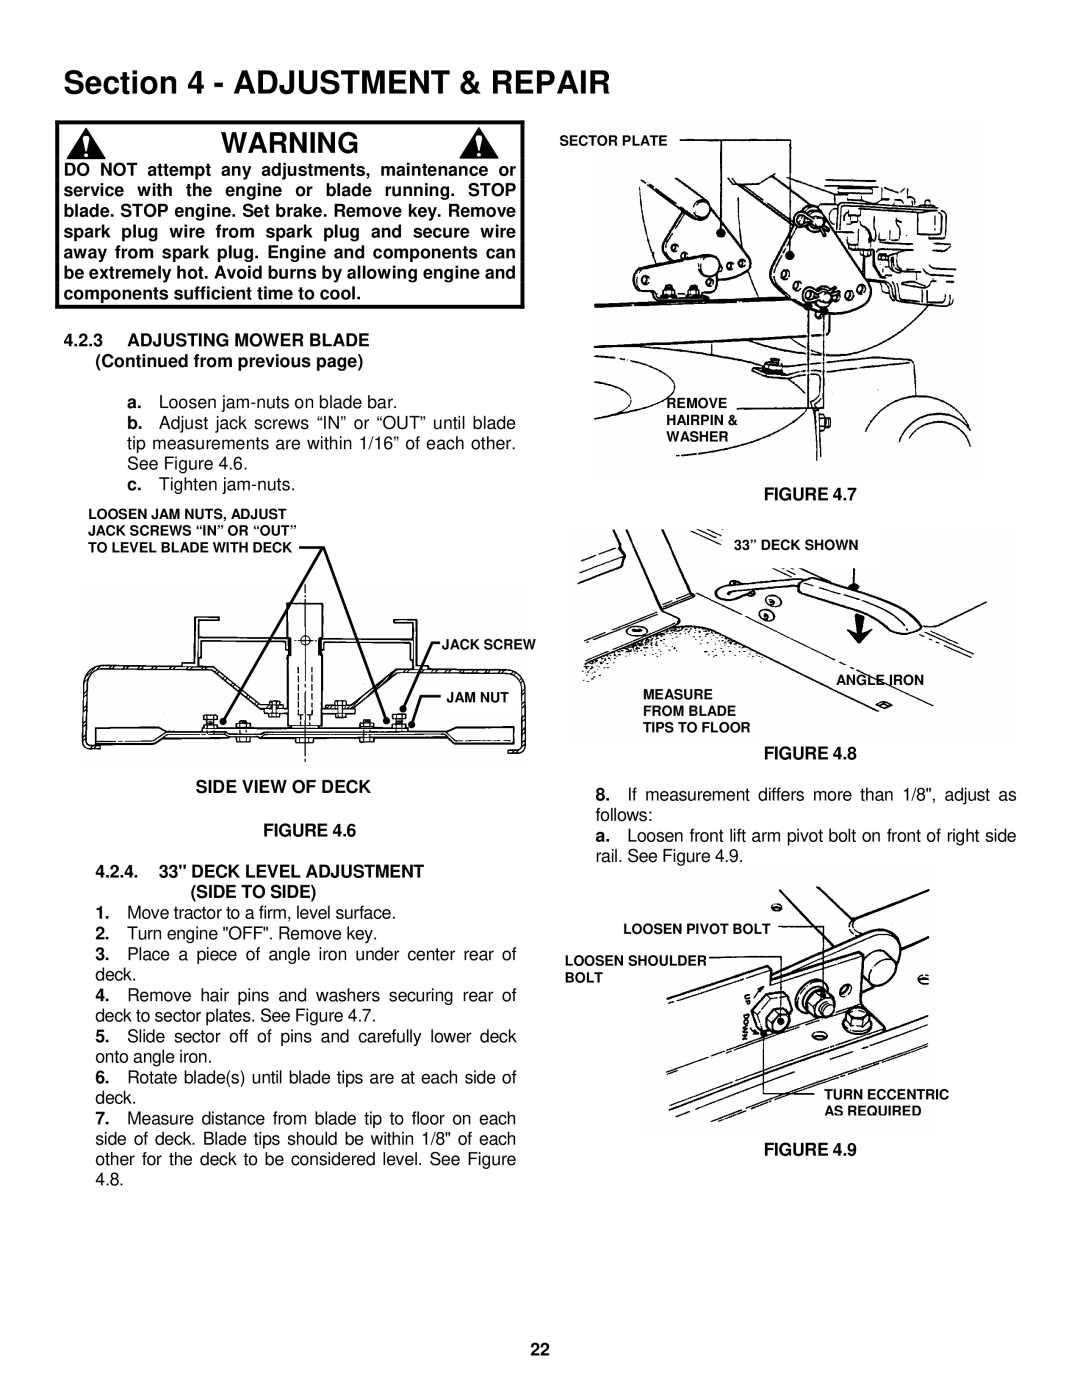
The Snapper ELT180H33IBV features a 33-inch cutting deck, making it compact yet efficient. The size allows for maneuverability in tight spaces, such as flower beds and garden edges, while still covering enough ground to make mowing quicker. The cutting deck height is easily adjustable, offering multiple height settings to achieve the desired grass length, which adds versatility to accommodate different types of lawns.
In terms of technology, the ELT180H33IBV is equipped with a user-friendly starting system. The mower features an easy pull-start mechanism, and the engine is designed to start with minimal effort, ensuring that users can quickly get to work without frustration.
Another important characteristic of this mower is its durability. Snapper has built this model with high-quality materials to withstand the rigors of outdoor use. The rugged construction ensures long-lasting performance, significantly reducing the need for frequent repairs or replacements.
For added convenience, the Snapper ELT180H33IBV incorporates a rear bagging system, which collects clippings for easy disposal. By using the bagging option, homeowners can keep their lawns looking neat and tidy without the hassle of raking.
Moreover, the mower comes with comfortable handles that provide a secure grip, enhancing overall control during operation. This ergonomic design reduces fatigue, making it easier to maneuver the mower over extended periods.
In summary, the Snapper ELT180H33IBV is a well-rounded mower that combines power, versatility, and user-friendly features, making it suitable for those who want an efficient solution for lawn maintenance. With its high-performance engine, compact design, and durable build, it stands out as a reliable choice for homeowners aiming to achieve a pristine lawn with ease.