Initial Installation
F |
| |
A |
| |
| C | |
E |
| |
B | D | |
E | ||
|
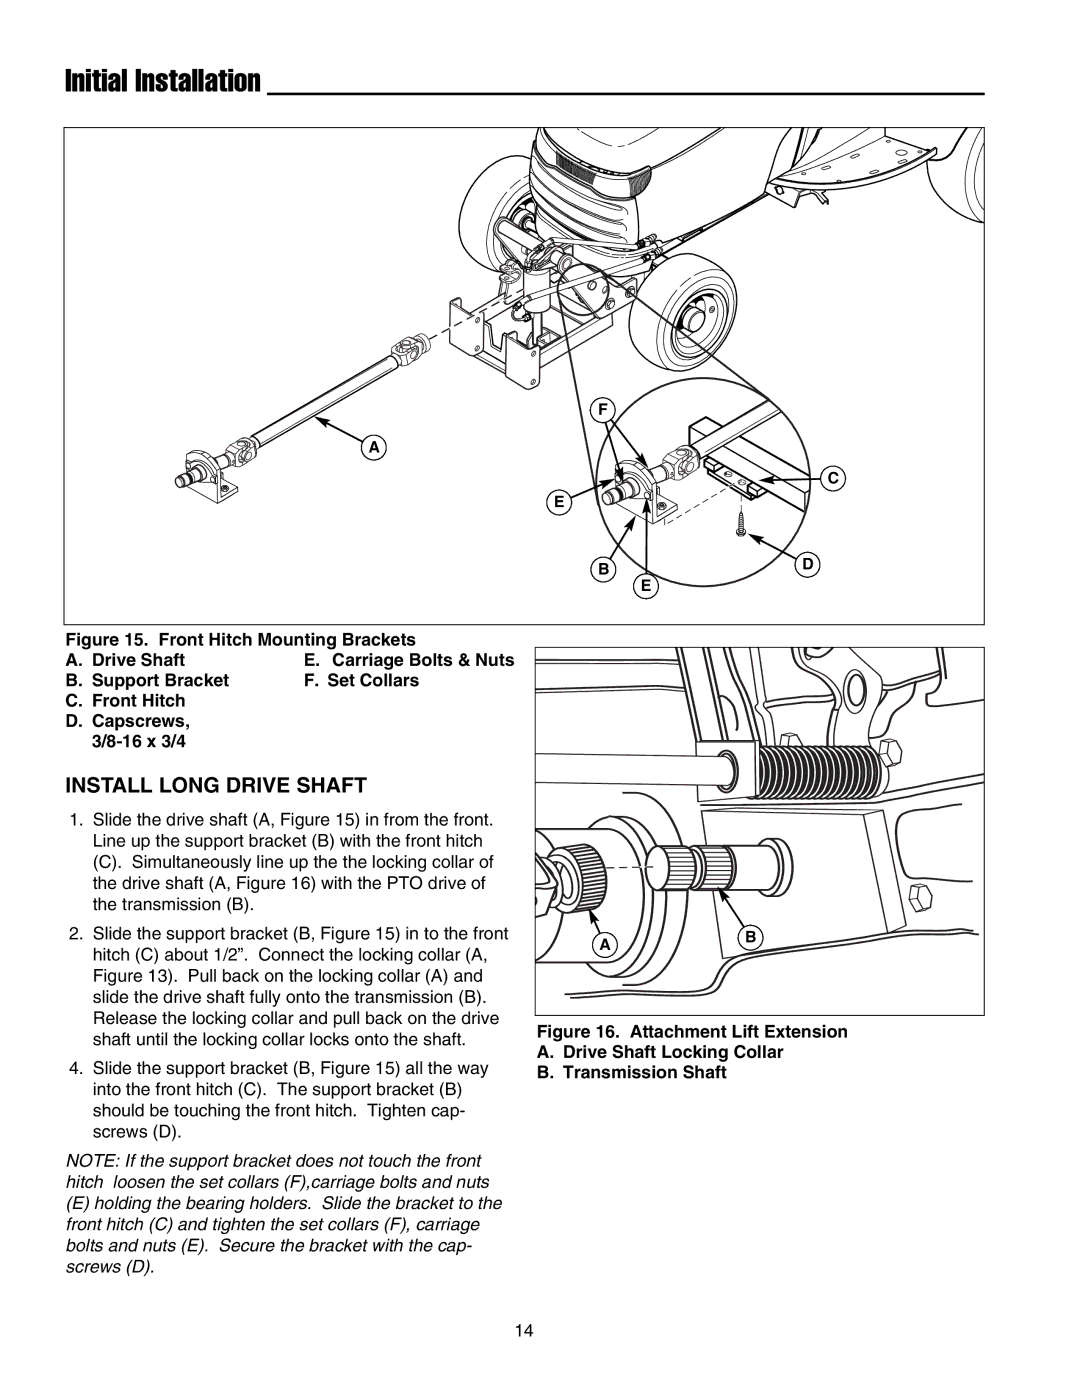
Figure 15. Front Hitch Mounting Brackets
A. | Drive Shaft | E. Carriage Bolts & Nuts |
B. | Support Bracket | F. Set Collars |
C.Front Hitch
D.Capscrews, 3/8-16 x 3/4
INSTALL LONG DRIVE SHAFT
1.Slide the drive shaft (A, Figure 15) in from the front. Line up the support bracket (B) with the front hitch
(C). Simultaneously line up the the locking collar of the drive shaft (A, Figure 16) with the PTO drive of the transmission (B).
2.Slide the support bracket (B, Figure 15) in to the front hitch (C) about 1/2”. Connect the locking collar (A, Figure 13). Pull back on the locking collar (A) and slide the drive shaft fully onto the transmission (B). Release the locking collar and pull back on the drive shaft until the locking collar locks onto the shaft.
4.Slide the support bracket (B, Figure 15) all the way into the front hitch (C). The support bracket (B) should be touching the front hitch. Tighten cap- screws (D).
NOTE: If the support bracket does not touch the front hitch loosen the set collars (F),carriage bolts and nuts
(E)holding the bearing holders. Slide the bracket to the front hitch (C) and tighten the set collars (F), carriage bolts and nuts (E). Secure the bracket with the cap- screws (D).
A | B |
|
Figure 16. Attachment Lift Extension
A.Drive Shaft Locking Collar
B.Transmission Shaft
14