Section 4 - MAINTENANCE
4.1INTRODUCTION
To retain the quality of the SNAPPER mower, use genuine SNAPPER replacement parts only. Contact a local SNAPPER dealer for parts and service assistance. For the correct part or information for a particular SNAPPER mower, always mention the model and serial number. SNAPPER recommends returning the mower to an authorized SNAPPER dealer annually for inspection and addition of any new devices, which might upgrade the safety of the mower. For the nearest SNAPPER dealer in your area, check the yellow pages under the heading LAWN MOWERS. For engine parts and service, look for the engine manufacturer’s dealers under the heading, ENGINES - gasoline.
4.2SERVICE - AFTER FIRST 5 HOURS
d. Fill engine crankcase with new oil. Refer to your engine owner’s manual for oil specifications.
e.Change oil filter at every oil change. Refer to your engine owner’s manual for service instructions.
4.2.2.CHECK MOWER BLADE
1.Stop Engine. Remove key. Disconnect spark plug wire(s) and secure away from spark plug(s).
2.Engage parking brake.
3.Use a hydraulic floor jack or hoist to raise machine high enough to gain access to the underside of deck. Secure machine with safety blocks.
WARNING
DO NOT attempt any maintenance, adjustments or service with engine running. STOP engine. STOP blades. Set brake. Remove key. Remove spark plug wires and secure away from spark plugs. Engine and components are HOT. Avoid serious burns, allow sufficient time for all parts to cool.
4.2.1.CHANGE ENGINE OIL
1.Change engine oil as follows:
a.Place a 4 quart minimum capacity container under the end of the oil drain.
b.Rotate counter clockwise and pull out to open the drain plug. See Figure 4.1.
WARNING
Wear heavy leather gloves when handling or working around cutting blades. Blades are extremely sharp and can cause severe injury. DO NOT use a cutting blade that shows signs of excessive wear or
damage. Refer to Section “MOWER BLADE REPLACEMENT” for proper blade inspection and service procedures.
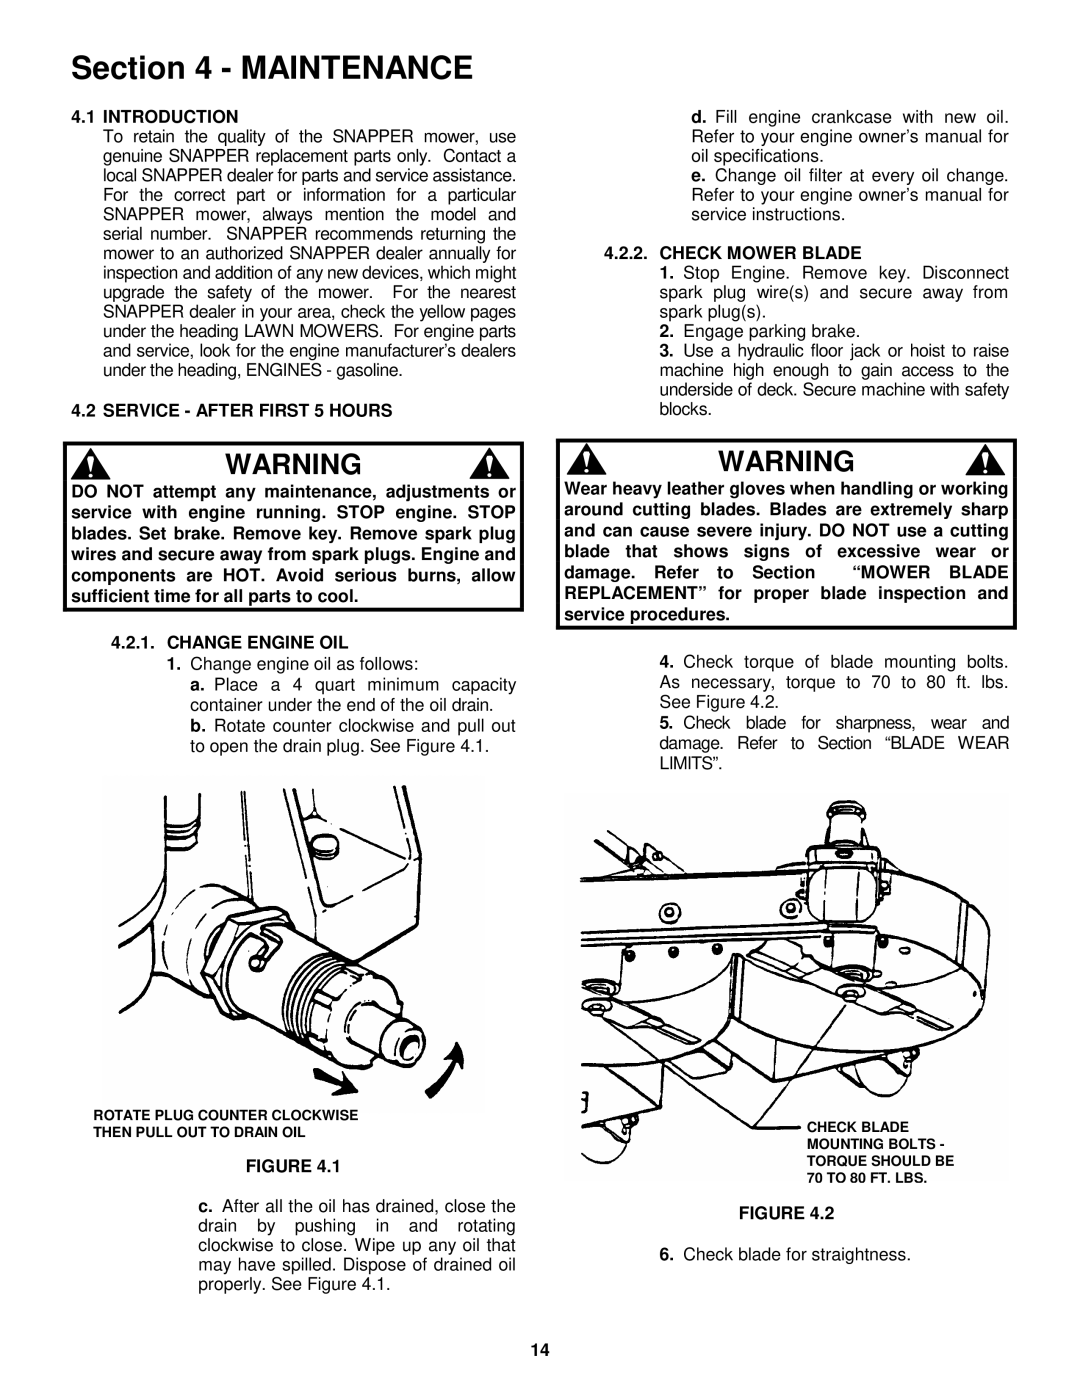
4.Check torque of blade mounting bolts. As necessary, torque to 70 to 80 ft. lbs. See Figure 4.2.
5.Check blade for sharpness, wear and damage. Refer to Section “BLADE WEAR LIMITS”.
ROTATE PLUG COUNTER CLOCKWISE
THEN PULL OUT TO DRAIN OIL
FIGURE 4.1
c.After all the oil has drained, close the drain by pushing in and rotating clockwise to close. Wipe up any oil that may have spilled. Dispose of drained oil properly. See Figure 4.1.
CHECK BLADE MOUNTING BOLTS - TORQUE SHOULD BE 70 TO 80 FT. LBS.
FIGURE 4.2
6.Check blade for straightness.
14