SECTION 3 - OPERATING INSTRUCTIONS
WARNING
DO NOT allow operation of the machine by untrained personnel.
3.1 PRE-START CHECKLIST
Make the following checks and perform the services as required before each
IMPORTANT: Before starting your SNAPPER Pro Hydro machine, the hydraulic reservoir and engine MUST be filled to the proper level with oil.
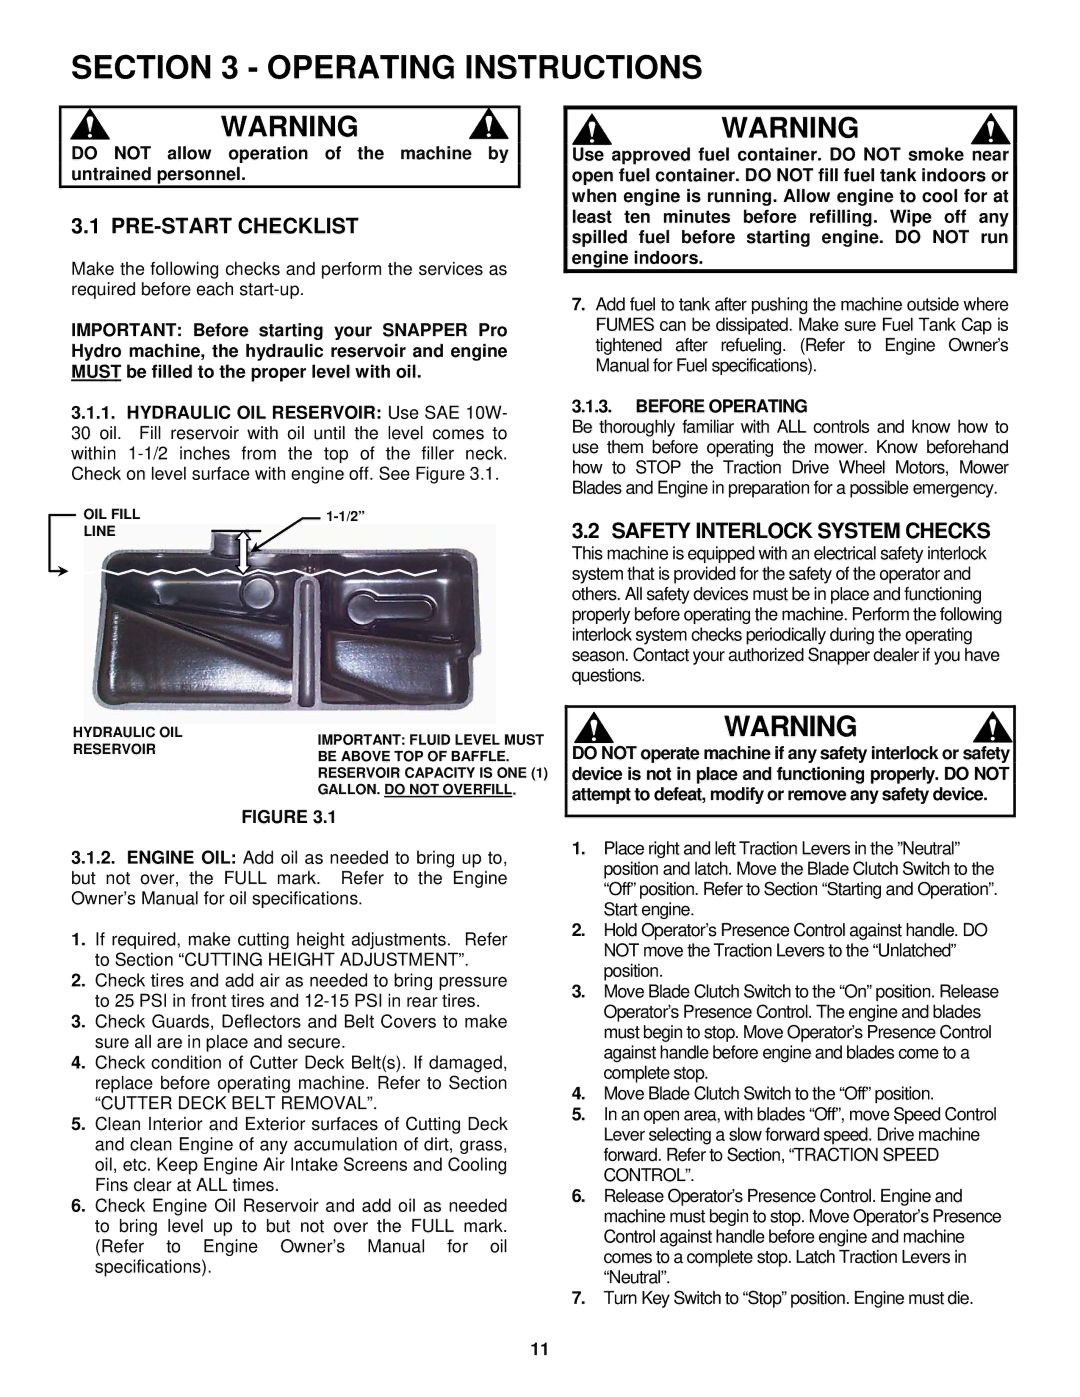
3.1.1.HYDRAULIC OIL RESERVOIR: Use SAE 10W- 30 oil. Fill reservoir with oil until the level comes to within
OIL FILL | |
LINE |
|
HYDRAULIC OIL | IMPORTANT: FLUID LEVEL MUST | |
RESERVOIR | ||
BE ABOVE TOP OF BAFFLE. | ||
| ||
| RESERVOIR CAPACITY IS ONE (1) | |
| GALLON. DO NOT OVERFILL. | |
| FIGURE 3.1 |
3.1.2.ENGINE OIL: Add oil as needed to bring up to, but not over, the FULL mark. Refer to the Engine Owner’s Manual for oil specifications.
1.If required, make cutting height adjustments. Refer to Section “CUTTING HEIGHT ADJUSTMENT”.
2.Check tires and add air as needed to bring pressure to 25 PSI in front tires and
3.Check Guards, Deflectors and Belt Covers to make sure all are in place and secure.
4.Check condition of Cutter Deck Belt(s). If damaged, replace before operating machine. Refer to Section
“CUTTER DECK BELT REMOVAL”.
5.Clean Interior and Exterior surfaces of Cutting Deck and clean Engine of any accumulation of dirt, grass, oil, etc. Keep Engine Air Intake Screens and Cooling Fins clear at ALL times.
6.Check Engine Oil Reservoir and add oil as needed to bring level up to but not over the FULL mark. (Refer to Engine Owner’s Manual for oil specifications).
WARNING
Use approved fuel container. DO NOT smoke near open fuel container. DO NOT fill fuel tank indoors or when engine is running. Allow engine to cool for at least ten minutes before refilling. Wipe off any spilled fuel before starting engine. DO NOT run engine indoors.
7.Add fuel to tank after pushing the machine outside where FUMES can be dissipated. Make sure Fuel Tank Cap is tightened after refueling. (Refer to Engine Owner’s Manual for Fuel specifications).
3.1.3.BEFORE OPERATING
Be thoroughly familiar with ALL controls and know how to use them before operating the mower. Know beforehand how to STOP the Traction Drive Wheel Motors, Mower Blades and Engine in preparation for a possible emergency.
3.2 SAFETY INTERLOCK SYSTEM CHECKS
This machine is equipped with an electrical safety interlock system that is provided for the safety of the operator and others. All safety devices must be in place and functioning properly before operating the machine. Perform the following interlock system checks periodically during the operating season. Contact your authorized Snapper dealer if you have questions.
WARNING
DO NOT operate machine if any safety interlock or safety device is not in place and functioning properly. DO NOT attempt to defeat, modify or remove any safety device.
1.Place right and left Traction Levers in the ”Neutral” position and latch. Move the Blade Clutch Switch to the “Off” position. Refer to Section “Starting and Operation”. Start engine.
2.Hold Operator’s Presence Control against handle. DO NOT move the Traction Levers to the “Unlatched” position.
3.Move Blade Clutch Switch to the “On” position. Release Operator’s Presence Control. The engine and blades must begin to stop. Move Operator’s Presence Control against handle before engine and blades come to a complete stop.
4.Move Blade Clutch Switch to the “Off” position.
5.In an open area, with blades “Off”, move Speed Control Lever selecting a slow forward speed. Drive machine forward. Refer to Section, “TRACTION SPEED CONTROL”.
6.Release Operator’s Presence Control. Engine and machine must begin to stop. Move Operator’s Presence Control against handle before engine and machine comes to a complete stop. Latch Traction Levers in “Neutral”.
7.Turn Key Switch to “Stop” position. Engine must die.
11