ASSEMBLY & INSTALLATION - THRU-THE-WALL (CONT.)
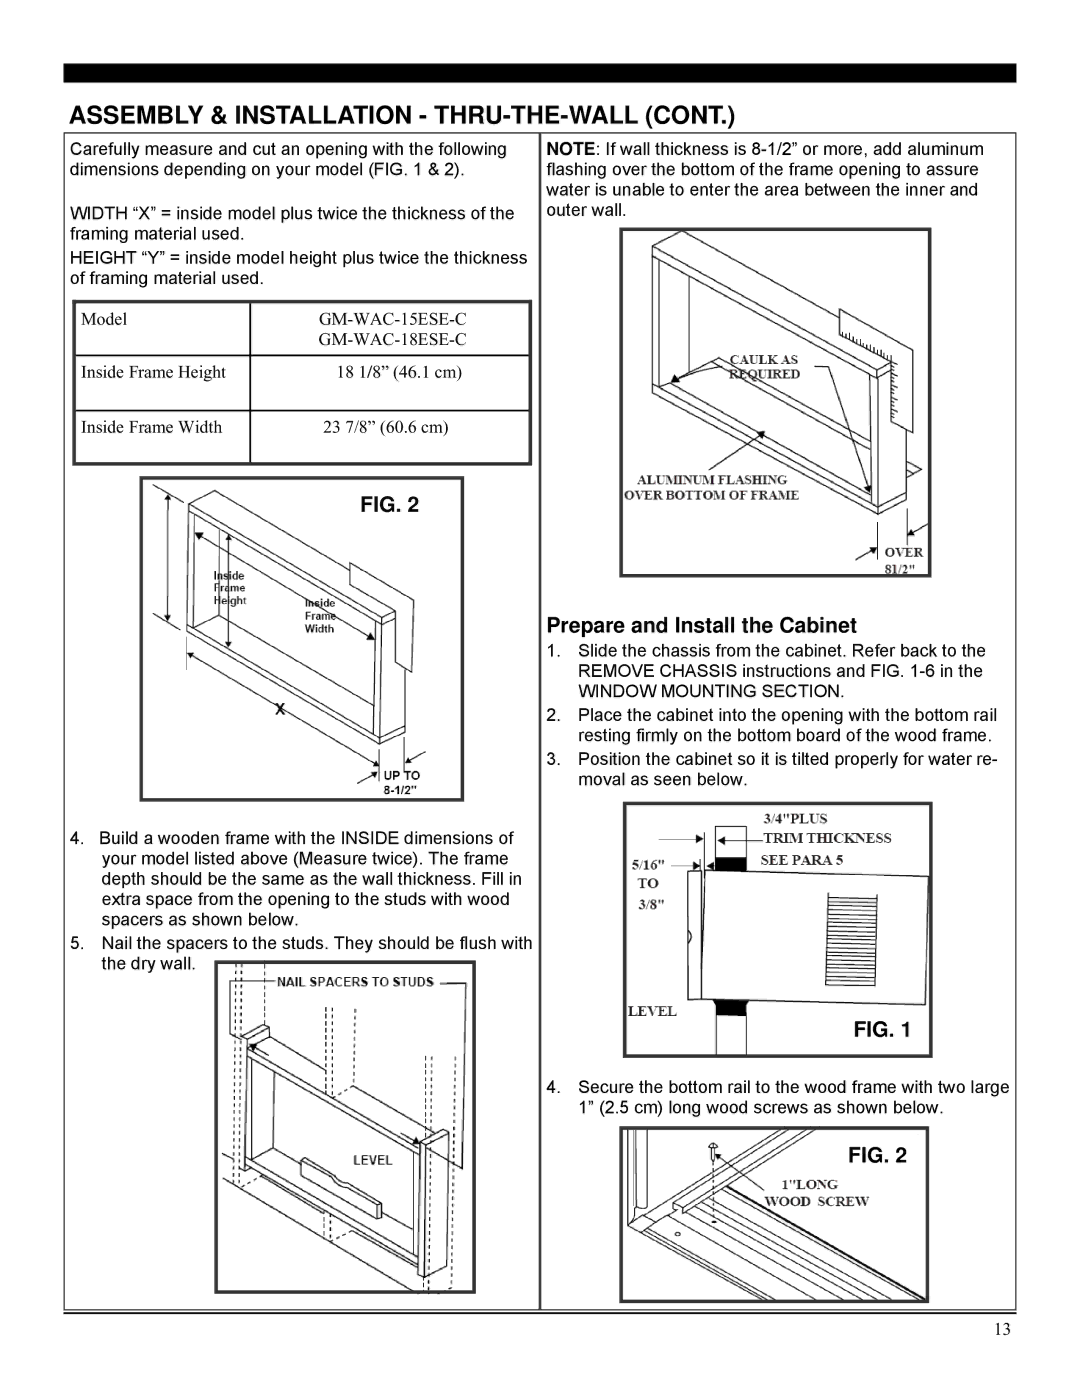
Carefully measure and cut an opening with the following dimensions depending on your model (FIG. 1 & 2).
WIDTH “X” = inside model plus twice the thickness of the framing material used.
HEIGHT “Y” = inside model height plus twice the thickness of framing material used.
Model | |
| |
|
|
Inside Frame Height | 18 1/8” (46.1 cm) |
|
|
Inside Frame Width | 23 7/8” (60.6 cm) |
|
|
NOTE: If wall thickness is
FIG. 2
4.Build a wooden frame with the INSIDE dimensions of your model listed above (Measure twice). The frame depth should be the same as the wall thickness. Fill in extra space from the opening to the studs with wood spacers as shown below.
5.Nail the spacers to the studs. They should be flush with the dry wall.
Prepare and Install the Cabinet
1.Slide the chassis from the cabinet. Refer back to the REMOVE CHASSIS instructions and FIG.
WINDOW MOUNTING SECTION.
2.Place the cabinet into the opening with the bottom rail resting firmly on the bottom board of the wood frame.
3.Position the cabinet so it is tilted properly for water re- moval as seen below.
FIG. 1
4.Secure the bottom rail to the wood frame with two large 1” (2.5 cm) long wood screws as shown below.
FIG. 2
13