User’s Guide
Inserting the Replacement Drive into the SonicWALL CDP Appliance
![]() Warning: Do not insert anything other than the SonicWALL approved hard drive into the SonicWALL CDP appliance.
Warning: Do not insert anything other than the SonicWALL approved hard drive into the SonicWALL CDP appliance.
To view the hard drive array and insert the replacement drive into the SonicWALL CDP appliance, perform the following steps:
1.Remove the hard drive and the drive number stickers from the replacement drive shipping carton.
2.Depending on which drive you are replacing, apply the appropriate sticker to the drive handle. While holding the drive with the label side up, place the sticker near the edge of the handle next to the square button.
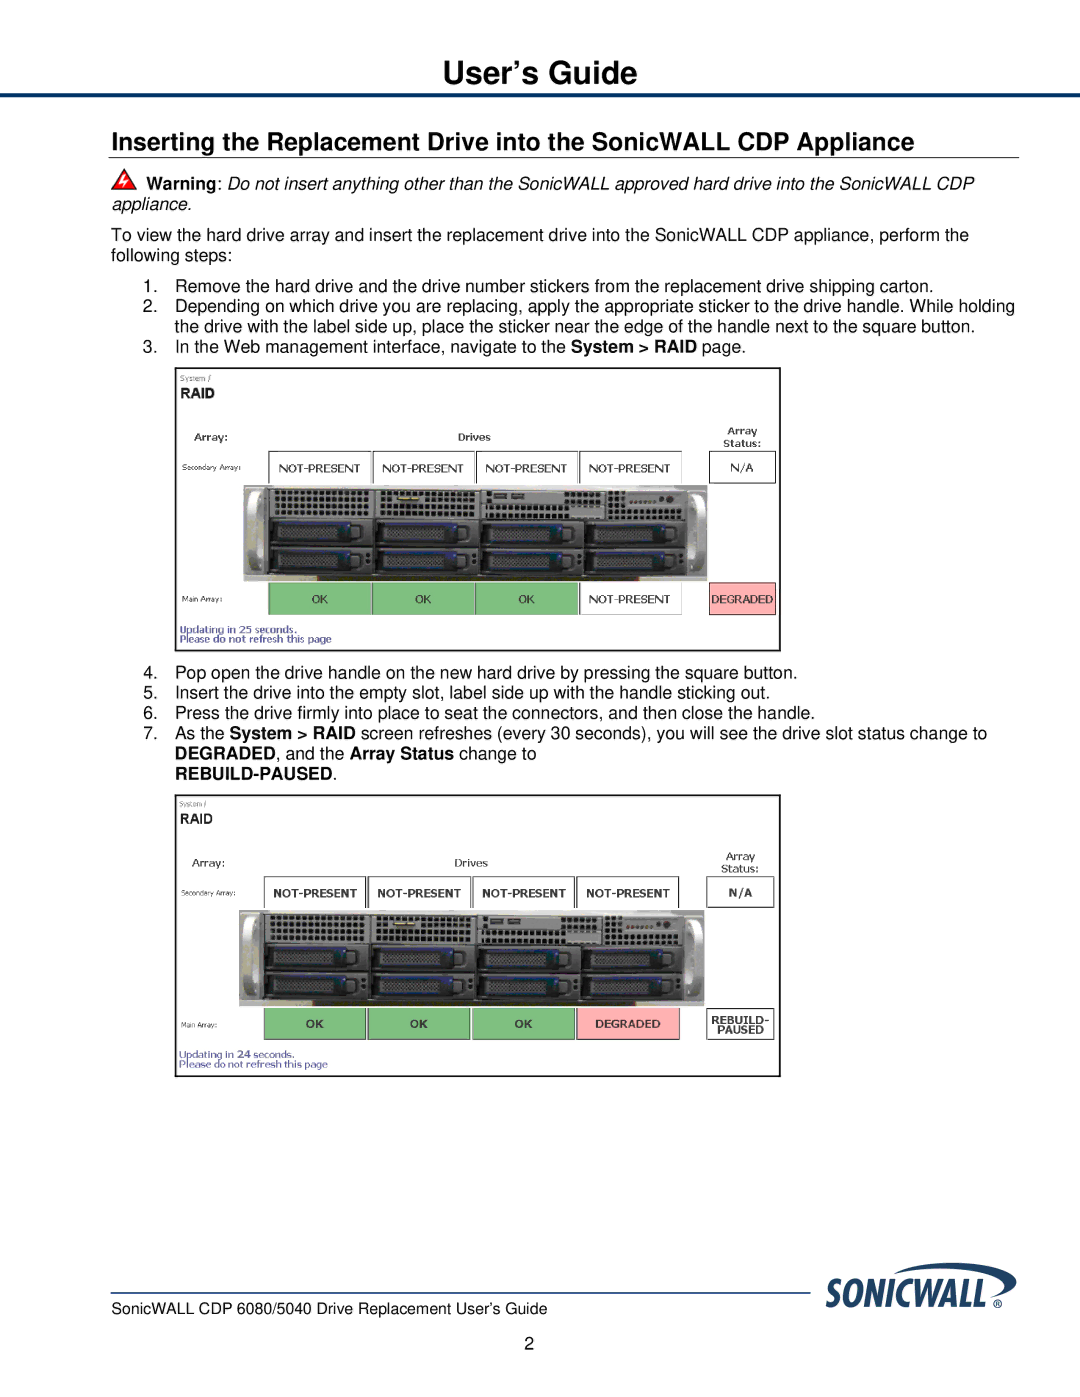
3.In the Web management interface, navigate to the System > RAID page.
4.Pop open the drive handle on the new hard drive by pressing the square button.
5.Insert the drive into the empty slot, label side up with the handle sticking out.
6.Press the drive firmly into place to seat the connectors, and then close the handle.
7.As the System > RAID screen refreshes (every 30 seconds), you will see the drive slot status change to DEGRADED, and the Array Status change to
REBUILD-PAUSED.
SonicWALL CDP 6080/5040 Drive Replacement User’s Guide
2