
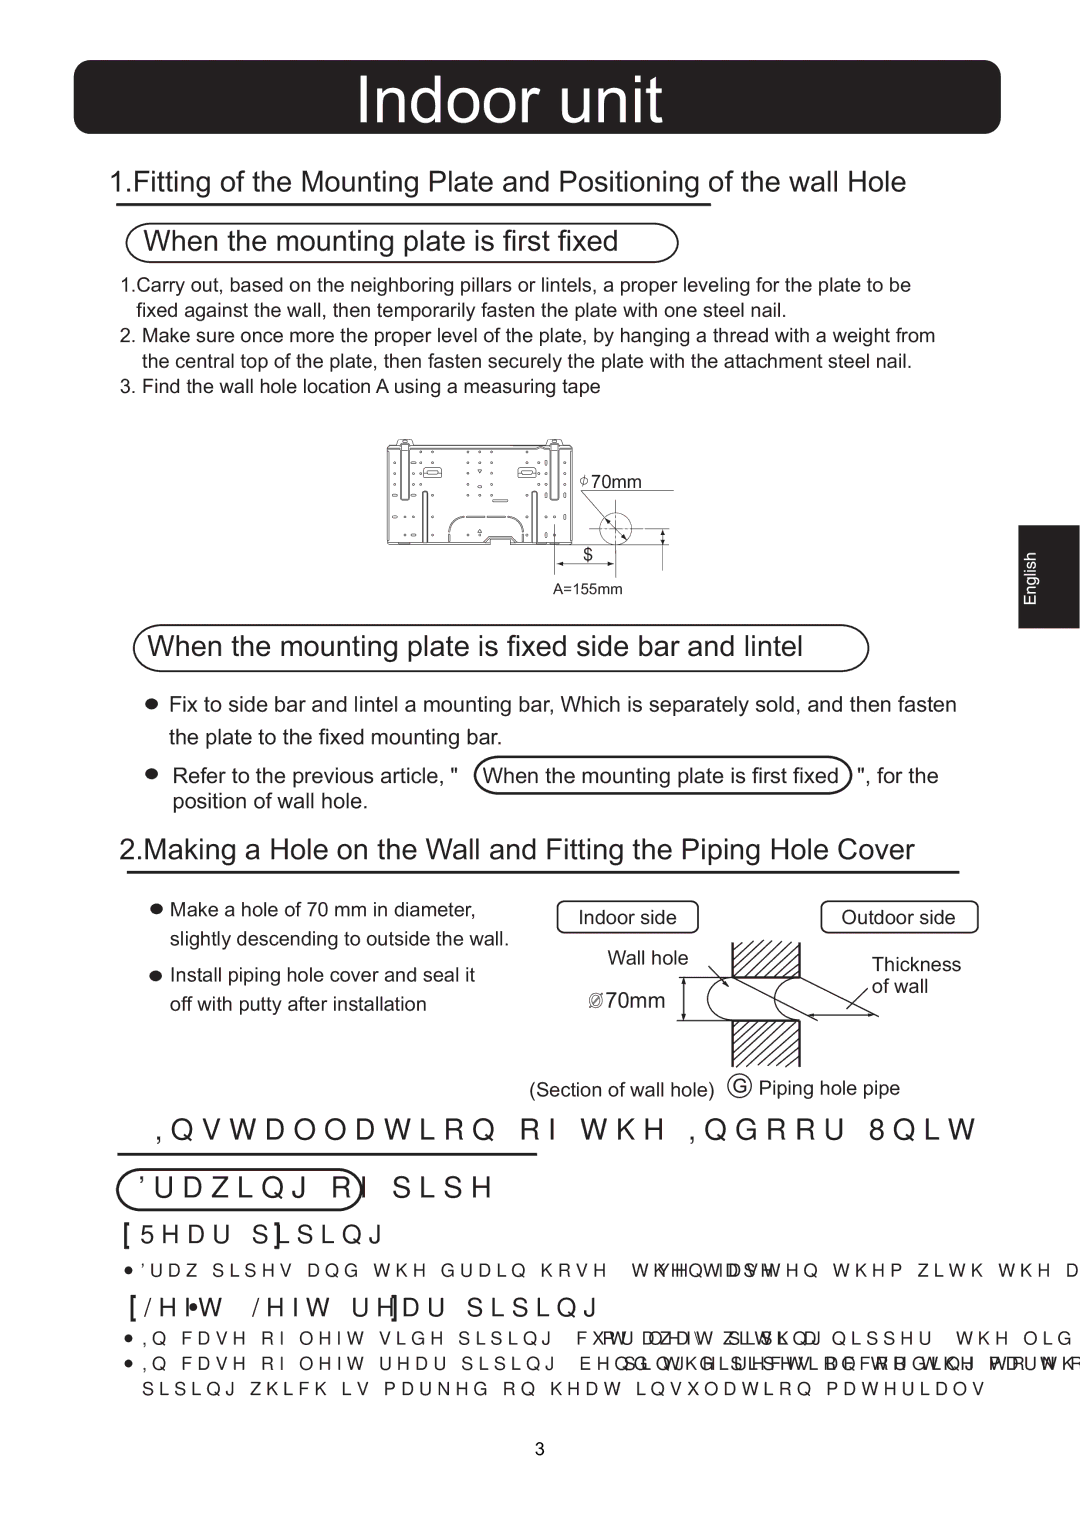
HSU-09RD03/R2(SDB), HSU-12RD03/R2(SDB) specifications
Hitachi, a leading player in the technology and electronics sector, has made considerable advancements in the field of cooling and air conditioning systems with its HSU-12RD03/R2(SDB) and HSU-09RD03/R2(SDB) models. Designed to meet the needs of modern households, these air conditioning units combine efficiency, performance, and innovative technology.The HSU-12RD03/R2(SDB) is a powerful model capable of delivering effective cooling or heating for larger living spaces, while the HSU-09RD03/R2(SDB) offers a more compact solution for smaller rooms. Both models utilize advanced inverter technology, which not only ensures faster cooling and heating but also provides energy savings. The inverter technology allows the units to adjust their compressor speed based on the indoor temperature, resulting in reduced energy consumption and stable comfort levels.
Another marquee feature of these models is their high Seasonal Energy Efficiency Ratio (SEER), which signifies their superior energy efficiency compared to standard air conditioning units. This makes them an ideal choice for environmentally conscious consumers looking to reduce their carbon footprint and lower energy bills.
Both HSU-12RD03/R2(SDB) and HSU-09RD03/R2(SDB) are equipped with innovative filtration systems that enhance indoor air quality. These filters capture dust, allergens, and other particulate matter, providing a cleaner and healthier living environment. The self-cleaning feature is another standout characteristic, as it helps to maintain the unit's performance over time by preventing the buildup of mold and bacteria.
Furthermore, the quiet operation of these air conditioning units is worth noting. With noise levels kept to a minimum, they ensure that comfort is maintained without disturbing daily activities or sleep.
In terms of control, Hitachi has incorporated smart technology in these models, allowing users to regulate temperatures via remote control or mobile applications. This user-friendly approach enhances convenience and allows for tailored climate control.
Overall, the Hitachi HSU-12RD03/R2(SDB) and HSU-09RD03/R2(SDB) air conditioning units represent a harmonious blend of technology, efficiency, and user-oriented features, making them ideal solutions for both residential and light commercial applications. With their robust performance, energy-saving capabilities, and smart functionalities, these units are set to redefine comfort in climate control.