Adjustments
Navigating the menu
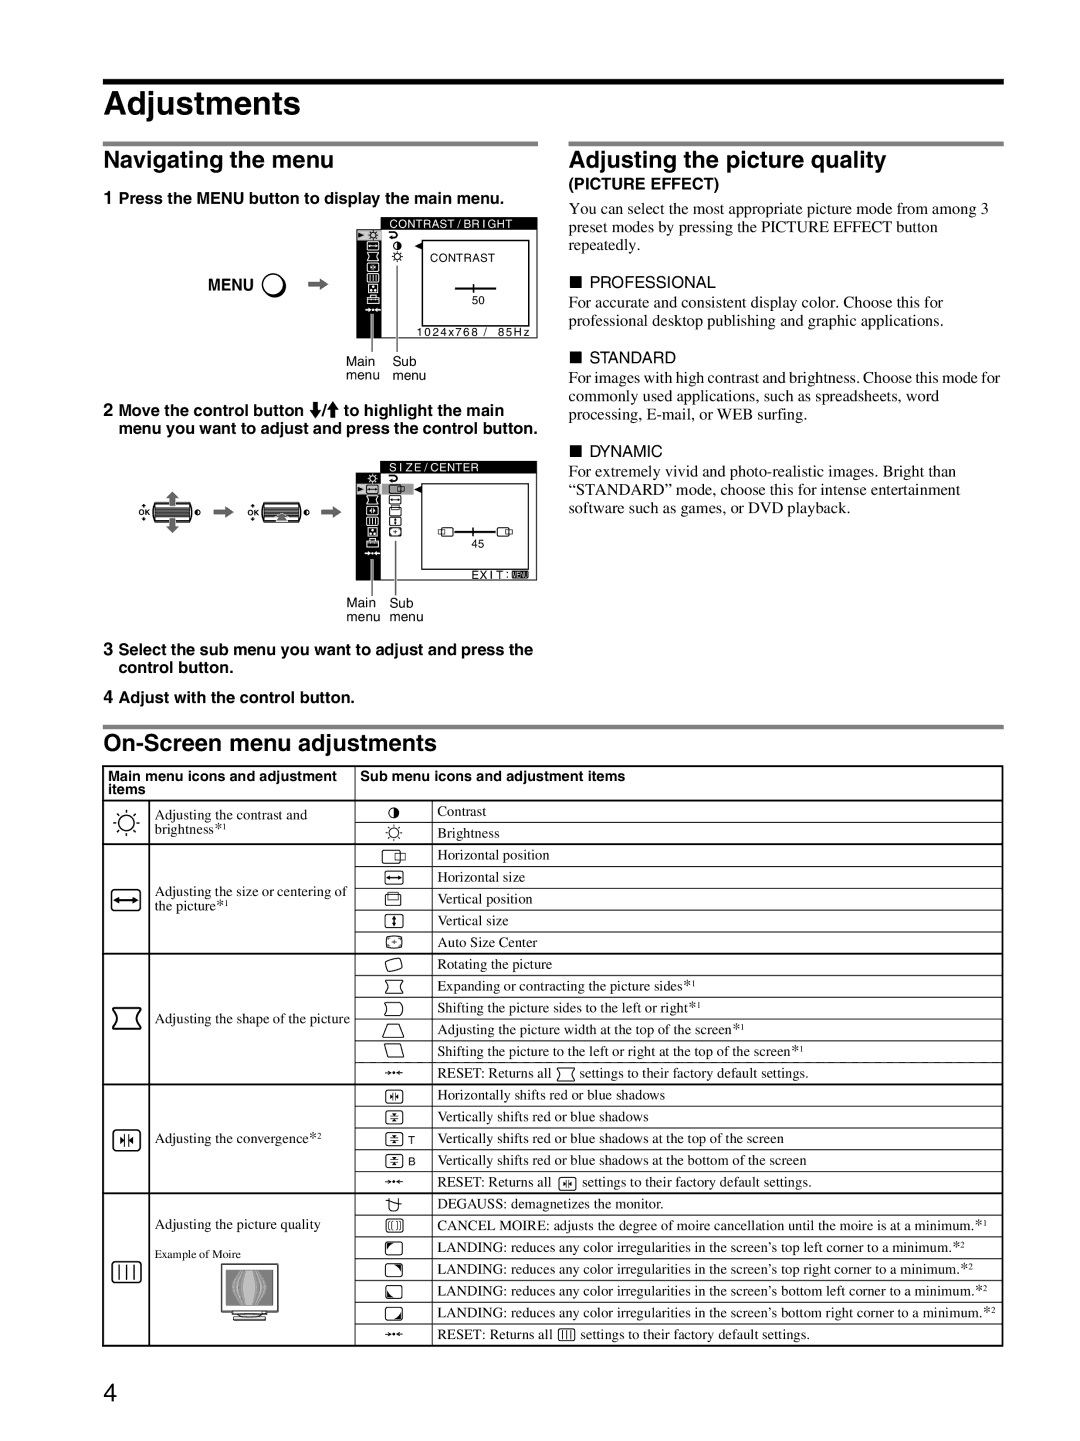
1 Press the MENU button to display the main menu.
| CONTRAST / BR I GHT |
| CONTRAST |
MENU | , |
| 50 |
| 1 0 2 4 x 7 6 8 / 8 5 H z |
Main Sub menu menu
2Move the control button m/M to highlight the main menu you want to adjust and press the control button.
|
|
| S I ZE / CENTER |
OK | , OK | , |
|
|
|
| 45 |
|
|
| EX I T : MENU |
|
| Main | Sub |
|
| menu menu | |
3 Select the sub menu you want to adjust and press the control button.
4 Adjust with the control button.
Adjusting the picture quality
(PICTURE EFFECT)
You can select the most appropriate picture mode from among 3 preset modes by pressing the PICTURE EFFECT button repeatedly.
xPROFESSIONAL
For accurate and consistent display color. Choose this for professional desktop publishing and graphic applications.
xSTANDARD
For images with high contrast and brightness. Choose this mode for commonly used applications, such as spreadsheets, word processing,
xDYNAMIC
For extremely vivid and
On-Screen menu adjustments
Main menu icons and adjustment | Sub menu icons and adjustment items | |
items |
| |
Adjusting the contrast and | Contrast | |
brightness*1 | Brightness | |
|
| |
| Horizontal position | |
|
| |
Adjusting the size or centering of | Horizontal size | |
| ||
Vertical position | ||
the picture*1 | ||
| Vertical size | |
|
| |
| Auto Size Center | |
|
| |
| Rotating the picture |
Adjusting the shape of the picture
Expanding or contracting the picture sides*1
Shifting the picture sides to the left or right*1
Adjusting the picture width at the top of the screen*1
Shifting the picture to the left or right at the top of the screen*1
0RESET: Returns all ![]() settings to their factory default settings.
settings to their factory default settings.
Horizontally shifts red or blue shadows
Vertically shifts red or blue shadows
Adjusting the convergence*2 |
| T | Vertically shifts red or blue shadows at the top of the screen |
| |||
|
![]() B Vertically shifts red or blue shadows at the bottom of the screen
B Vertically shifts red or blue shadows at the bottom of the screen
0RESET: Returns all ![]() settings to their factory default settings.
settings to their factory default settings.
|
|
| DEGAUSS: demagnetizes the monitor. |
Adjusting the picture quality | CANCEL MOIRE: adjusts the degree of moire cancellation until the moire is at a minimum.*1 | ||
Example of Moire | LANDING: reduces any color irregularities in the screen’s top left corner to a minimum.*2 | ||
|
|
| LANDING: reduces any color irregularities in the screen’s top right corner to a minimum.*2 |
|
|
| |
|
|
| LANDING: reduces any color irregularities in the screen’s bottom left corner to a minimum.*2 |
|
|
| LANDING: reduces any color irregularities in the screen’s bottom right corner to a minimum.*2 |
0RESET: Returns all ![]() settings to their factory default settings.
settings to their factory default settings.
4