To Install Memory
The preinstalled memory configuration may vary, depending on the computer you purchased. All memory slots in your system may have memory modules already installed. See the Specifications sheet for information about the amount of memory installed in your computer. For memory upgrades, use only 2.5V
Note:
You can purchase additional memory modules, accessories, and peripheral equipment from your local retailer.
Caution:
Observe the proper safety precautions when you add or remove memory in your Sony computer. Before upgrading your Sony computer, see
Removing memory
1.Shut down your computer and turn off all peripheral devices, such as your printer.
2.Unplug your computer and all peripheral devices.
3.Gently place the unit on its side and remove the side panel. See To Remove the Side Panel.
4.Locate the memory module(s) you wish to remove. If necessary, remove any cables,
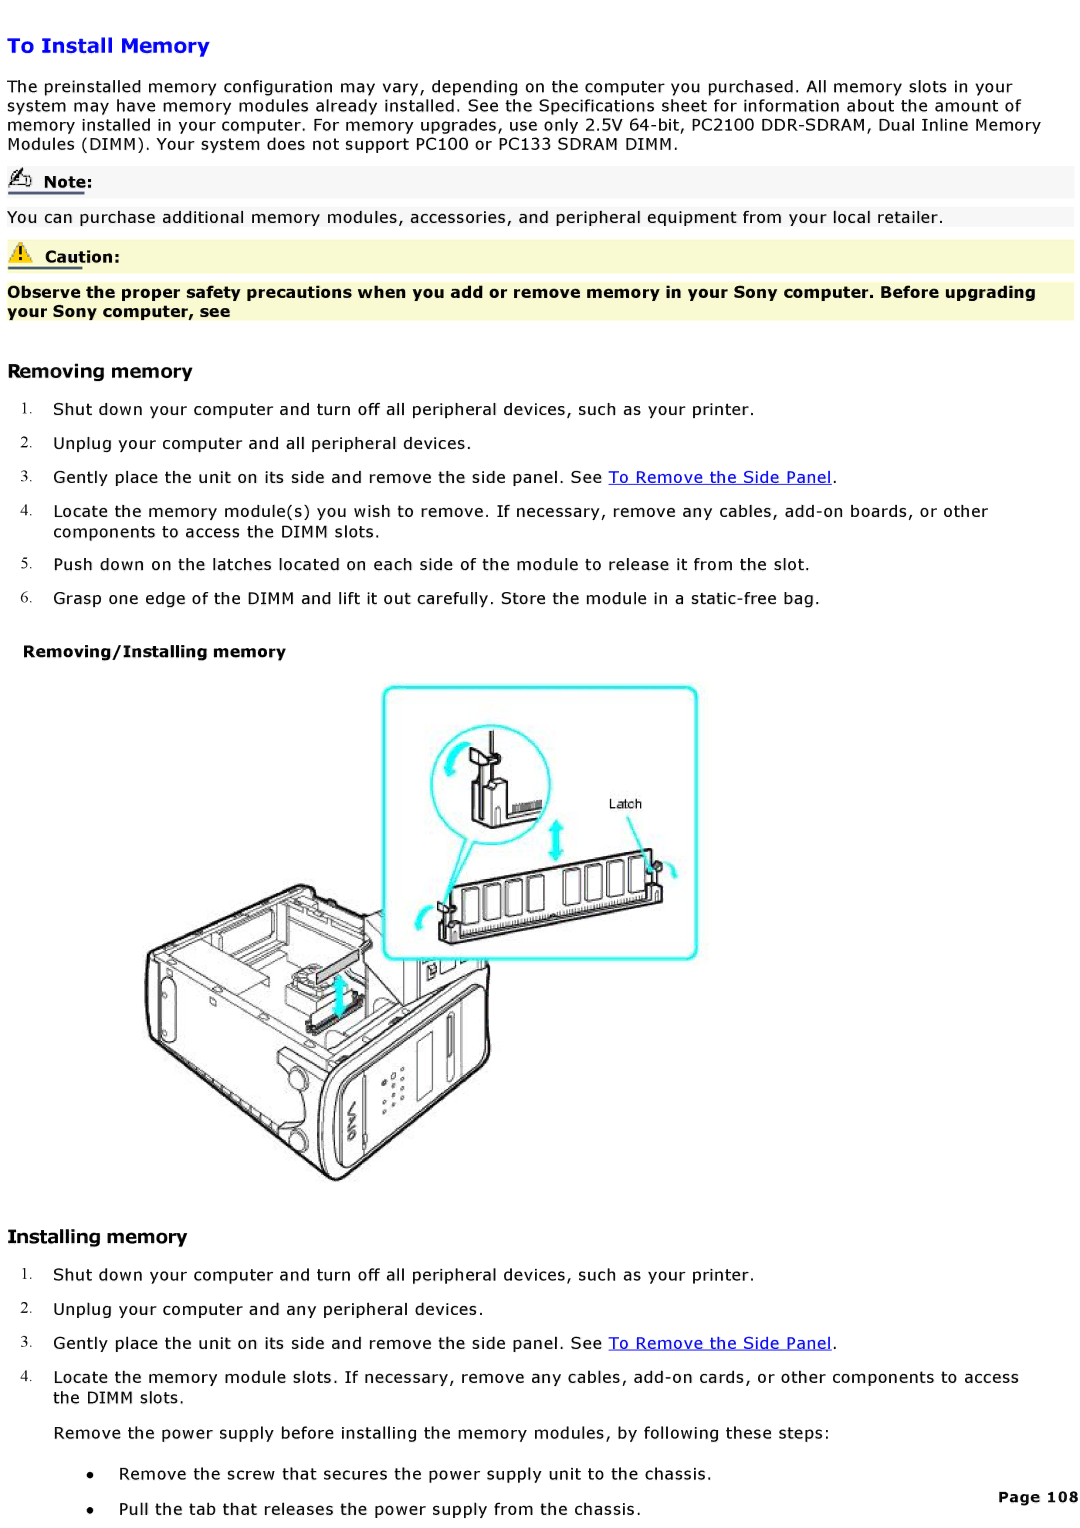
5.Push down on the latches located on each side of the module to release it from the slot.
6.Grasp one edge of the DIMM and lift it out carefully. Store the module in a
Removing/Installing memory
Installing memory
1.Shut down your computer and turn off all peripheral devices, such as your printer.
2.Unplug your computer and any peripheral devices.
3.Gently place the unit on its side and remove the side panel. See To Remove the Side Panel.
4.Locate the memory module slots. If necessary, remove any cables,
Remove the power supply before installing the memory modules, by following these steps:
∙Remove the screw that secures the power supply unit to the chassis.
∙Pull the tab that releases the power supply from the chassis.