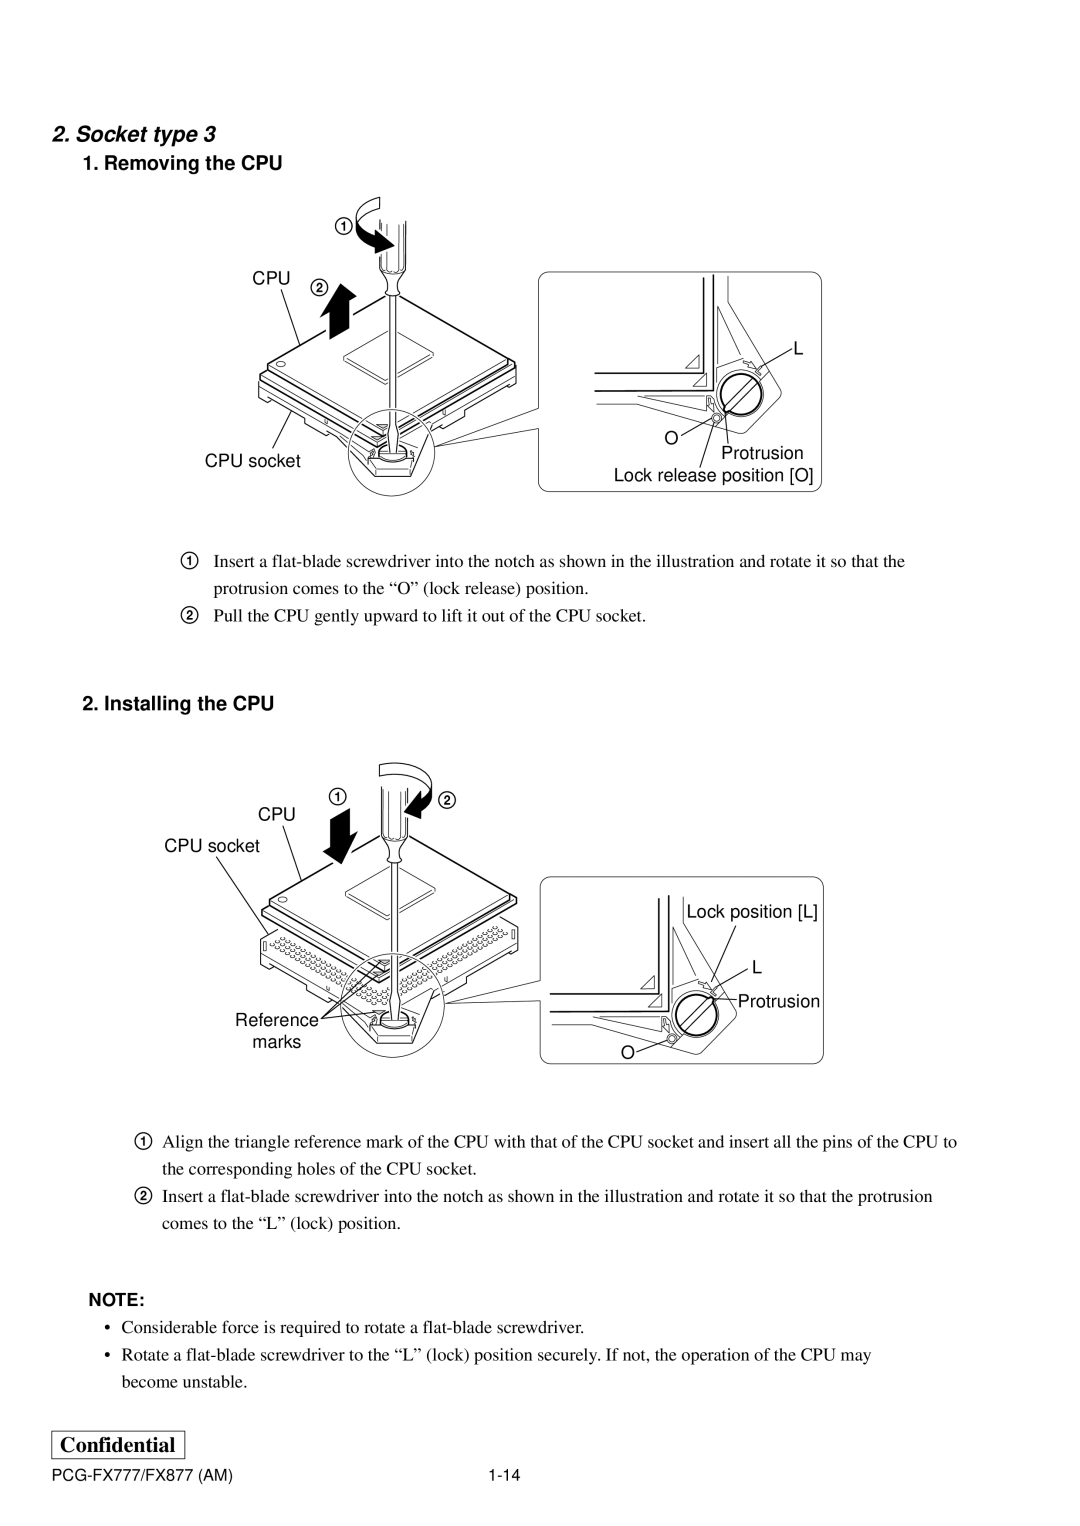
2.Socket type 3
1.Removing the CPU
1![]()
CPU 2
L
| O | |
CPU socket | Protrusion | |
Lock release position [O] | ||
|
1Insert a
2Pull the CPU gently upward to lift it out of the CPU socket.
2.Installing the CPU
1 ![]() 2
2
CPU
CPU socket
Lock position [L]
L
 Protrusion
Reference
marks
O
1Align the triangle reference mark of the CPU with that of the CPU socket and insert all the pins of the CPU to the corresponding holes of the CPU socket.
2Insert a
NOTE:
•Considerable force is required to rotate a
•Rotate a