1-4.Replacing the CPU
NOTE:
This computer uses either one of the two types of CPU socket.
The CPU locking position and the
1. Socket type 1, 2
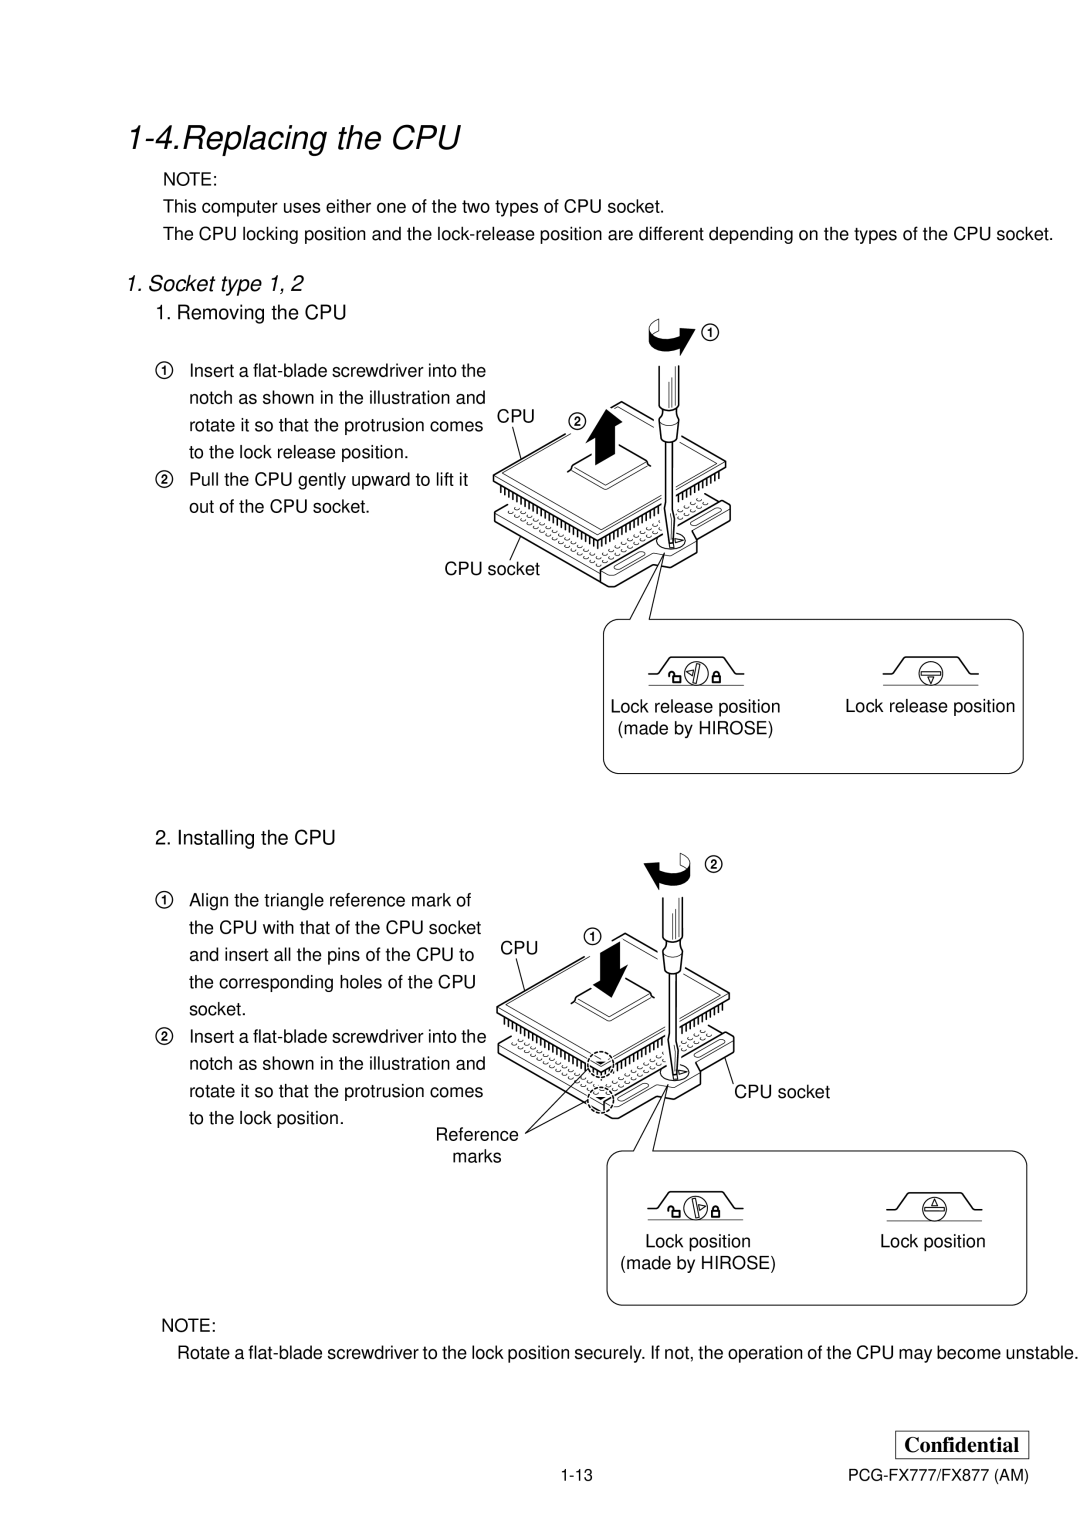
1. Removing the CPU
![]() 1
1
1 Insert a
notch as shown in the illustration and
rotate it so that the protrusion comes | CPU | 2 |
|
to the lock release position.
2 Pull the CPU gently upward to lift it out of the CPU socket.
CPU socket
Lock release position | Lock release position |
(made by HIROSE) |
|
2. Installing the CPU
|
| 2 |
|
1 Align the triangle reference mark of |
|
|
|
the CPU with that of the CPU socket | CPU | 1 |
|
and insert all the pins of the CPU to |
| ||
|
| ||
|
|
| |
the corresponding holes of the CPU |
|
|
|
socket. |
|
|
|
2 Insert a |
|
|
|
notch as shown in the illustration and |
|
|
|
rotate it so that the protrusion comes |
| CPU socket |
|
to the lock position. |
|
|
|
Reference |
|
| |
marks |
|
| |
|
| Lock position | Lock position |
|
| (made by HIROSE) |
|
NOTE:
Rotate a
