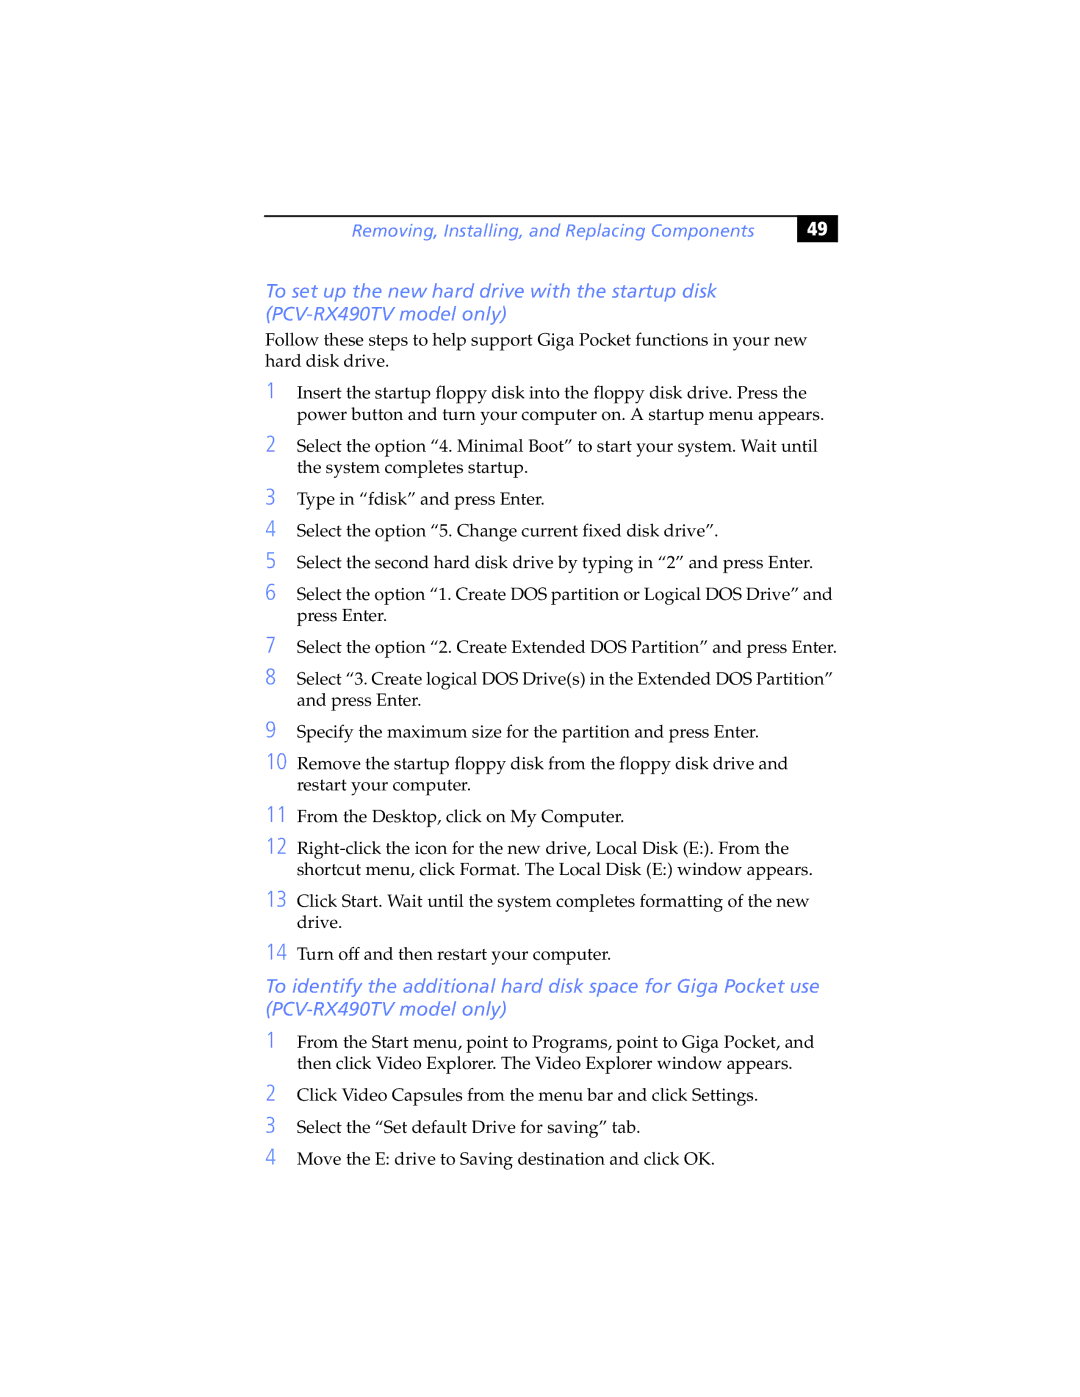
PCV-RX470DS, PCV-RX480DS, PCV-RX462DS, PCV-RX465DS, PCV-RX463DS specifications
The Sony PCV-RX462DS is a noteworthy desktop PC that represents a blend of performance, design, and multimedia capabilities. This model, part of Sony’s RX series, was designed to cater to both casual users and those seeking more robust computing solutions.At the heart of the PCV-RX462DS is its powerful CPU, an Intel Pentium 4 processor, which provides reliable performance for everyday tasks. With a clock speed of 2.4 GHz, it handles various applications—from basic word processing to multimedia playback—effortlessly. The system is equipped with 512 MB of RAM, allowing for smooth multitasking, although users looking for more intensive applications might consider upgrading the memory.
One of the standout features of the PCV-RX462DS is its extensive multimedia capabilities. It includes a dedicated 64 MB graphics card, enabling decent performance for casual gaming and graphic applications. The system supports DirectX technology, which enhances visual effects in compatible games, making it a solid choice for gamers on a budget.
The PCV-RX462DS also shines in terms of storage. With a 120 GB hard drive, users have ample space for their documents, applications, and multimedia files. This generous storage capacity is complemented by an internal CD-RW/DVD-ROM drive, which allows users to create their own CDs and enjoy DVD movies effortlessly.
Connectivity is another key aspect of this desktop. It features multiple USB ports, enabling users to connect various peripherals such as printers, external drives, and cameras with ease. Additionally, built-in Ethernet provides high-speed internet access, ensuring that users can stay connected without hassle.
In terms of design, the PCV-RX462DS boasts a compact chassis with a sleek appearance, making it a stylish addition to any home or office setup. The system is also relatively quiet, allowing for a more pleasant computing experience without the distracting hum of traditional desktop computers.
Overall, the Sony PCV-RX462DS is a versatile desktop PC that balances performance with multimedia functionality. Its Intel Pentium 4 processor, decent graphics capabilities, and ample storage capacity make it suitable for a range of users, from students to professionals. Its design and connectivity options further enhance its appeal, making it a compelling choice in the competitive landscape of desktop computing in its time. Users looking for reliability and good performance would find the PCV-RX462DS to be a commendable option.